Pink bathroom tiles can occupy a small backsplash, cover a shower or connect an entire room. Decide where you want the color before selecting a shade: a glossy pink square beside a white sink has a different effect from a deep rose tile across every wall. Compare samples with the fixtures and flooring you plan to keep.
These photographs focus on visible pink tiling rather than rooms that only have pink paint or accessories. Each arrangement offers a different decision about proportion, layout or adjoining finishes. Confirm the product’s suitability for its intended location, and have the installation details checked for wet areas; a color or surface pattern does not establish waterproofing or floor safety.
PART 01
Pink tiles around showers and baths
IDEA 01 / 20
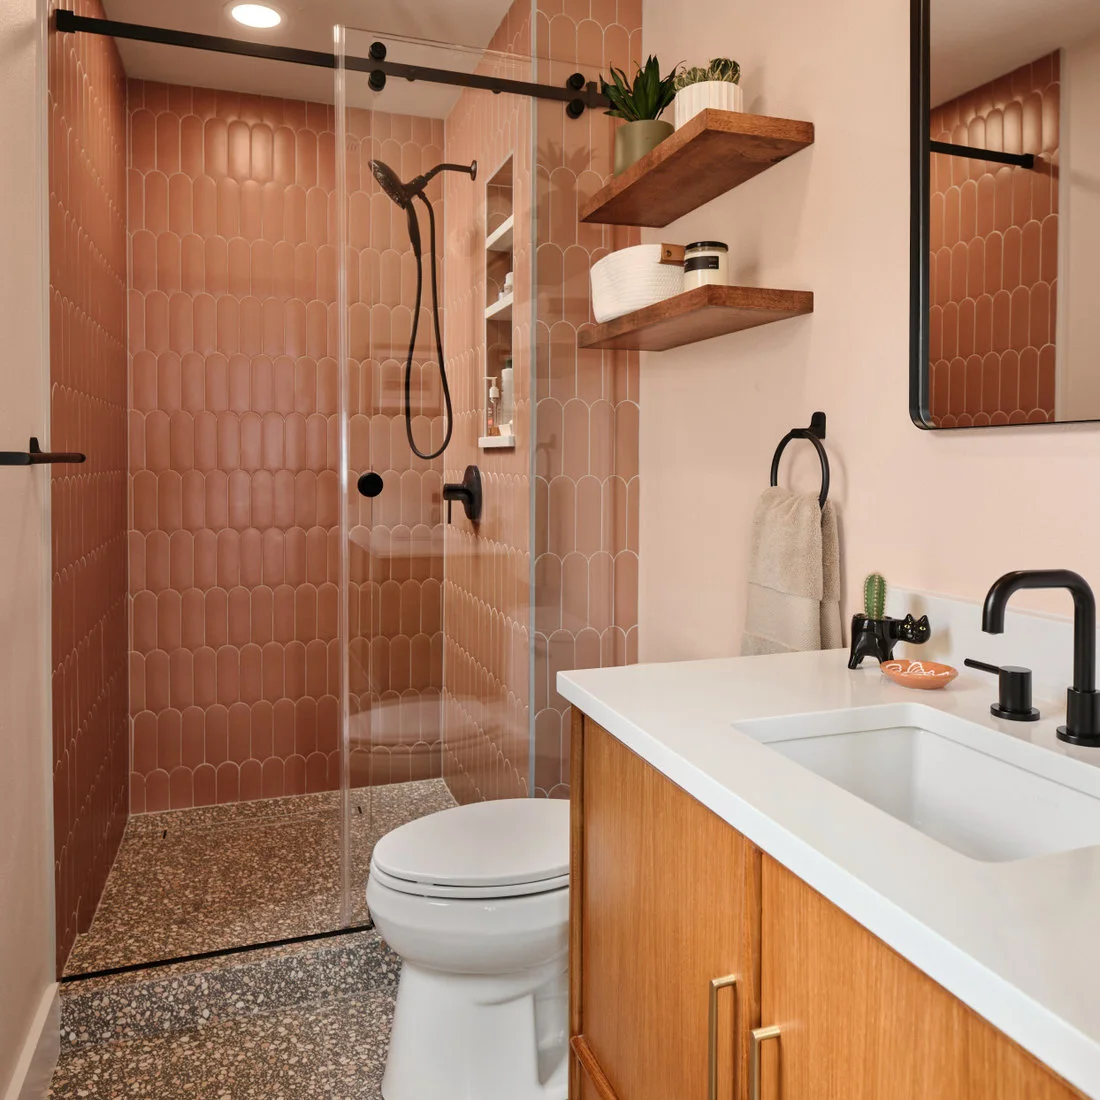
Use Rounded Tile Ends as the Shower Pattern
 SaveSupport Non AI Creator
Image credit: Catalyst Construction, Inc
Peach-pink tiles form repeated rounded shapes across the shower walls, giving the surface detail without a separate decorative border. Black fittings and door hardware provide a darker outline, while wooden shelves and the vanity introduce warmth. The white sink and pale wall beside the shower keep the repeated pink pattern concentrated in the bathing area.
Ask the installer to plan the rounded pattern around corners, controls and the niche before work begins. Small cuts can change how the repeated shapes read. Keep shelf positions useful for the products you need and confirm their suitability near moisture; a neat photograph does not show the waterproofing or fixing details behind a finished shower.
IDEA 02 / 20
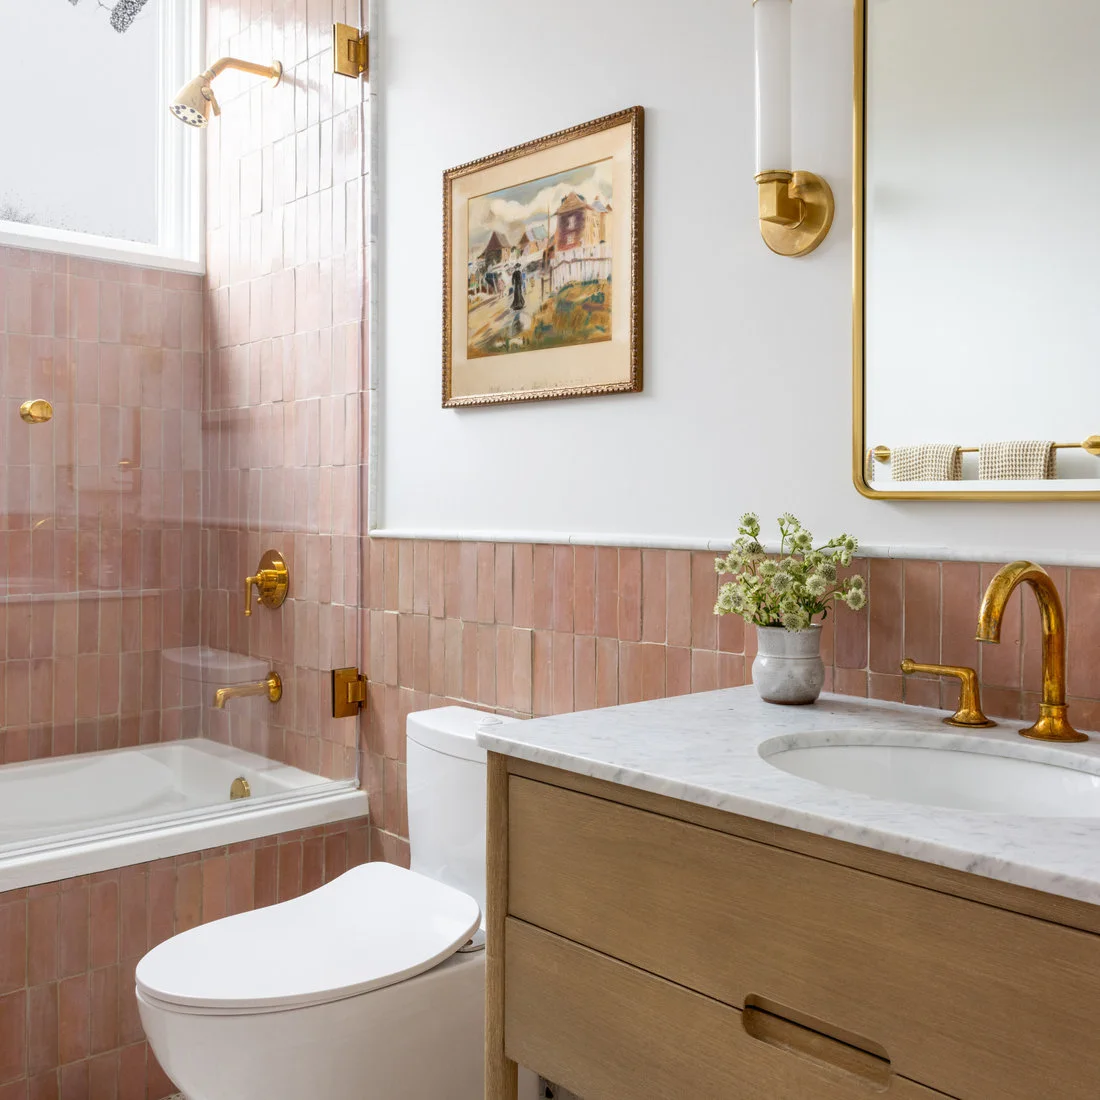
Stop Pink Tiles Below a Pale Upper Wall
 SaveSupport Non AI Creator
Image credit: Imparfait Design Studio
Pale pink tiles cover the lower walls and bath area, with white above them leaving the room lighter near the ceiling. A wooden vanity and gold-colored fittings add warmer details without another strong painted surface. The window interrupts the tile run, making the height of the tiled area an important part of the overall arrangement.
Mark the proposed stopping line on each wall before choosing the tile quantity, accounting for the bath, window and mirror. Plan a suitable edge finish rather than leaving that decision until the tiles are laid. Compare the pale upper-wall color with the actual tile sample, since different whites can make the same pink look warmer or cooler.
IDEA 03 / 20
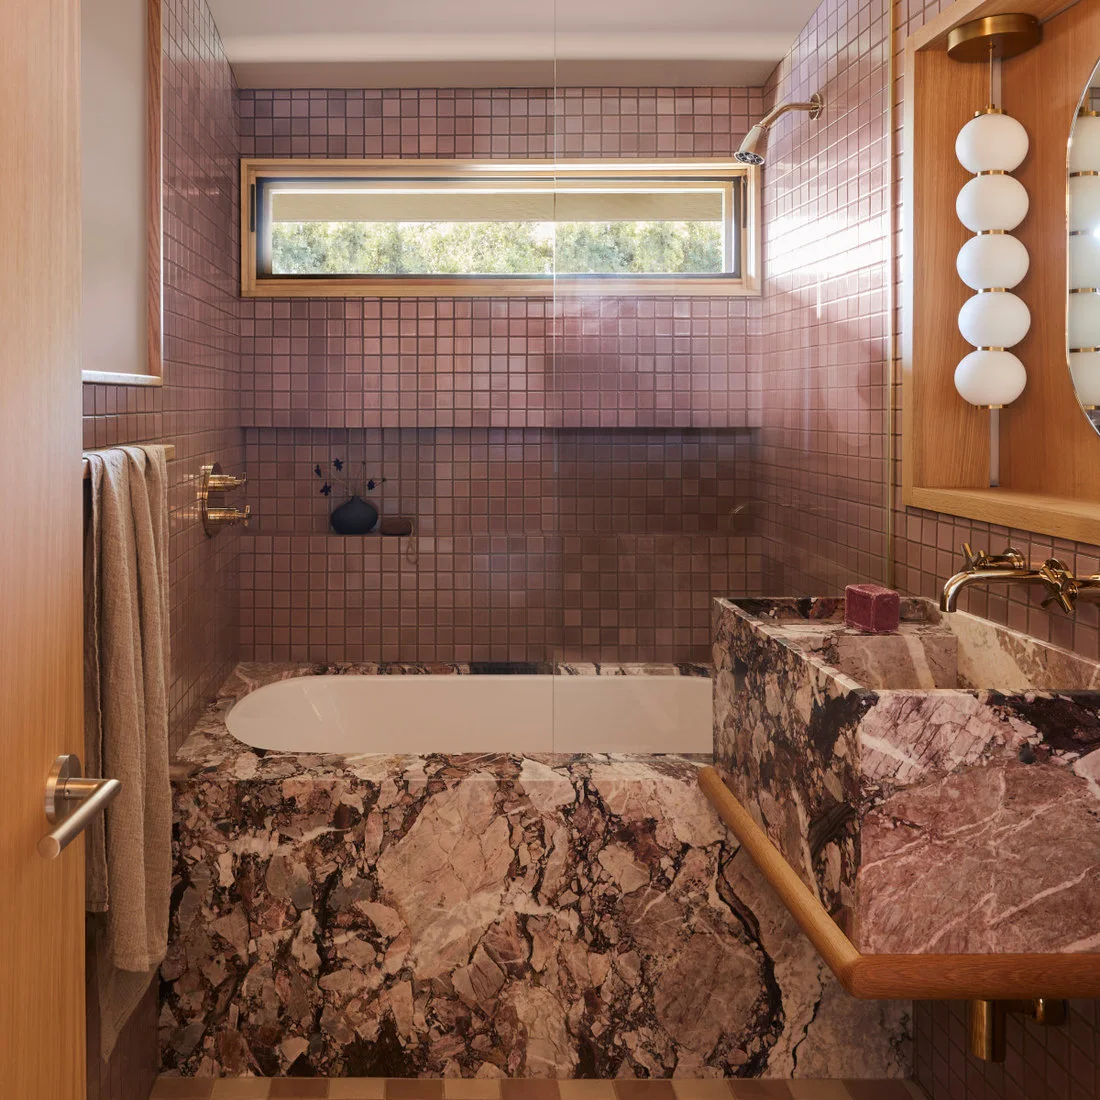
Pair Small Rose Tiles with a Strong Counter Pattern
 SaveSupport Non AI Creator
Image credit: Linette Dai Design
Small rose-colored square tiles provide a regular grid behind the bath, while the strongly veined counter and bath surround supply a larger pattern. A horizontal window brings light across the tiles. Wooden edges and a tall light made from several globes connect the more decorative surfaces without introducing another patterned wall covering.
Compare a full counter sample with several tiles when both surfaces contain substantial variation. Decide which should dominate and keep nearby accessories relatively simple. Ask for the care guidance of each specified product separately; similar pink coloring does not mean the tile, counter and trim can all be cleaned with the same treatment.
IDEA 04 / 20
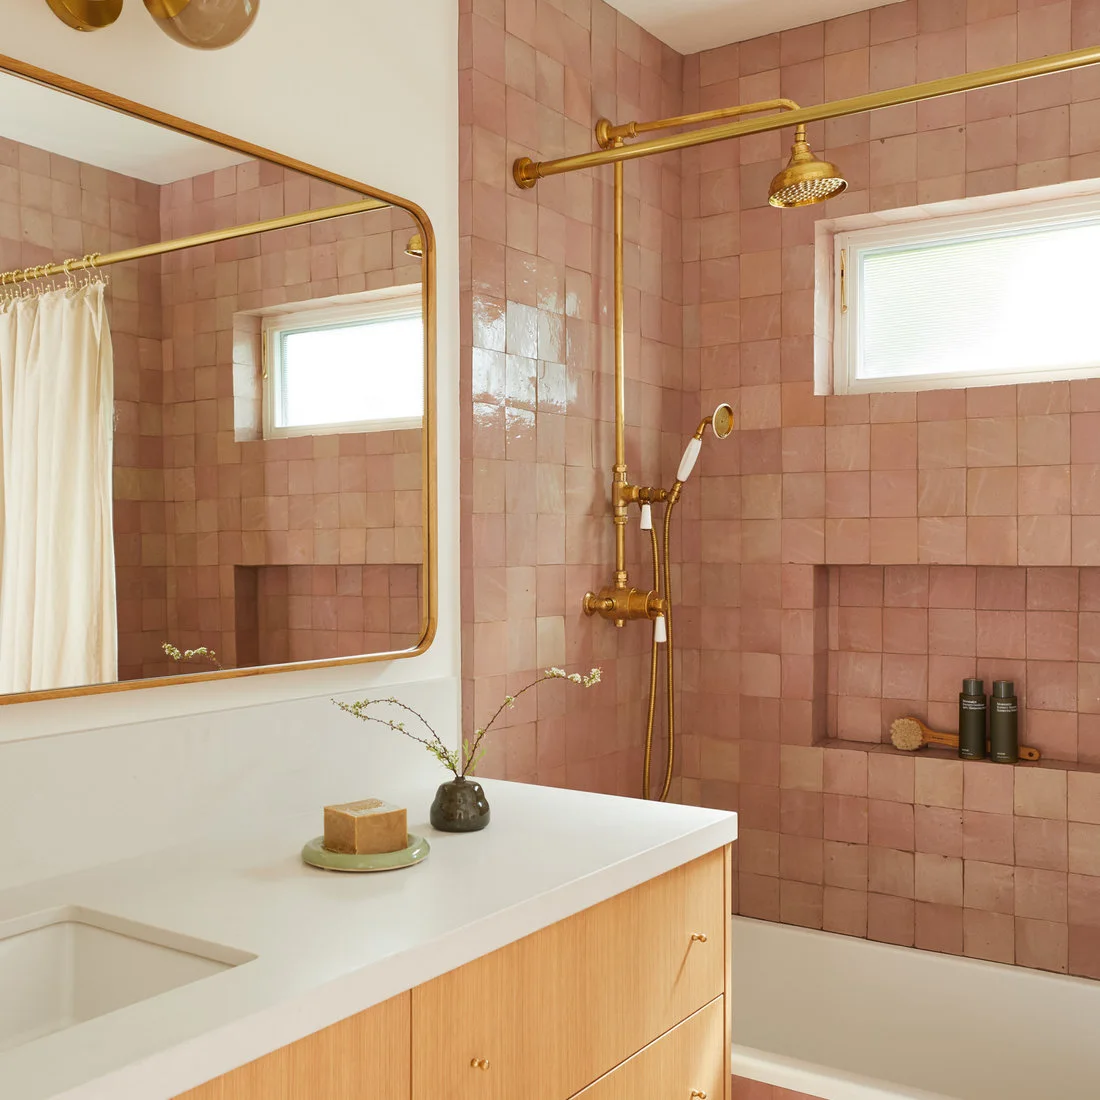
Use a Niche to Break Up a Pink Shower Wall
 SaveSupport Non AI Creator
Image credit: Cathie Hong Interiors
A recessed niche gives the pink square-tile wall a practical interruption beside the shower fittings. The tiles vary gently in shade and reflection, while the pale curtain and light sink counter keep the adjoining surfaces quieter. Gold-colored hardware repeats across the shower rail, mirror and taps, connecting the washing and bathing areas.
Size the niche around the bottles you actually use and confirm its placement with the installer before tiling. The layout should account for drainage and waterproofing rather than only matching the tile grid. Keep a simple counter display near the sink so the pink shower remains the main feature without taking away space for everyday toiletries.
IDEA 05 / 20
Concentrate Deeper Pink in a Bath Alcove
 SaveSupport Non AI Creator
Image credit: kimberly peck architect
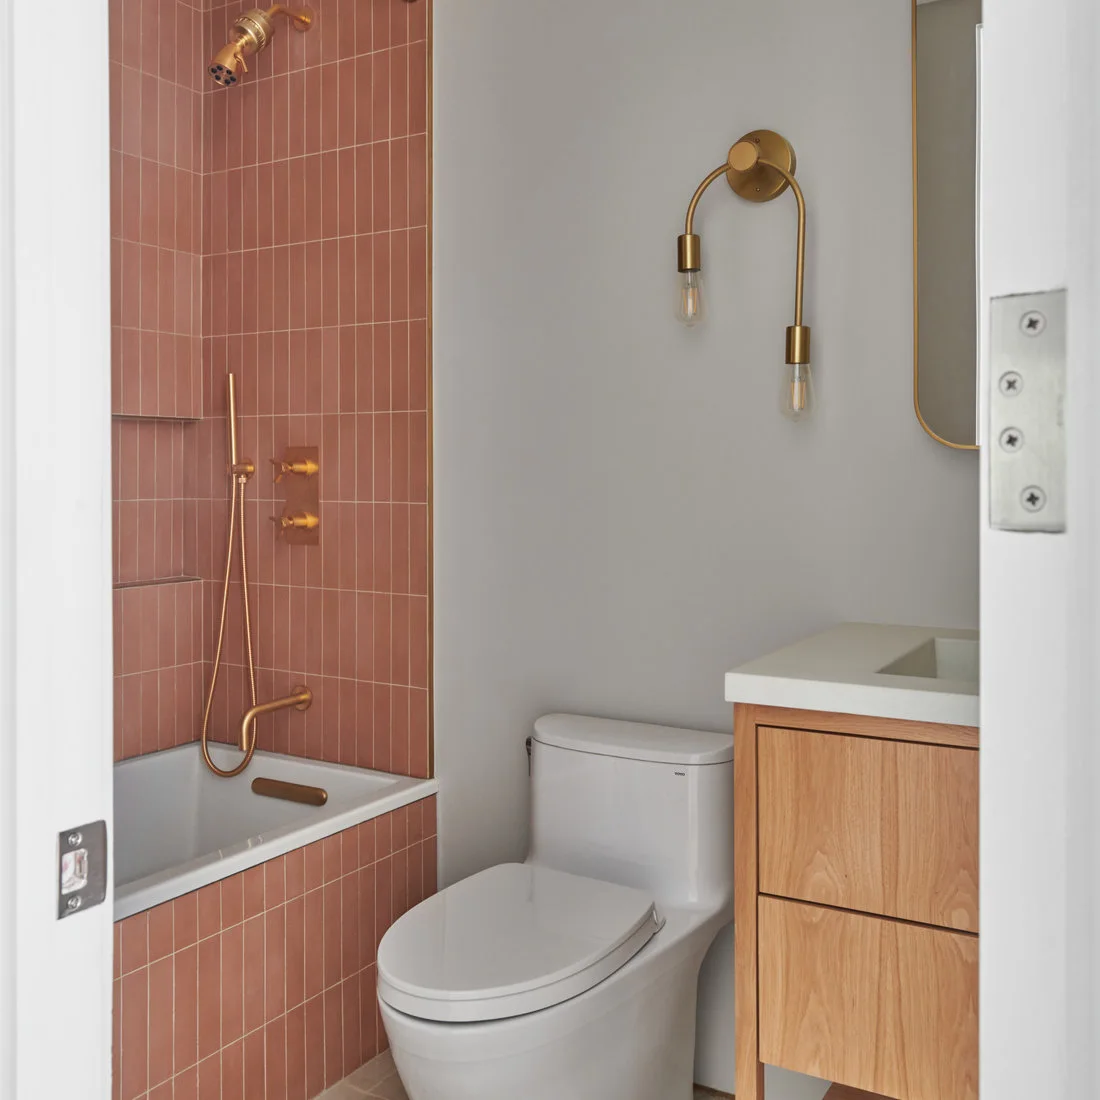
Vertically arranged deep pink tiles define the bath alcove, while pale walls continue into the sink and toilet area. A wooden vanity provides a warm surface outside the tiled recess. The bath panel uses the same pink, so the bathing area reads as a contained block of color rather than a single accent strip.
A deeper tiled alcove can work when you want pink without covering every wall. Compare the sample in the alcove’s actual light before ordering, and check where the tile will meet the painted wall and bath edge. Plan reachable toiletry storage; leaving bottles on a narrow bath rim can make an otherwise simple arrangement awkward to maintain.
PART 02
Balance pink with wood and pale surfaces
IDEA 06 / 20
Let Pink Pattern Sit Beyond a Neutral Vanity
 SaveSupport Non AI Creator
Image credit: LETTER FOUR, INC.
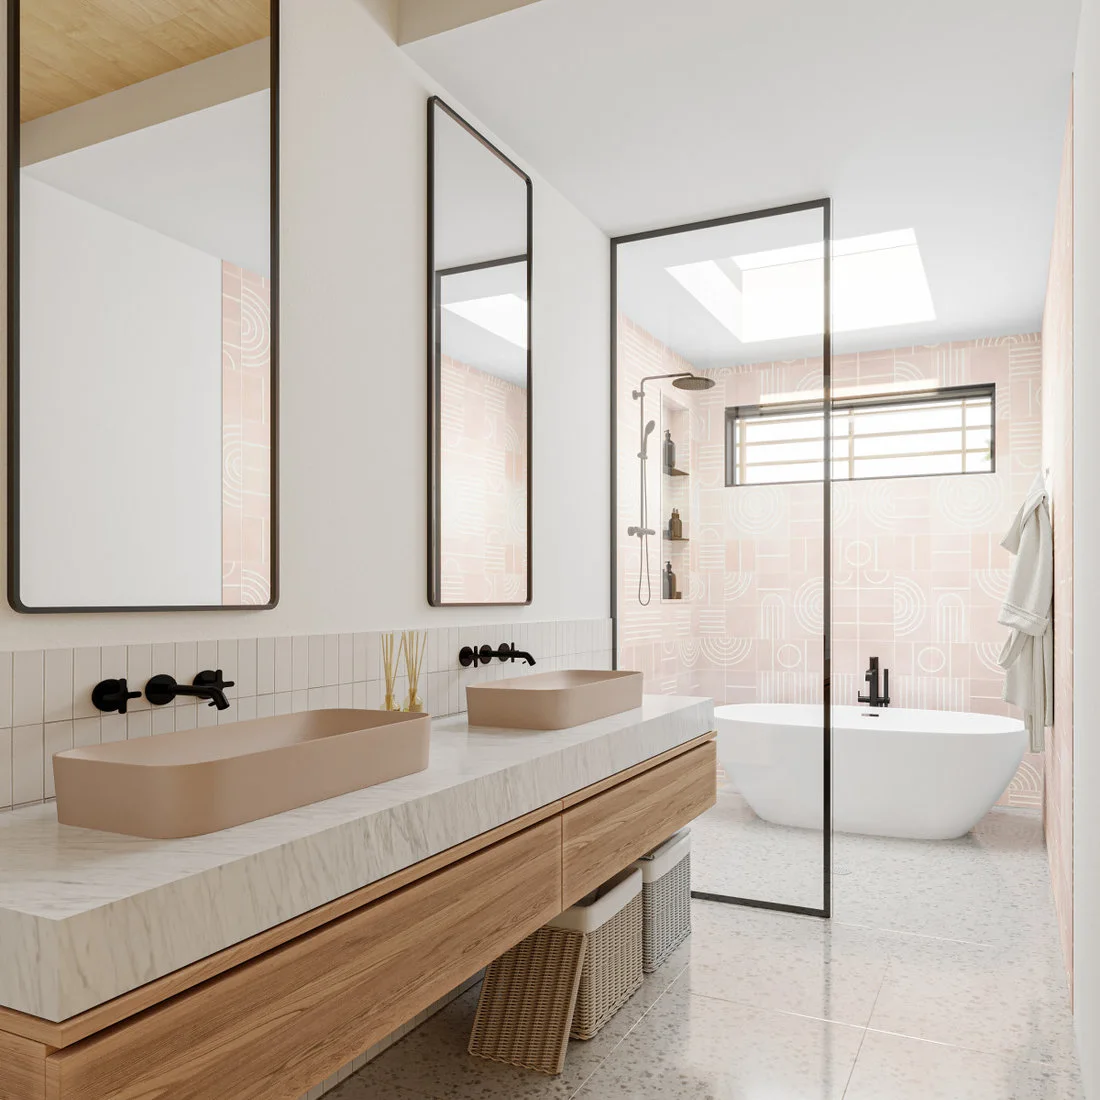
The wooden vanity and pale rectangular sinks keep the foreground restrained, while pink geometric tiles provide interest around the bath beyond it. Slim dark mirror frames repeat the black taps without competing with the tiled pattern. A high window and skylight help the pink area remain visible from the longer sink counter.
When a patterned bath wall is visible beyond a vanity, compare both areas from the doorway as well as beside the sink. Keep the vanity finishes quieter if you want the tiled area to lead. Check access around the bath screen and mirrors so the long arrangement remains straightforward to clean rather than becoming a collection of narrow, unreachable gaps.
IDEA 07 / 20
Outline Rounded Pink Tiles with Dark Grout
 SaveSupport Non AI Creator
Image credit: Mavis Design LLC
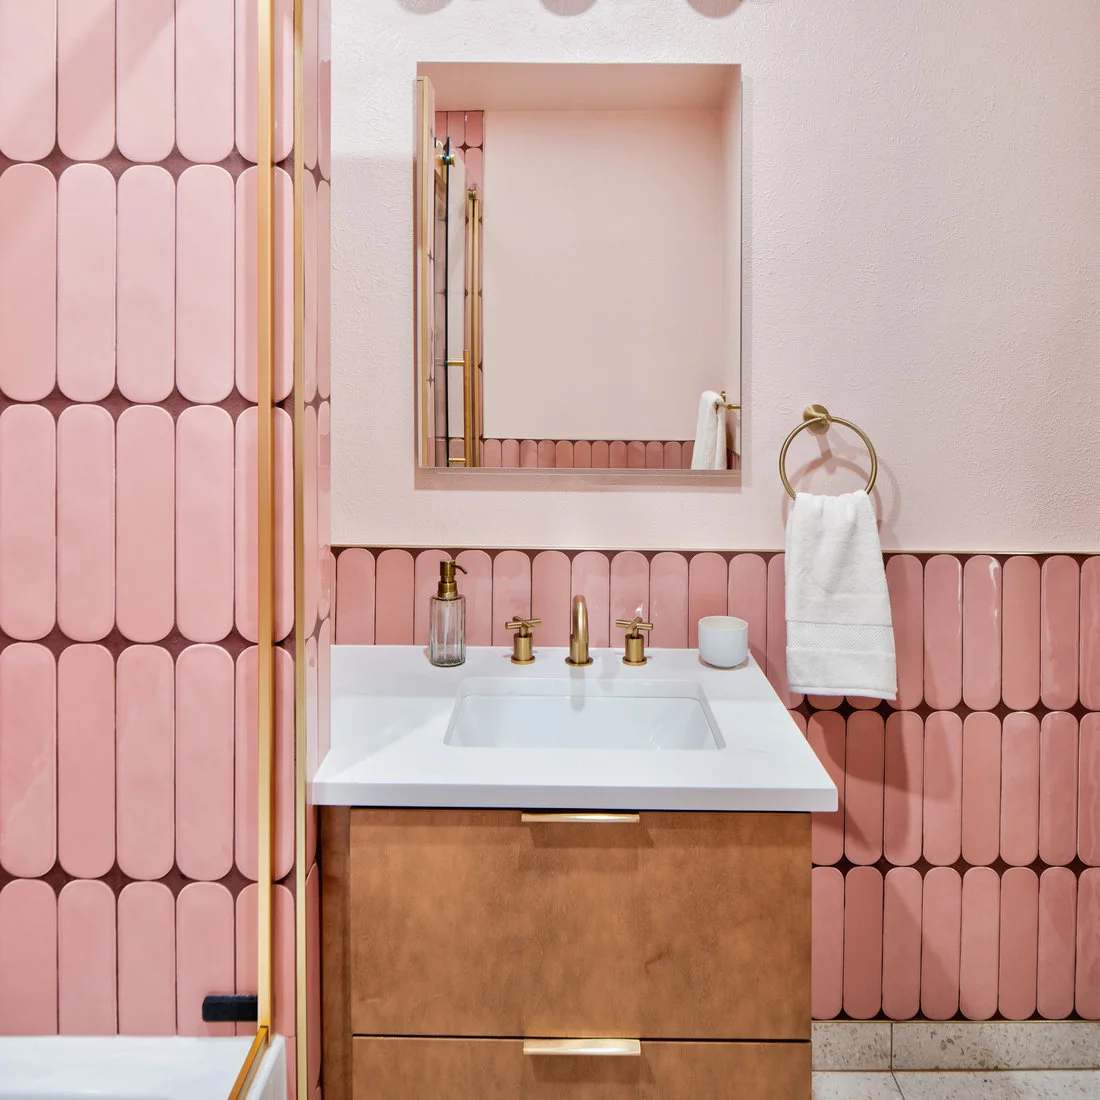
Dark grout emphasizes the rounded ends of these pink tiles, creating a stronger graphic surface around the sink. Wooden drawers provide a warm base, while the pale countertop and rectangular mirror give the repeated shapes simpler boundaries. Gold-colored fittings add a small accent without requiring another decorative tile band.
Contrasting grout makes layout irregularities more noticeable, so review the proposed cuts and alignment before installation. Compare the tile and grout together rather than choosing them separately from online swatches. Our earthy bathroom ideas explore quieter surrounding finishes if you want the pink pattern to stand out while keeping the rest of the room restrained.
IDEA 08 / 20
Connect Soft Pink Glass Tiles with Pale Wood
 SaveSupport Non AI Creator
Image credit: Fireclay Tile
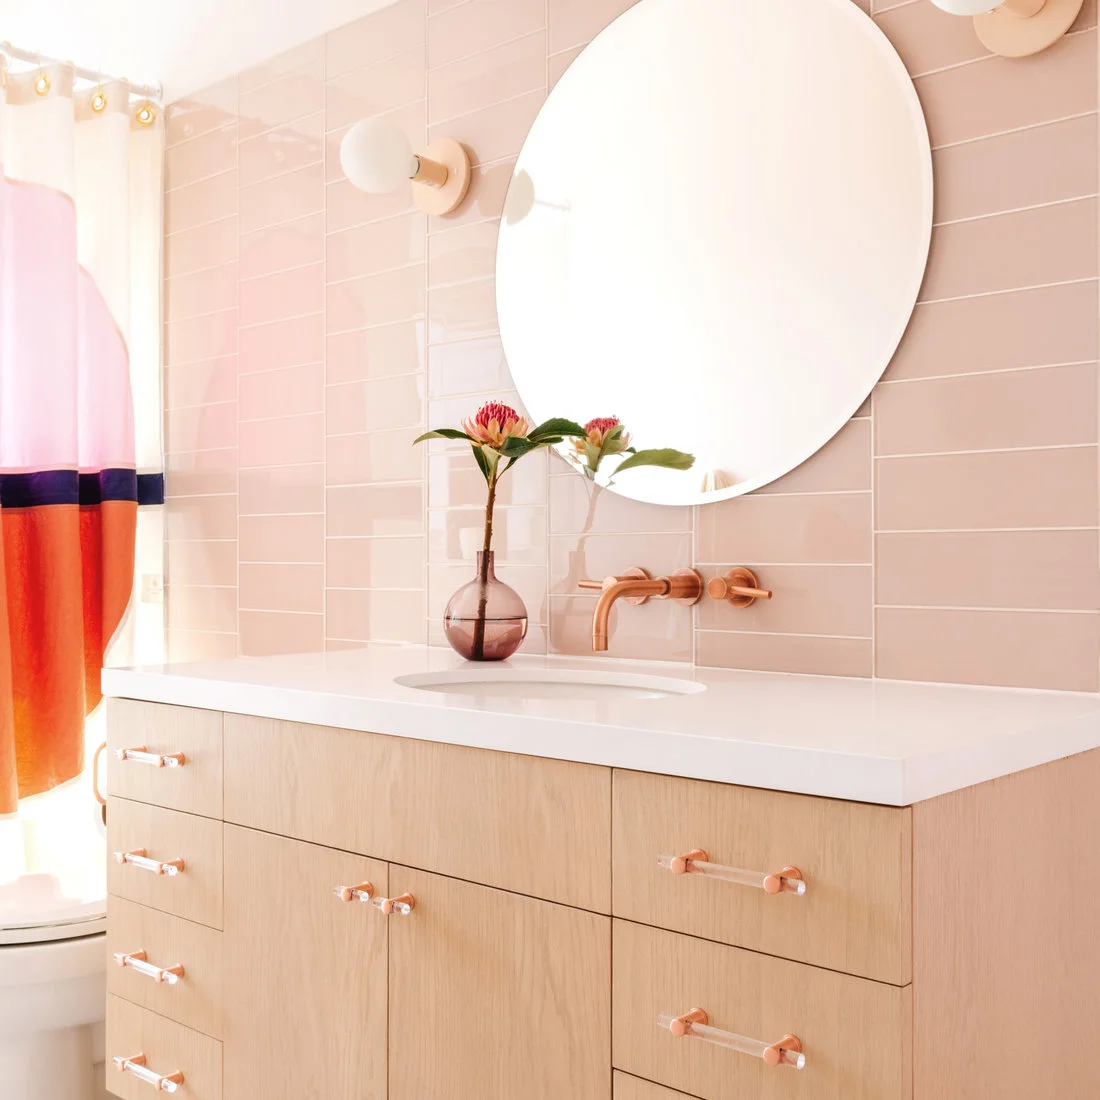
Pale pink rectangular tiles run horizontally behind the sink, with a round mirror interrupting the straight lines. Light wooden drawers soften the lower half of the arrangement, and warmer-colored taps and handles repeat across the vanity. A striped curtain supplies a stronger accent at the side while leaving the sink wall comparatively calm.
Ask to see several tiles together so you can judge their color and surface variation under realistic lighting. Glass and other glossy products may need particular installation and cleaning methods; confirm the specification instead of relying on their appearance. Keep enough counter space around the sink for daily use, especially when decorative objects share the same narrow ledge.
IDEA 09 / 20
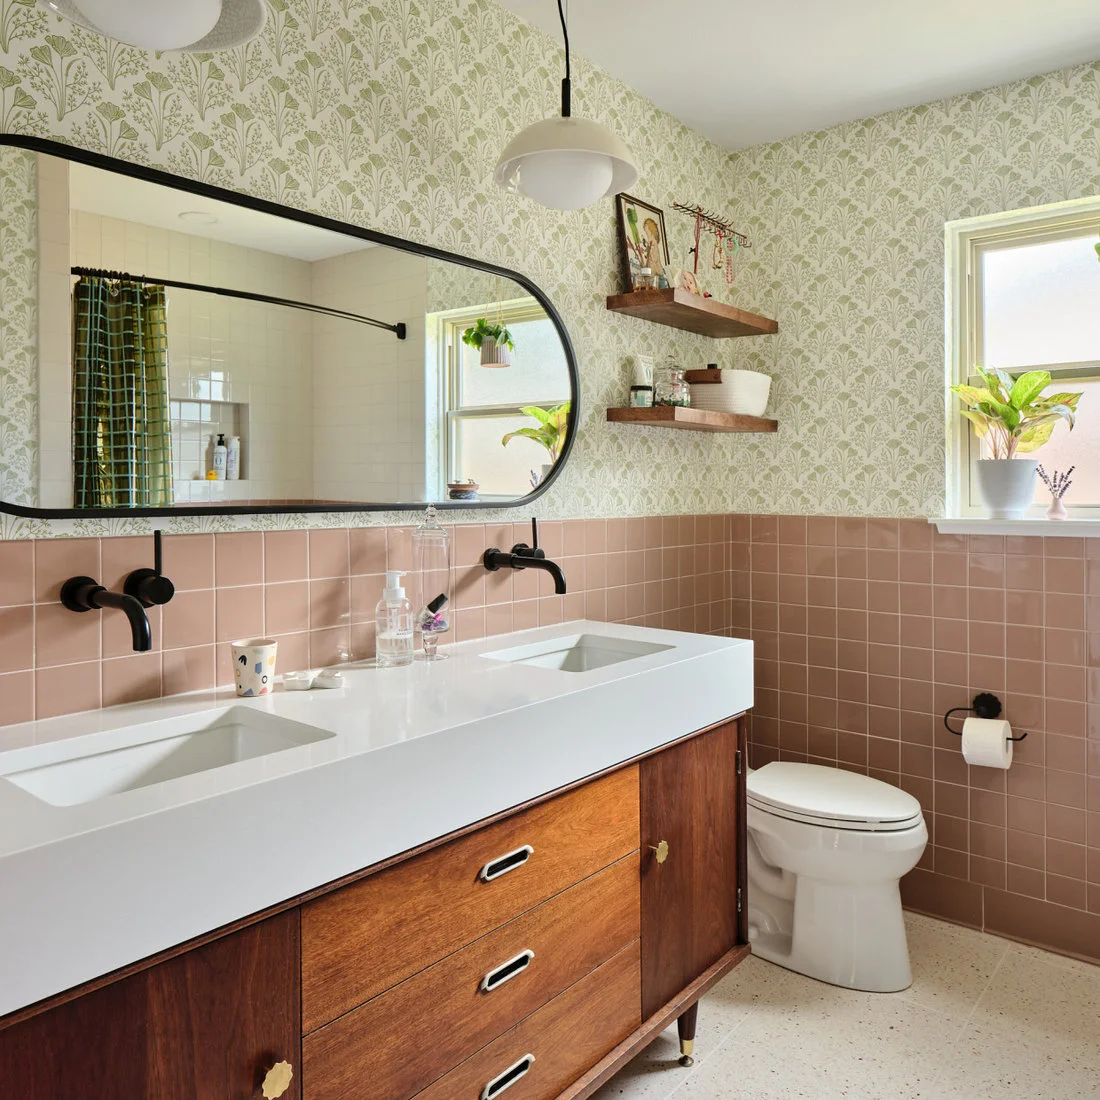
Keep Pink Wainscoting Below Botanical Wallpaper
 SaveSupport Non AI Creator
Image credit: Catalyst Construction, Inc
Pink square tiles form the lower wall finish, while botanical wallpaper adds a smaller pattern above. The long double sink and dark taps create a clear horizontal boundary at the vanity. Wooden drawers connect the warmer tile color with the furniture, and a wide mirror reflects the bath without requiring more separate wall decorations.
Compare wallpaper and tile samples together, including the narrow transition strip between them. Keep wallpaper outside direct splash areas and check its suitability for the room’s moisture conditions. Make sure both sinks have reachable storage, since a long counter can still become cluttered when each person’s everyday products have nowhere convenient to go.
IDEA 10 / 20
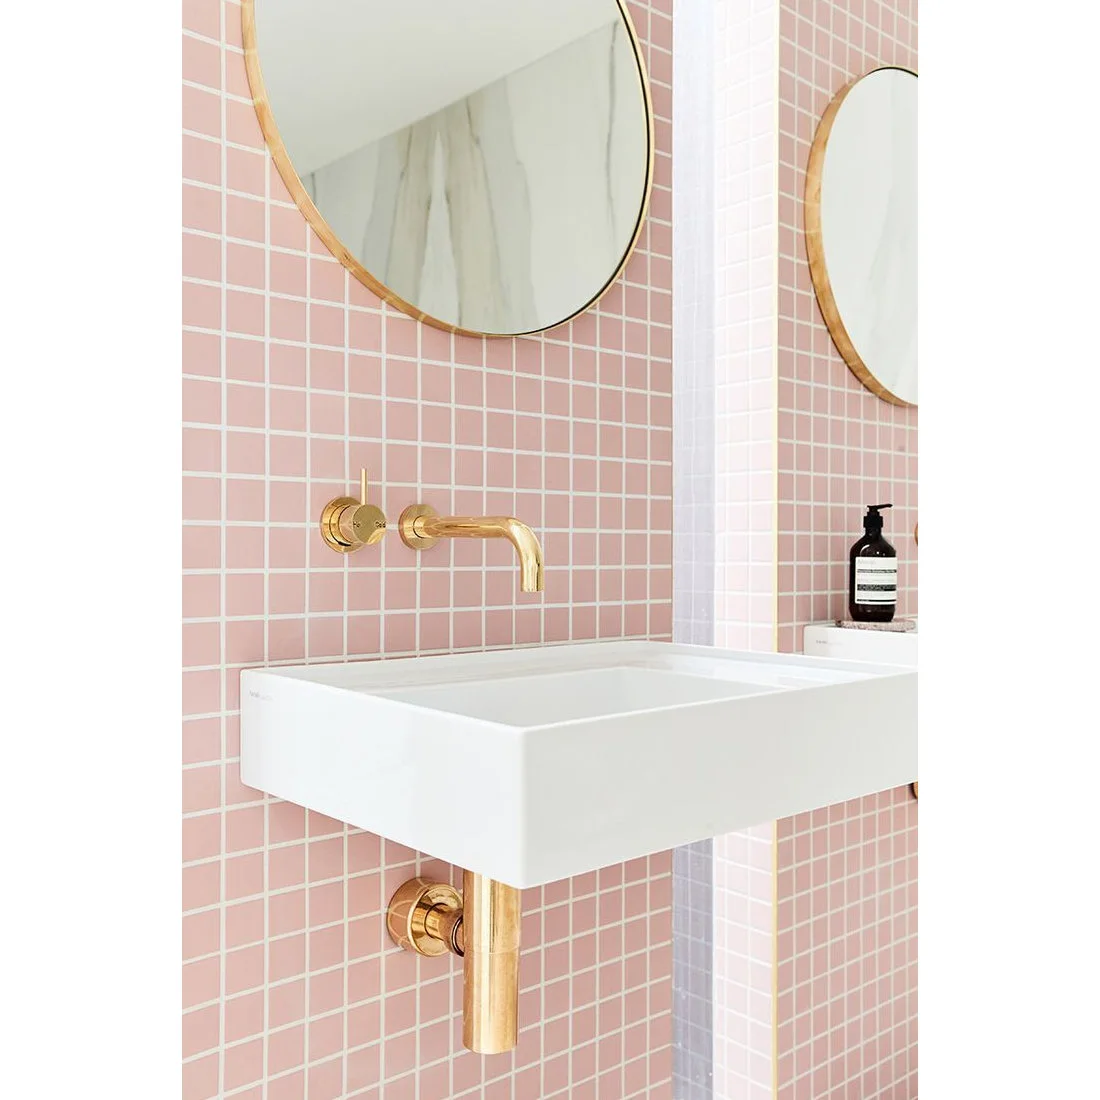
Use Pale Pink as a Quiet Backdrop
 SaveSupport Non AI Creator
Image credit: Finstad's Carpet One
Small pale pink squares create a consistent background for the white wall-mounted sink and round mirrors. Gold-colored taps and frames bring warmth, while the exposed pipework repeats that detail below. The arrangement is comparatively simple because the tiles provide color without an additional painted cabinet or patterned backsplash competing for attention.
Before choosing a wall-mounted sink, plan support, pipe access and storage with the installer. Check that the basin gives the users enough practical space and that cleaning beneath it is manageable. Compare the pink sample beside the actual white fixture; a subtle tile color can change noticeably when paired with a warmer or cooler sink finish.
PART 03
Use shape and pattern deliberately
IDEA 11 / 20
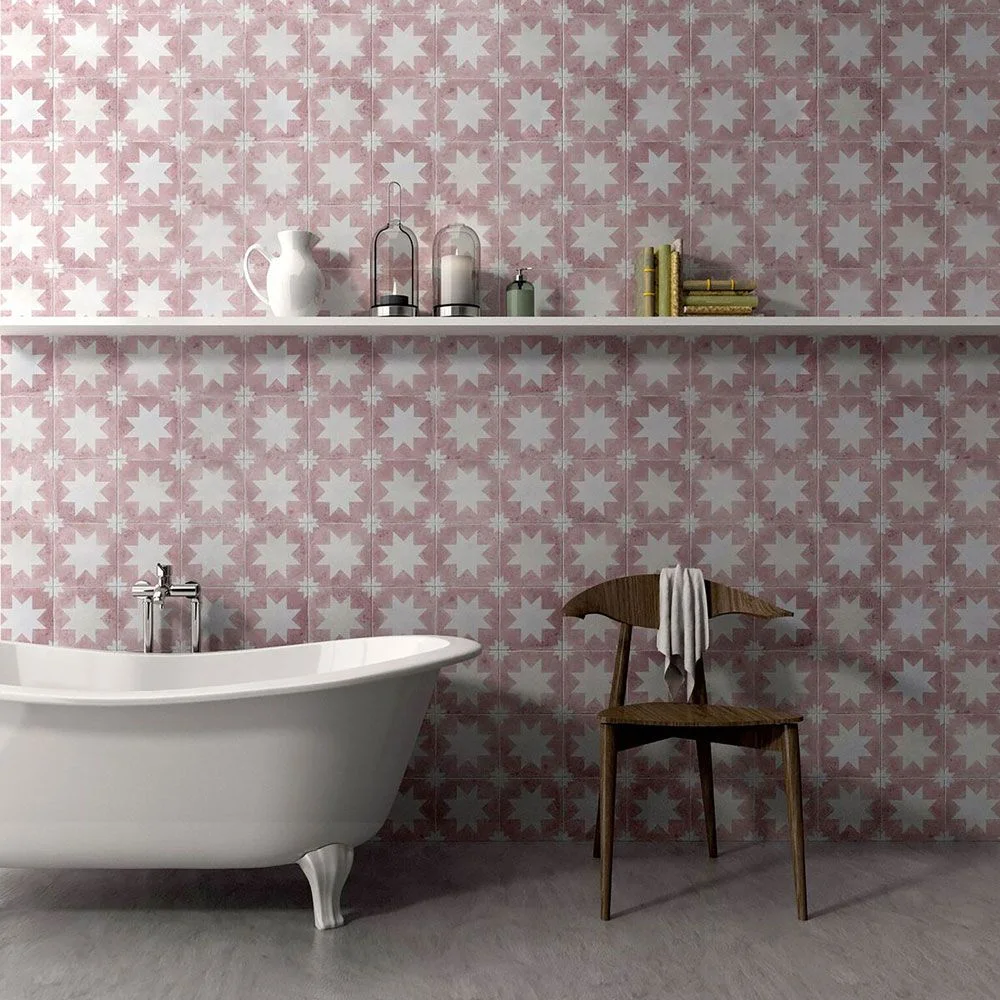
Make a Star Pattern the Main Wall Feature
 SaveSupport Non AI Creator
Image credit: Bert & May
Pink and white stars cover the wall behind the bath, with a long white shelf cutting a clear horizontal line across the pattern. The pale freestanding tub and wooden chair provide larger quiet shapes. Rather than adding several colors, the room relies on repetition and the difference between the patterned wall and simpler furniture.
Lay out enough sample tiles to see a complete star before deciding on the pattern’s scale. Plan the shelf fixing and tile cuts together so the repeated design does not end awkwardly around fittings. Confirm that nearby furniture and shelving suit a damp bathroom, and leave space to clean around the freestanding bath rather than treating the photographed placement as a measured layout.
IDEA 12 / 20
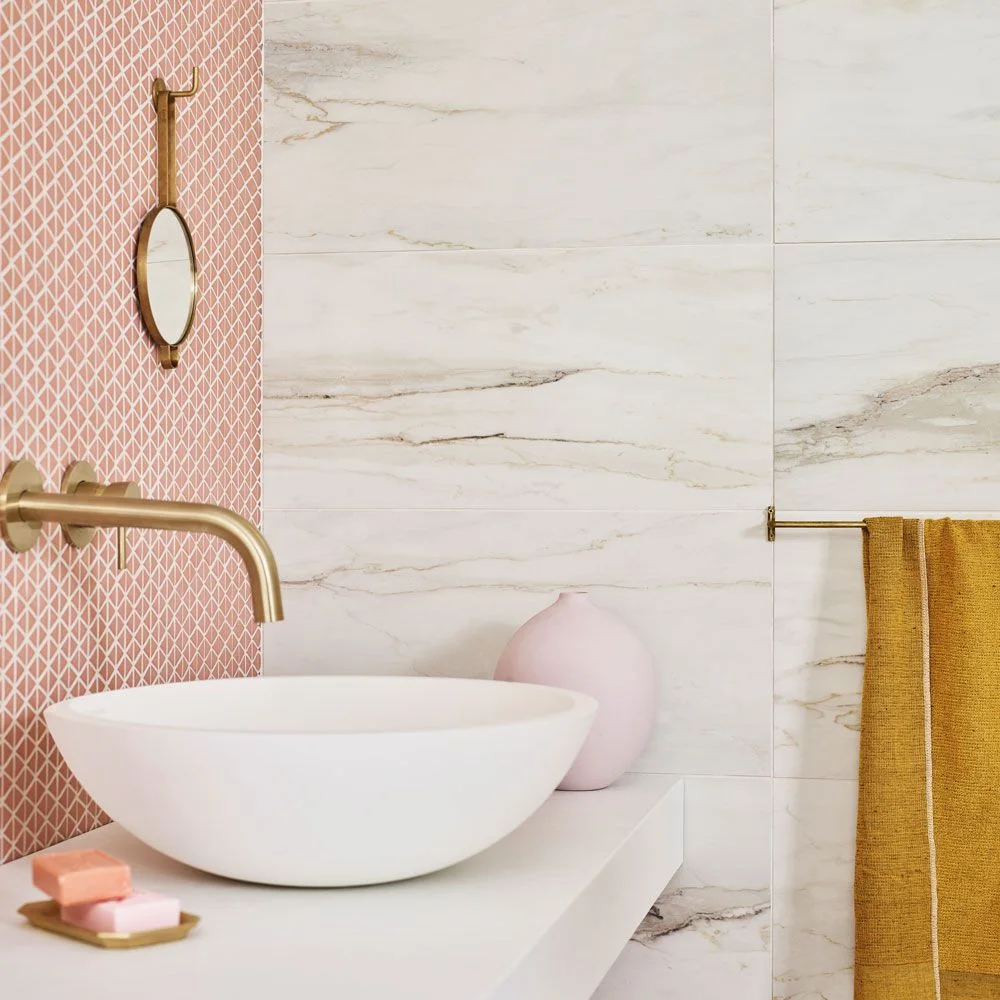
Use Pink Mosaic Behind a White Basin
 SaveSupport Non AI Creator
Image credit: Claybrook
Small pink geometric tiles give the sink wall a more detailed texture beside larger pale veined tiles. The white vessel basin provides a simple shape in front of the pattern, while gold-colored taps and a narrow towel rail repeat a warm accent. The contrast in tile size defines the washing area without requiring a strongly colored vanity.
Consider the additional grout lines when choosing mosaic tiles for a frequently used sink area. Ask for cleaning guidance and inspect a sample sheet for spacing and edge quality. Plan how the smaller tiles will meet the larger wall finish, including any trim, so the change in scale looks deliberate rather than like an unresolved junction.
IDEA 13 / 20
Pair a Pink Geometric Backsplash with Green Storage
 SaveSupport Non AI Creator
Source: houzz.com
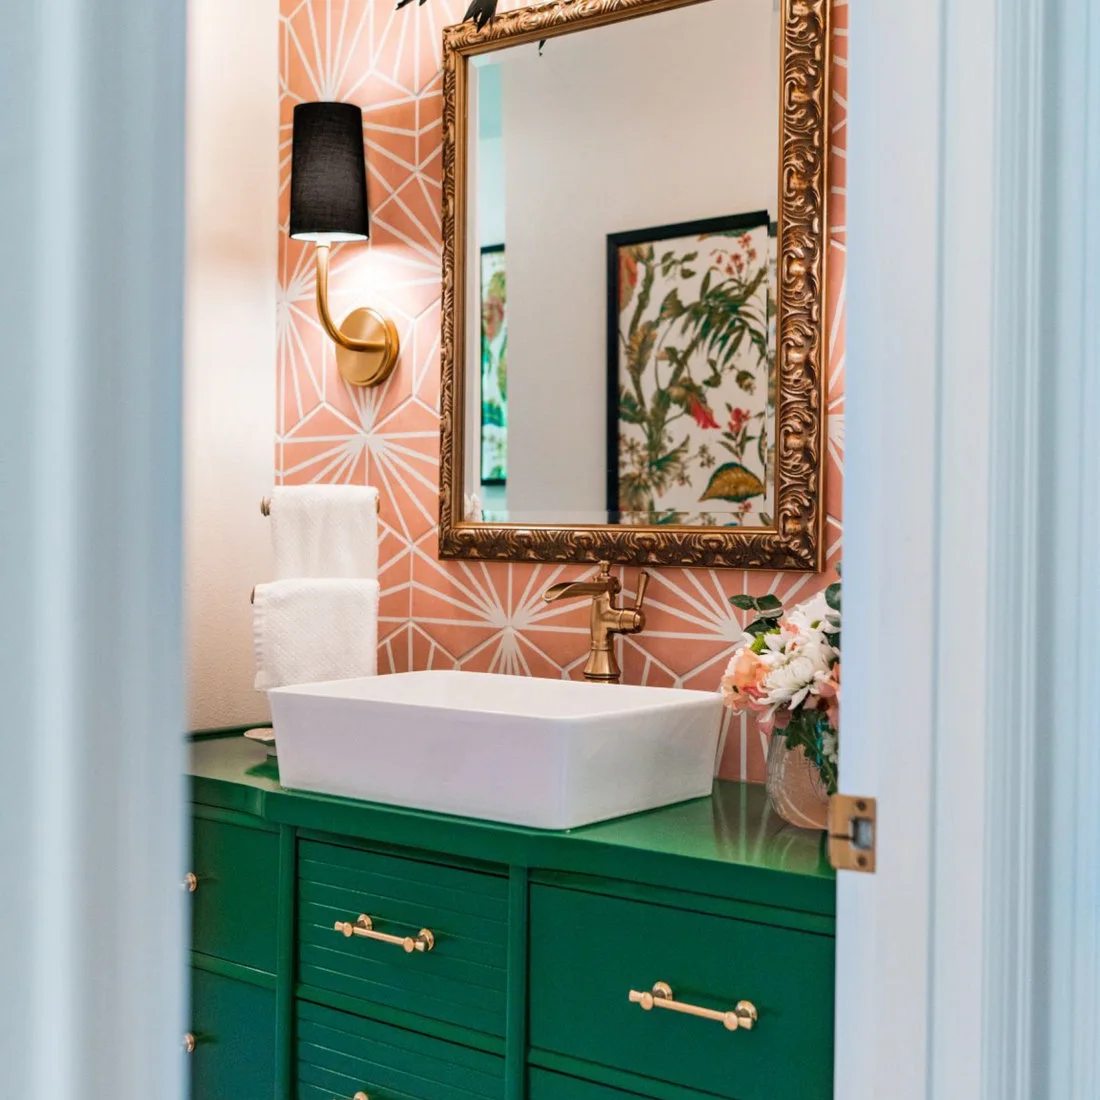
The pink geometric backsplash and green vanity establish a clear contrast beneath an ornate gold-framed mirror. A white vessel sink gives the center of the arrangement a quieter surface, while a dark-shaded wall light adds another defined outline. The tile pattern supplies much of the decoration, leaving limited need for additional objects on the counter.
Compare the green and pink samples alongside the mirror finish before painting a vanity or ordering tile. If the combination feels too busy, simplify the handles or counter display first. Keep the backsplash wide enough for the sink’s splash pattern, and confirm that lighting and wall fixings are suitable for their positions within the bathroom.
IDEA 14 / 20
Use Herringbone Within a Bath-and-Shower Zone
 SaveSupport Non AI Creator
Image credit: James Merrell
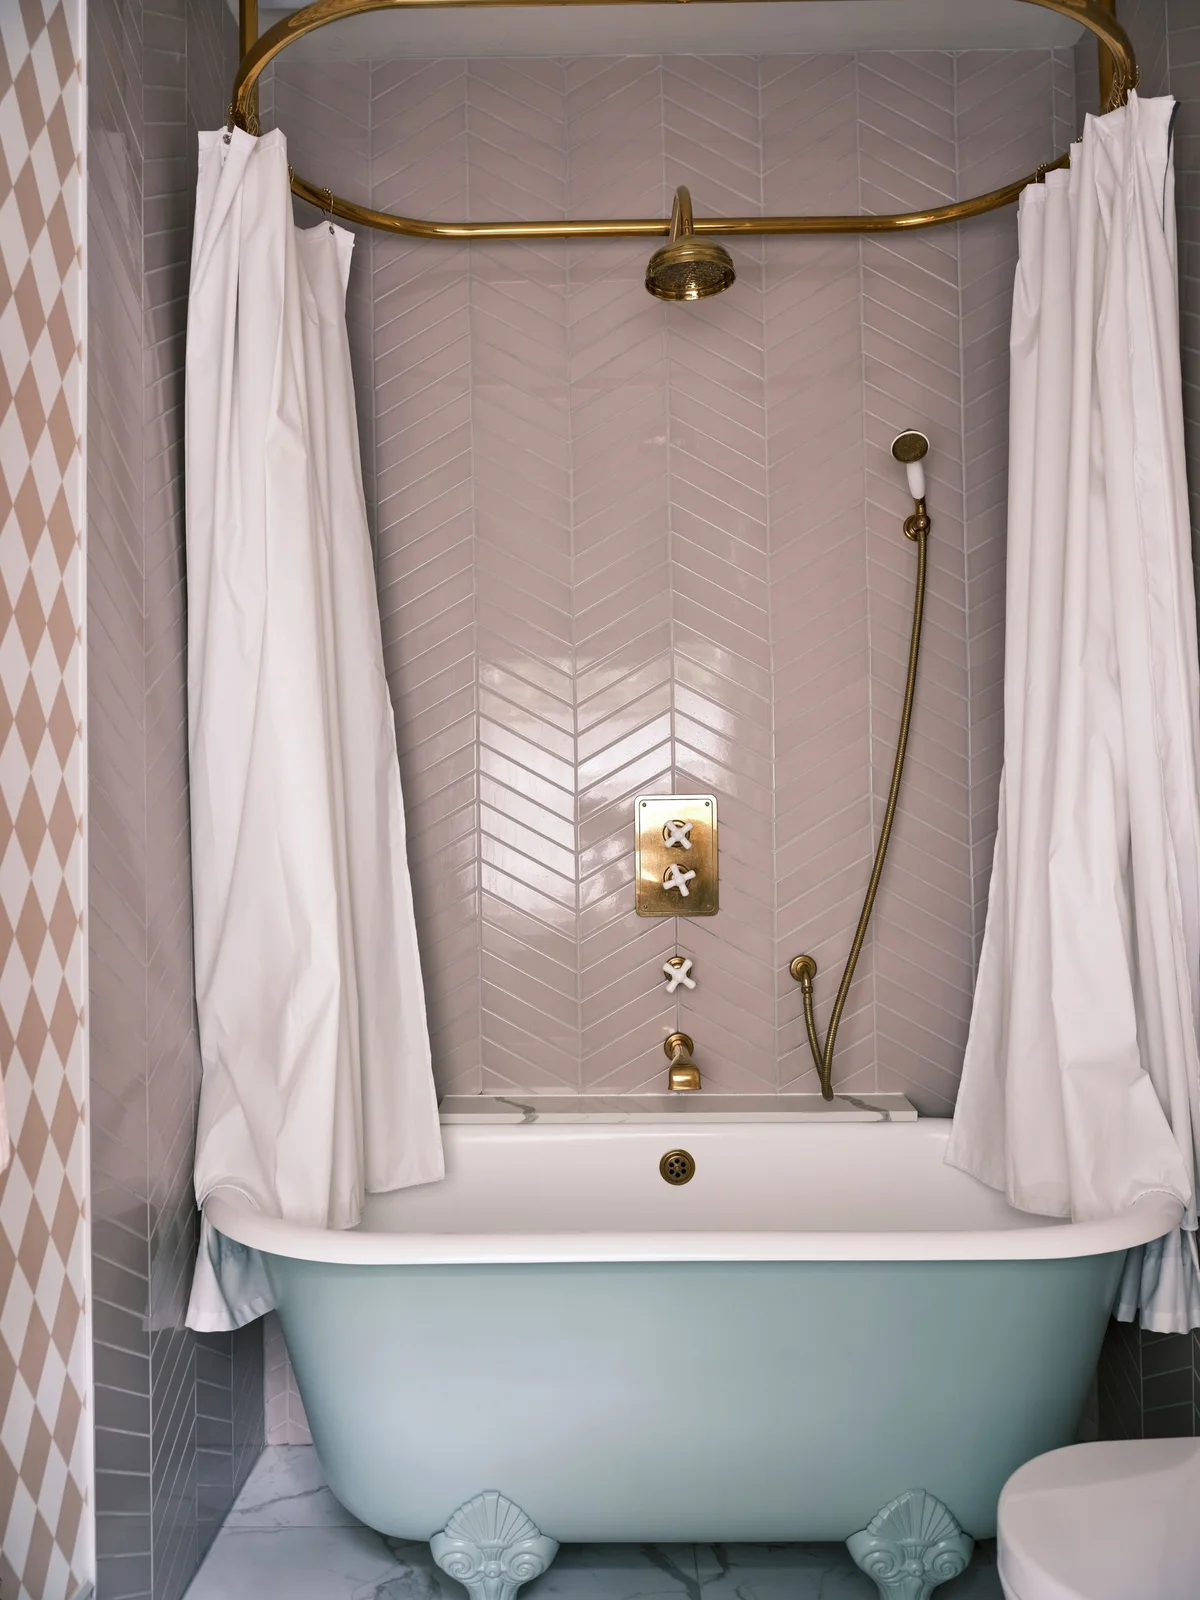
Pale pink herringbone tiles give the bath-and-shower area a directional pattern, while white curtains soften the edges of the oval rail. A blue-green bath exterior supplies contrast below the paler wall. The gold-colored fittings connect the shower and bath, and the tile arrangement remains the main patterned surface inside the enclosure.
Herringbone needs a clear starting point and careful edge planning, especially around a shower control or niche. Review a drawing of the proposed layout with the installer before cutting tiles. Compare the bath exterior color with the grout and wall tile together, and choose curtains that can be removed and cleaned according to their care instructions.
IDEA 15 / 20
Finish Pink Tiling with a Dark Border
 SaveSupport Non AI Creator
Image credit: Drummonds
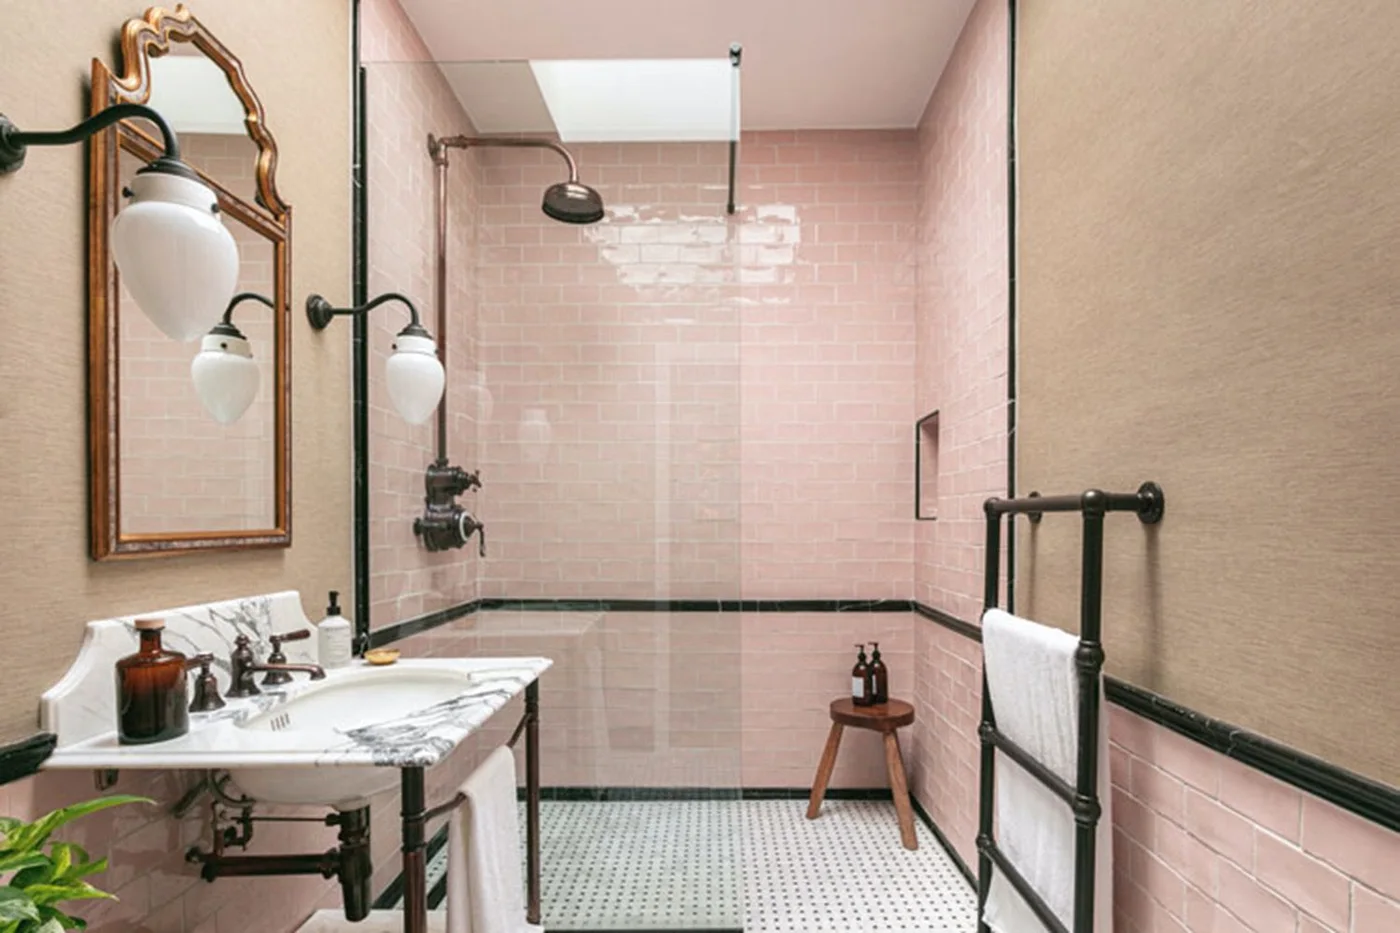
Dark trim creates a clear boundary through the pale pink tiled walls, with the darker fittings repeating the same outline. The glossy tile surface reflects light inside the shower, while the pale basin top provides a larger neutral area beside it. A small wooden stool introduces another texture without altering the pink-and-dark palette.
Plan border positions around the basin, shower and wall corners before the tiling starts. A narrow dark line can reveal misaligned heights, so check the full wall layout rather than placing each section independently. Our classic bathroom ideas offer other ways to connect traditional-looking fixtures with clear tile boundaries and quieter surrounding surfaces.
PART 04
Borders, fittings and finishing details
IDEA 16 / 20
Refresh a Pink Bath with a Simple Curtain
 SaveSupport Non AI Creator
Image credit: Lesley Glotzl
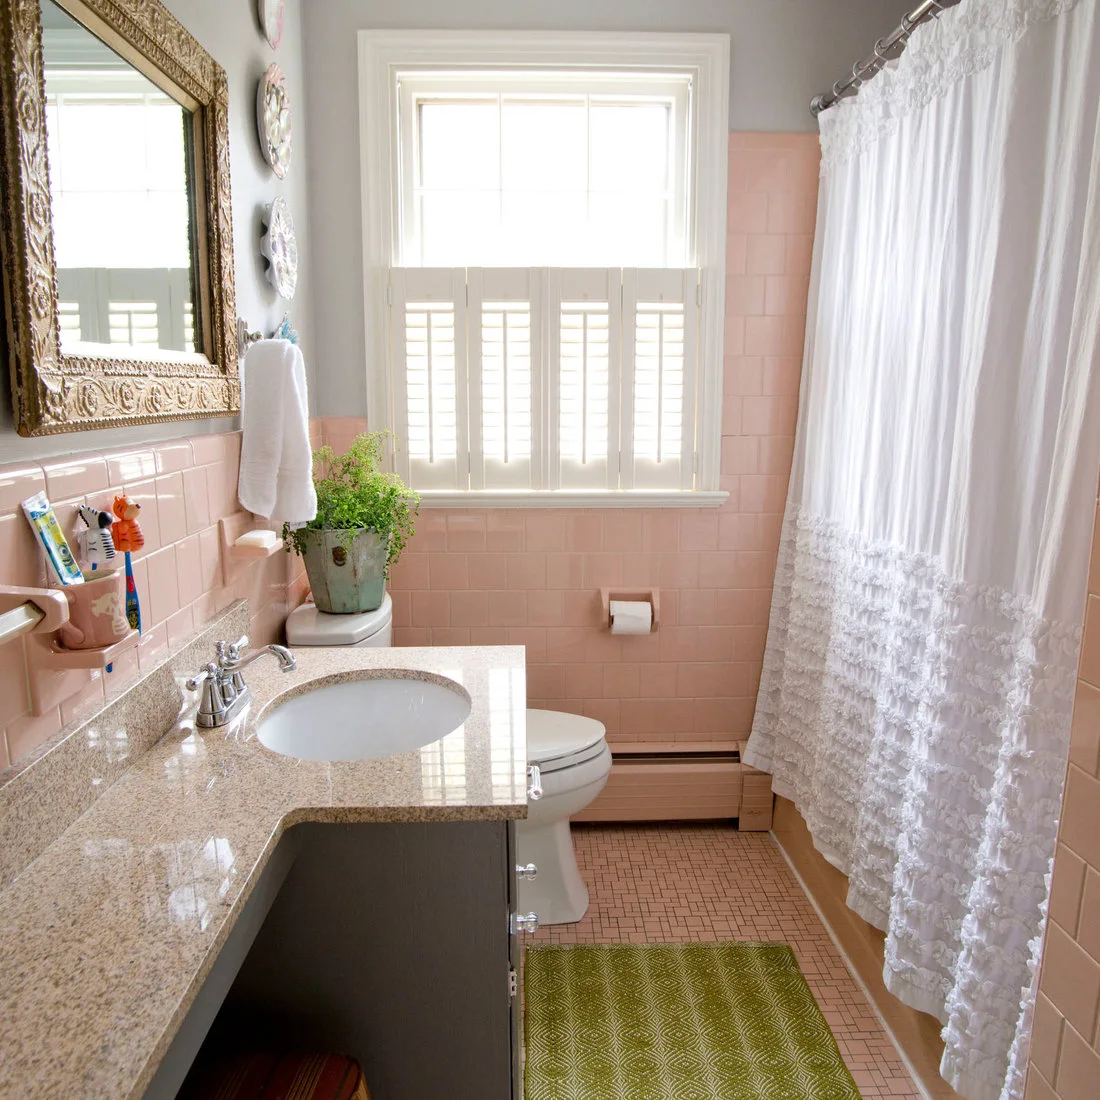
Pink tiles continue around the bath and sink, with a white shower curtain providing a simpler surface beside them. A pale vanity counter and white fixtures keep the room from becoming entirely pink. The gold-framed mirror adds a decorative shape, while the half-height wall tiling leaves room for a quieter painted area above.
If you are keeping an existing pink bathroom, try a simpler curtain and coordinated towels before replacing sound finishes. Have loose tiles, failed joints or signs of leakage assessed separately from the decoration. Choose a curtain arrangement that contains splashes appropriately, and leave it easy to open, remove and clean without disturbing nearby fittings.
IDEA 17 / 20
Use One Mosaic Band Beside Pink Squares
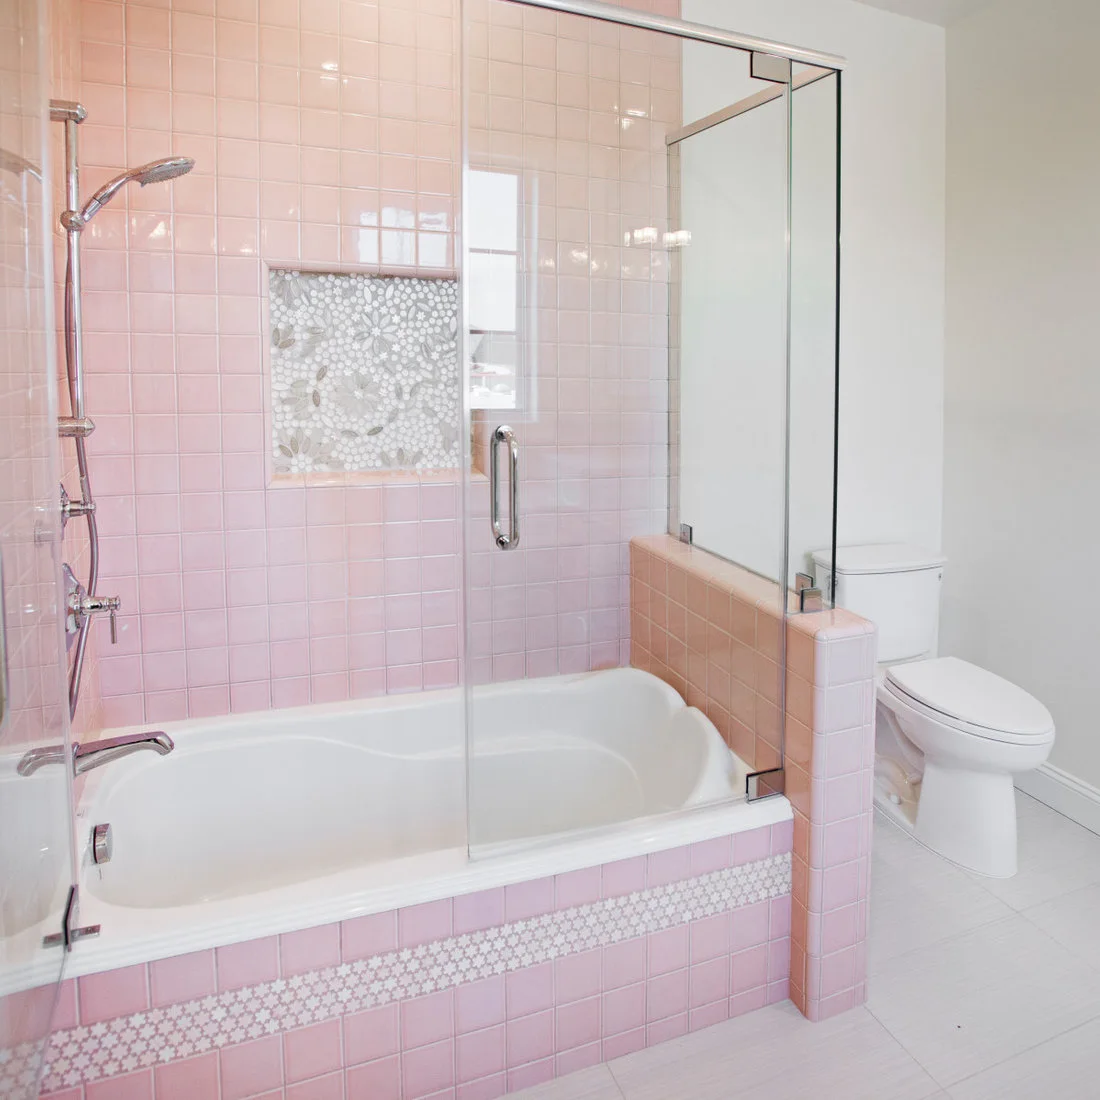 SaveSupport Non AI Creator
Image credit: Builtworks Inc.
Pink square tiles provide the main grid around the bath, with a small mosaic band adding detail across the panel below. The niche repeats the smaller pattern, connecting storage with the bath face. A clear screen leaves the tile layout visible, while the white tub and pale floor keep the surrounding surfaces comparatively light.
Use a decorative band sparingly when the main tiles already create a clear grid. Plan the band height and niche edges together so the smaller pattern feels connected. For adjoining floor options, our bathroom floor tile ideas compare different layouts; confirm that any product you select is suitable for the floor conditions and not merely a matching wall tile.
IDEA 18 / 20
Frame Dusty Pink Tiles with a Pale Arch
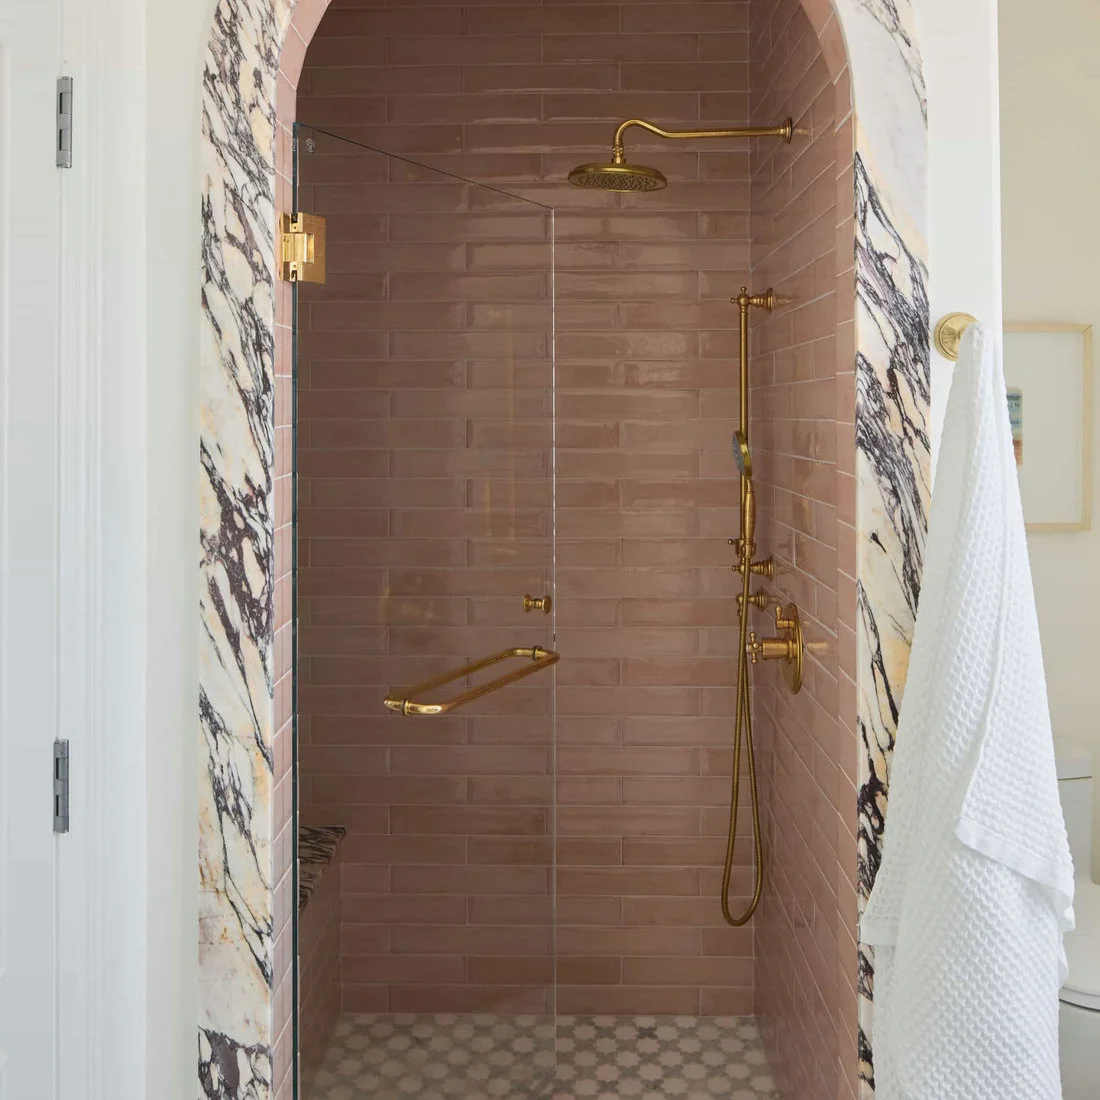 SaveSupport Non AI Creator
Image credit: 805 Interiors, Inc.
A pale veined arch frames the dusty pink shower tiles, keeping the color concentrated within the recess. Gold-colored fittings repeat the warmer tones, while a small patterned floor introduces a different scale beneath the larger rectangular wall pieces. The framed opening gives the shower a distinct identity without requiring every adjoining wall to be pink.
Coordinate the arch finish, tile thickness and exposed edges early in the installation plan. Ask the contractor to confirm suitable backing, waterproofing and access around the fittings rather than copying the visible finish alone. Compare the dusty pink with the floor sample inside the same light, since the recess may make the tile look deeper than it does elsewhere.
IDEA 19 / 20
Stack Rectangular Tiles in a Clear Grid
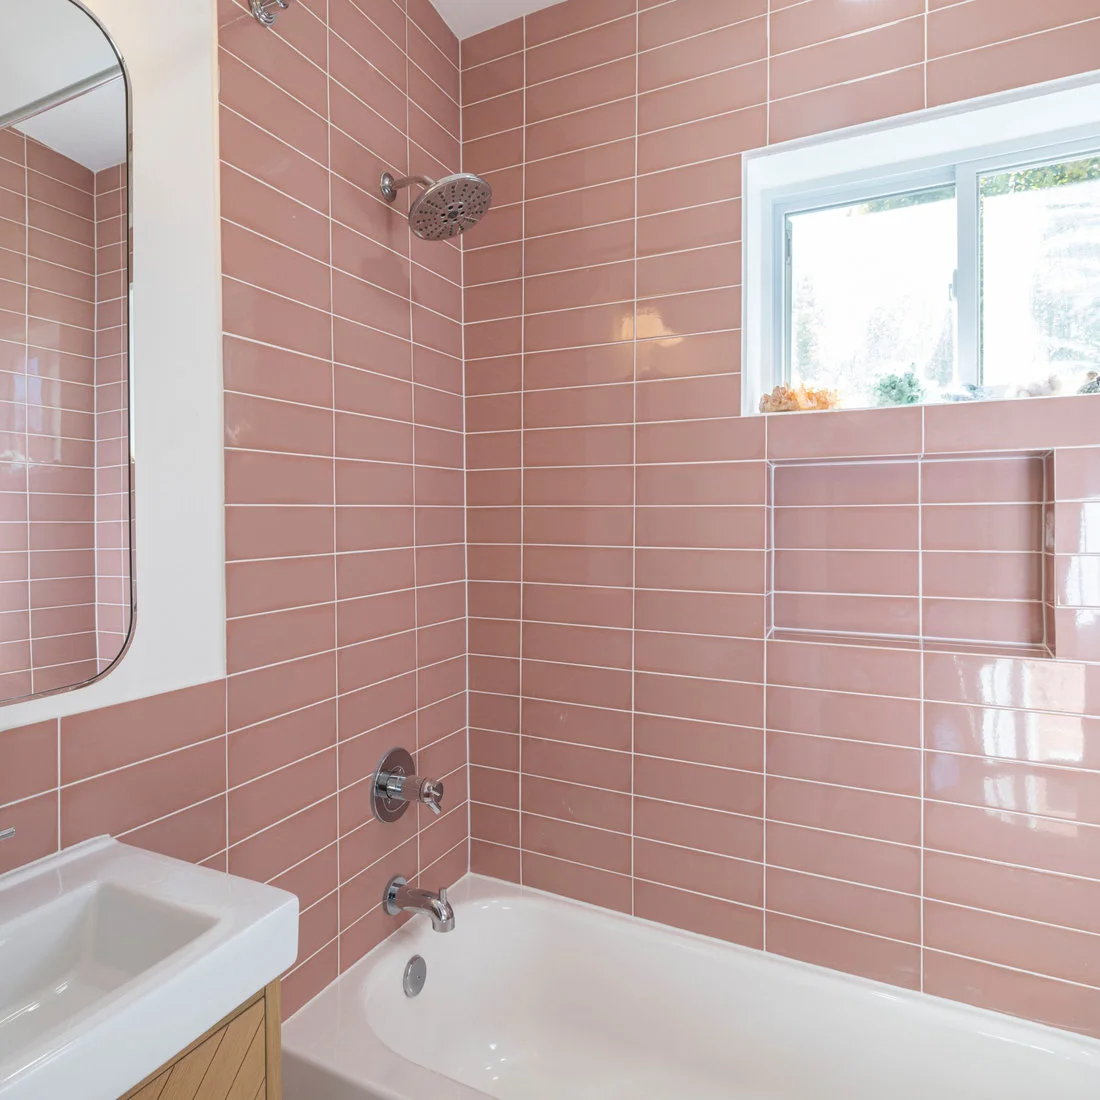 SaveSupport Non AI Creator
Image credit: Solid Kitchen & Bath
Stacked rectangular tiles form straight rows and columns around this white bath, with pale grout emphasizing the layout. A recessed niche interrupts the grid near the rim, while a small window breaks the upper wall. The arrangement uses the pink tile as its main color, allowing the bath and nearby fixtures to remain visually straightforward.
A stacked layout makes alignment especially visible, so ask for careful planning around the window, niche and bath edge. Compare grout shades on several tiles before choosing the contrast. Keep window hardware accessible and plan the wet-area finishing with the installer; neat visible rows do not establish the condition or water protection behind the tiled surface.
IDEA 20 / 20
Keep Pink Across Several Existing Surfaces
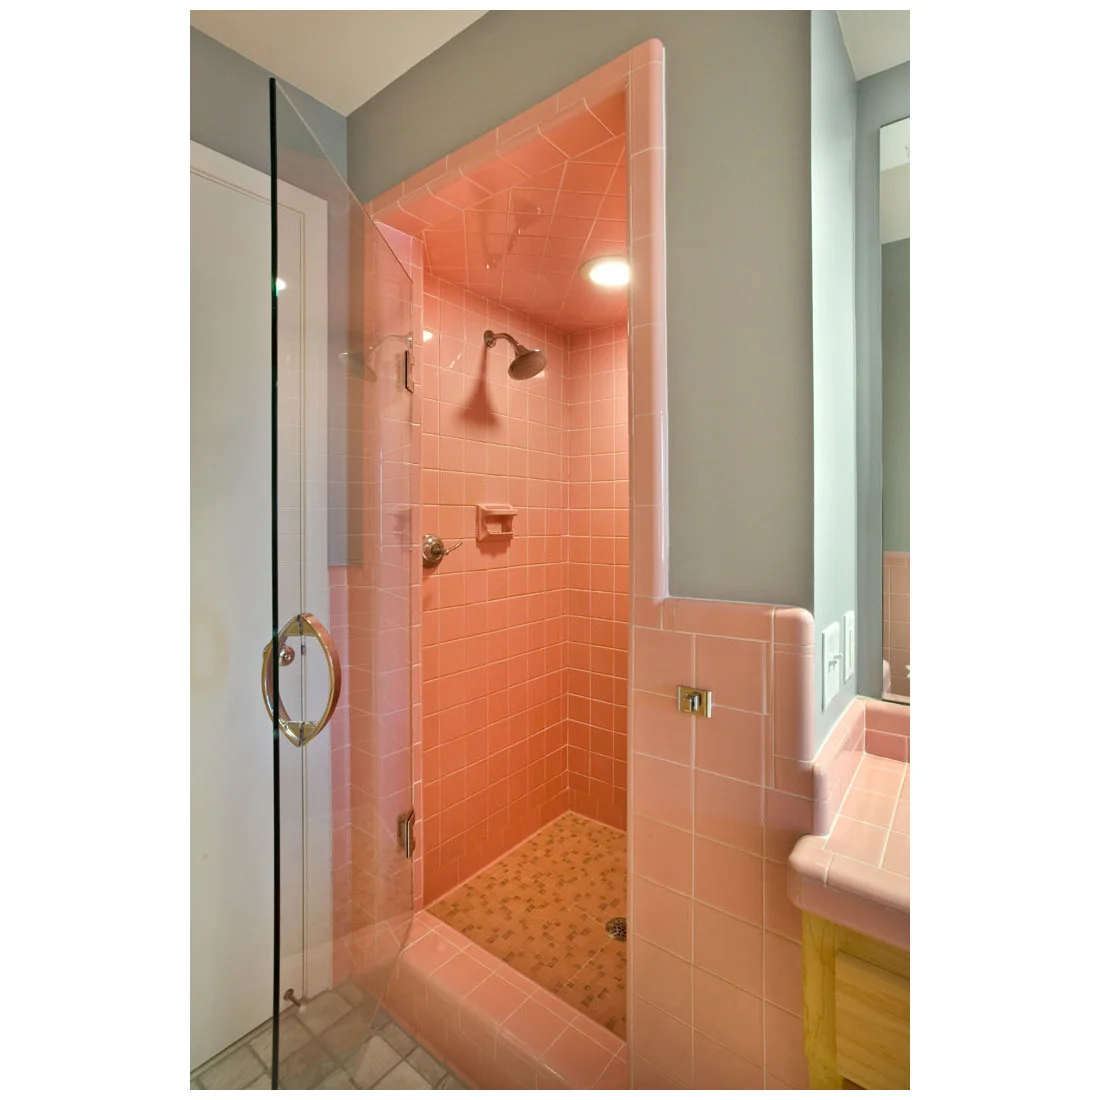 SaveSupport Non AI Creator
Image credit: The Legacy Building Co Inc
Pink tiles connect the shower, vanity and lower walls, creating a consistent color through the room. Gray upper walls and the patterned floor provide a different background without removing that continuity. The long wooden vanity introduces a warmer furniture surface, while framed pictures near the window keep the tiled area from being the only source of character.
When several original pink surfaces remain, work out which are sound and useful before planning replacement. Changing every fixture is not always necessary to make the room feel coherent. Keep new accessories restrained and check practical access along the vanity; preserving character should still leave enough room for toiletries, cleaning and comfortable movement around the shower.
BRING IT ALL TOGETHER
Choose the layout before ordering the tiles
Lay out several tile samples beside the grout, wall finish and fixtures you intend to use. Compare the complete combination in your own lighting, then mark where tiled surfaces will stop and how exposed edges will be finished. A clear plan for corners, niches and trim can matter as much as choosing a particular pink.
Keep the room’s daily use in view. Plan reachable storage for toiletries, accessible controls and a cleaning routine that suits the specified surfaces. If you are keeping existing pink tiles, inspect their condition and obtain appropriate advice before removing or covering them. New fittings and quieter adjoining finishes may be enough to make the room feel considered.