Modern bathroom ideas can come from a clear fixture shape, useful floating storage or a stronger color balanced with simpler neighboring surfaces. These photographs include separate baths and showers, compact dark wash areas and longer shared vanities. Some rooms use bold pattern or existing wood architecture, showing different ways to connect contemporary fittings with a personal space.
Compare the visible arrangement with the routines your room must support: washing, showering, storing supplies and keeping surfaces clean. Identify actual materials before planning maintenance, and have lighting, waterproofing, drainage and fitting support specified for the installation. A photograph helps compare shapes and colors but cannot establish whether a floor or fixture is suitable for your home.
PART 01
Connect useful storage with color and clear fixtures
IDEA 01 / 20
Connect Floating Storage with Separate Mirrors
 SaveSupport Non AI Creator
Image credit: Photo: D2 Interieurs, Jane Beiles. From: D2 Interieurs
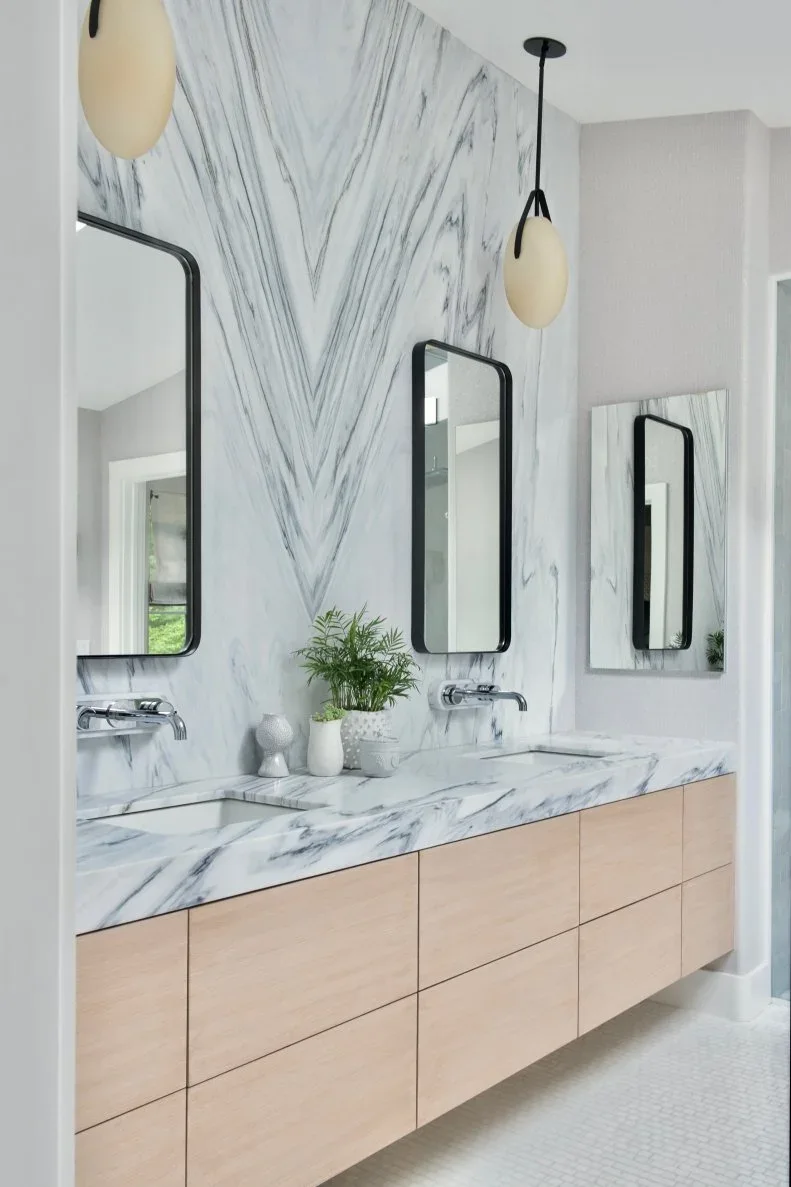
The long floating vanity provides one continuous storage block below the separate mirrors. Pale wood fronts bring warmth beneath the larger veined wall, while dark mirror frames give each wash position a clear outline. Small hanging lights repeat another vertical shape without filling the counter with additional objects or dividing the whole vanity into separate furniture pieces.
Plan drawer contents around the actual plumbing before selecting a floating unit. Check useful mirror positions for regular users and specify suitable lighting where it will be installed. Keep the space underneath accessible for cleaning, and leave each basin enough adjacent surface for daily supplies instead of treating the entire counter as a decorative display.
IDEA 02 / 20
Frame a Plain Bath with Blue Wall Tiles
 SaveSupport Non AI Creator
Image credit: Paul Craig
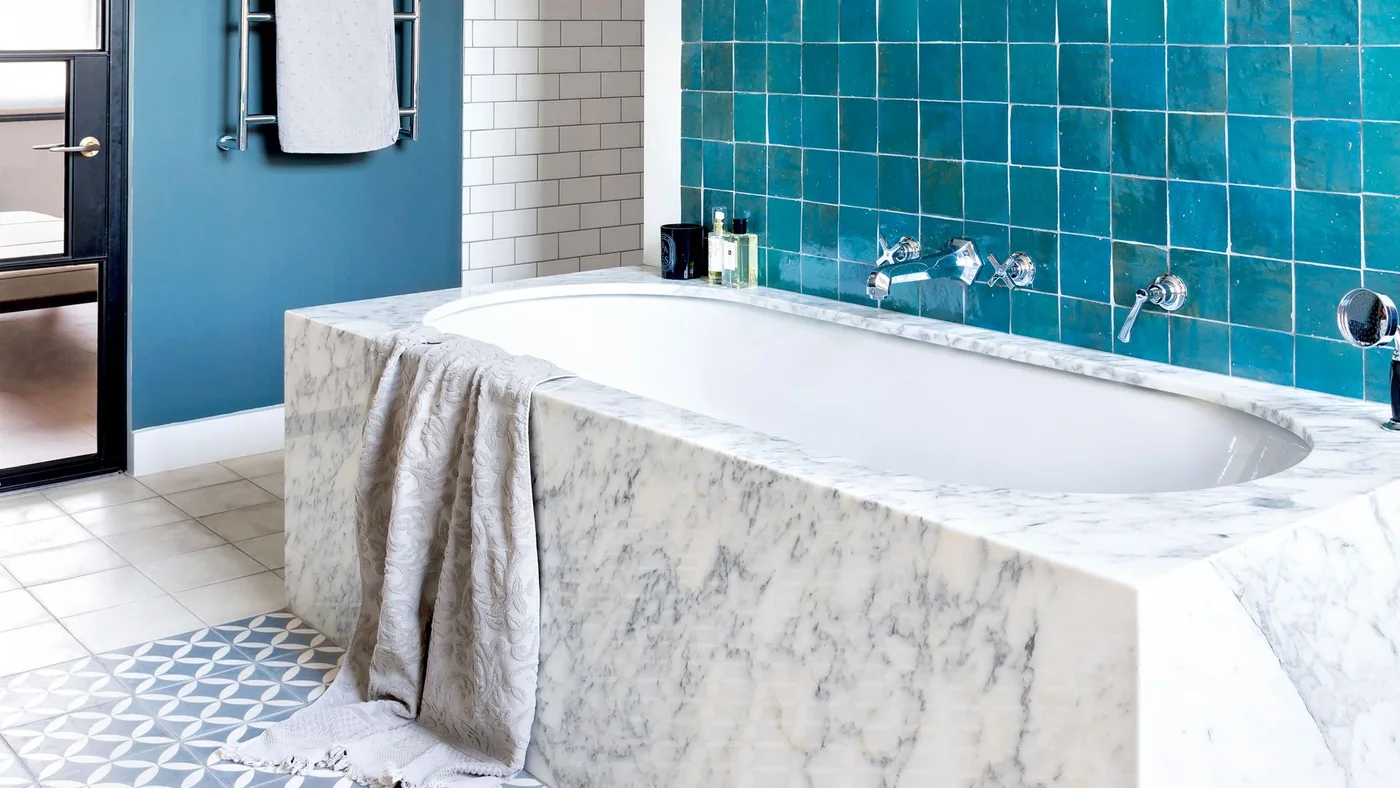
The broad pale surround gives the white bath a clear rectangular outer shape. Blue square tiles introduce stronger color at the wall, while the painted blue section connects to them without repeating their smaller grid. The floor’s patterned area remains a separate detail below, making the room’s different surfaces visible rather than blending them into one finish.
Compare the blue tile and painted wall in larger samples before choosing the final shades. Dark blue bathroom ideas offer more ways to balance blue with paler fixtures. Check access to the bath fittings and surround maintenance, keeping towels on a convenient rail rather than routinely leaving damp fabric over a surface whose care requirements have not been established.
IDEA 03 / 20
Use a Recess to Keep Bath Supplies Contained
 SaveSupport Non AI Creator
Image credit: Rachael Smith / Future
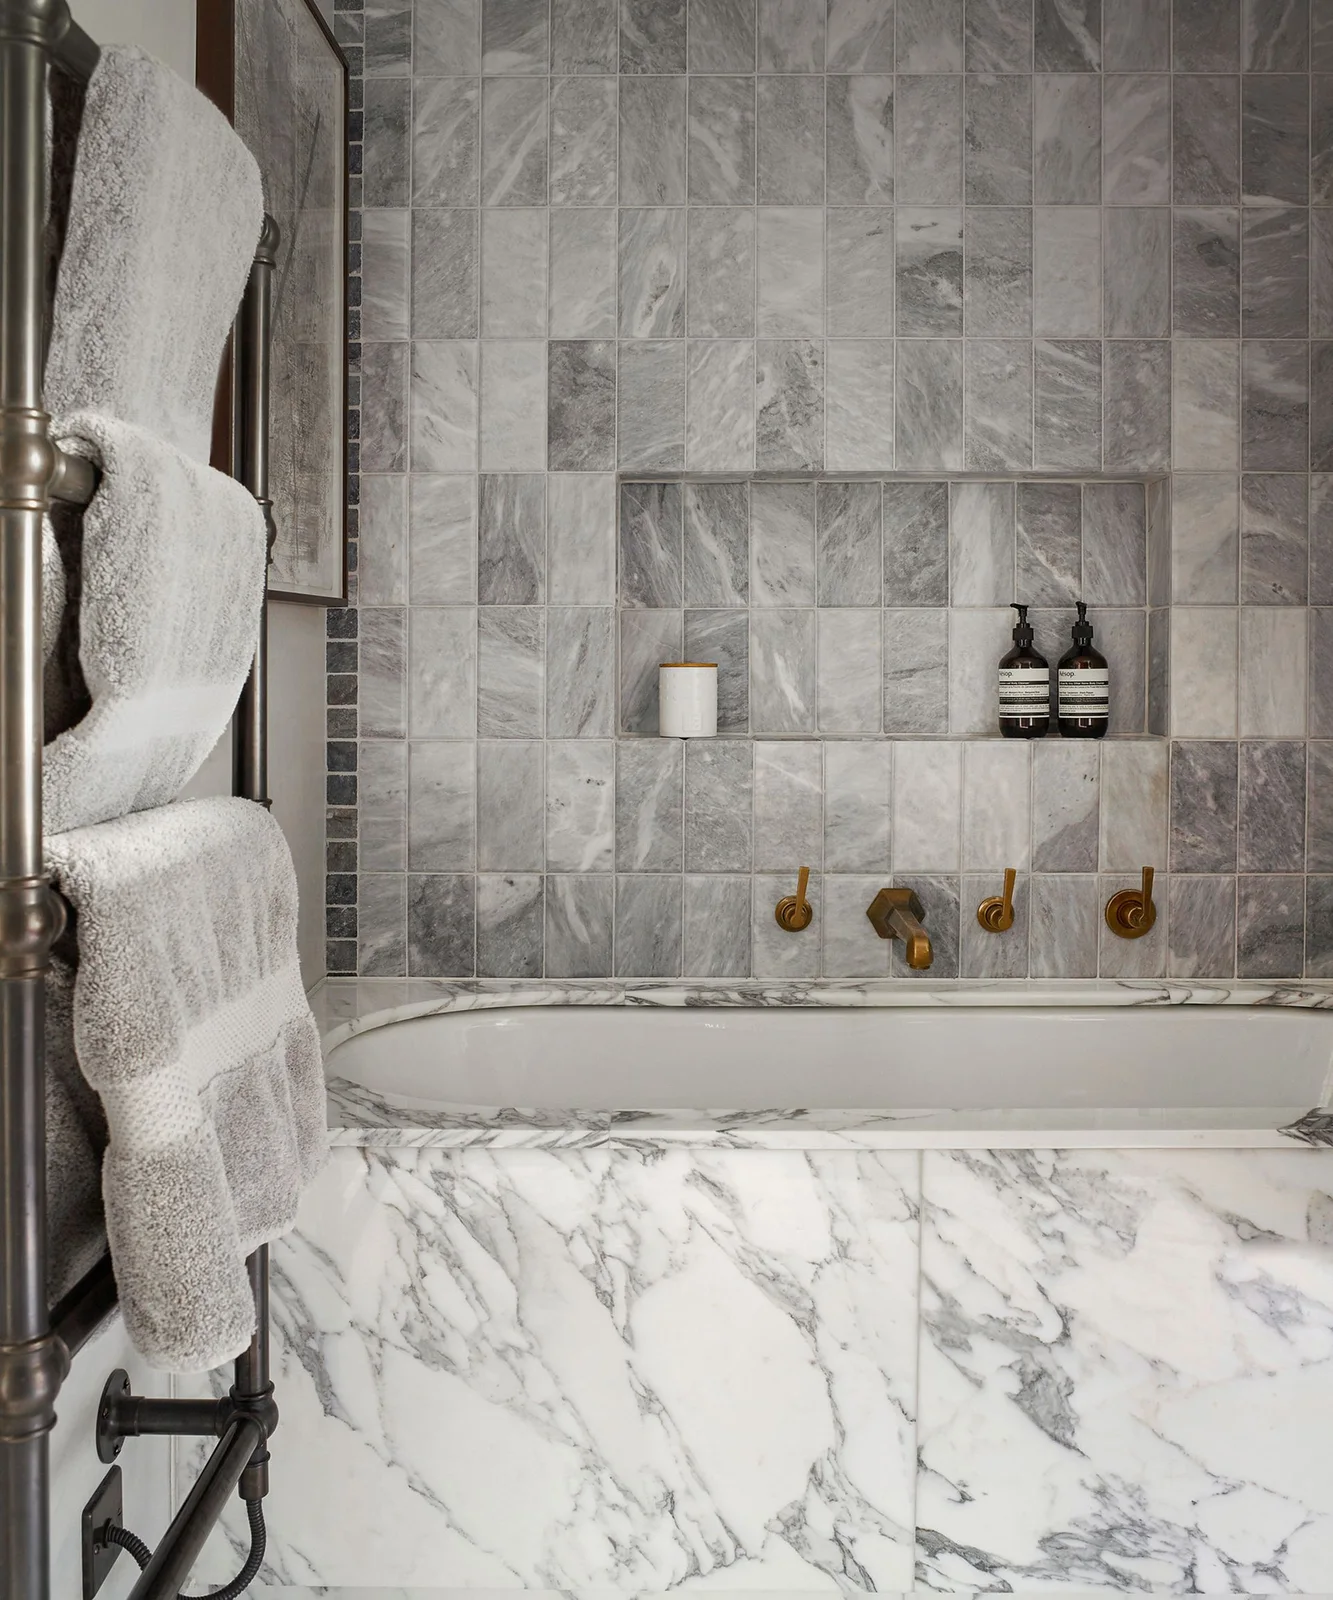
The wall recess holds bottles within a defined opening above the bath instead of adding a projecting shelf. Gray veined tiles give the upper wall a repeating grid, while the paler bath surround creates a broader lower surface. Warm-toned controls form smaller accents beneath the niche, with the towel rail providing separate storage at the side.
Size a planned niche around the supplies you actually use and have its waterproofing detailed as part of the installation. Keep bottle groups small enough to lift and wipe around comfortably. Identify both the tile and surround materials before selecting cleaners, and place controls so they can be reached conveniently without relying on the photographed arrangement to establish suitability.
IDEA 04 / 20
Separate a Freestanding Bath from the Shower
 SaveSupport Non AI Creator
Image credit: Franchie Cristogatin / Future
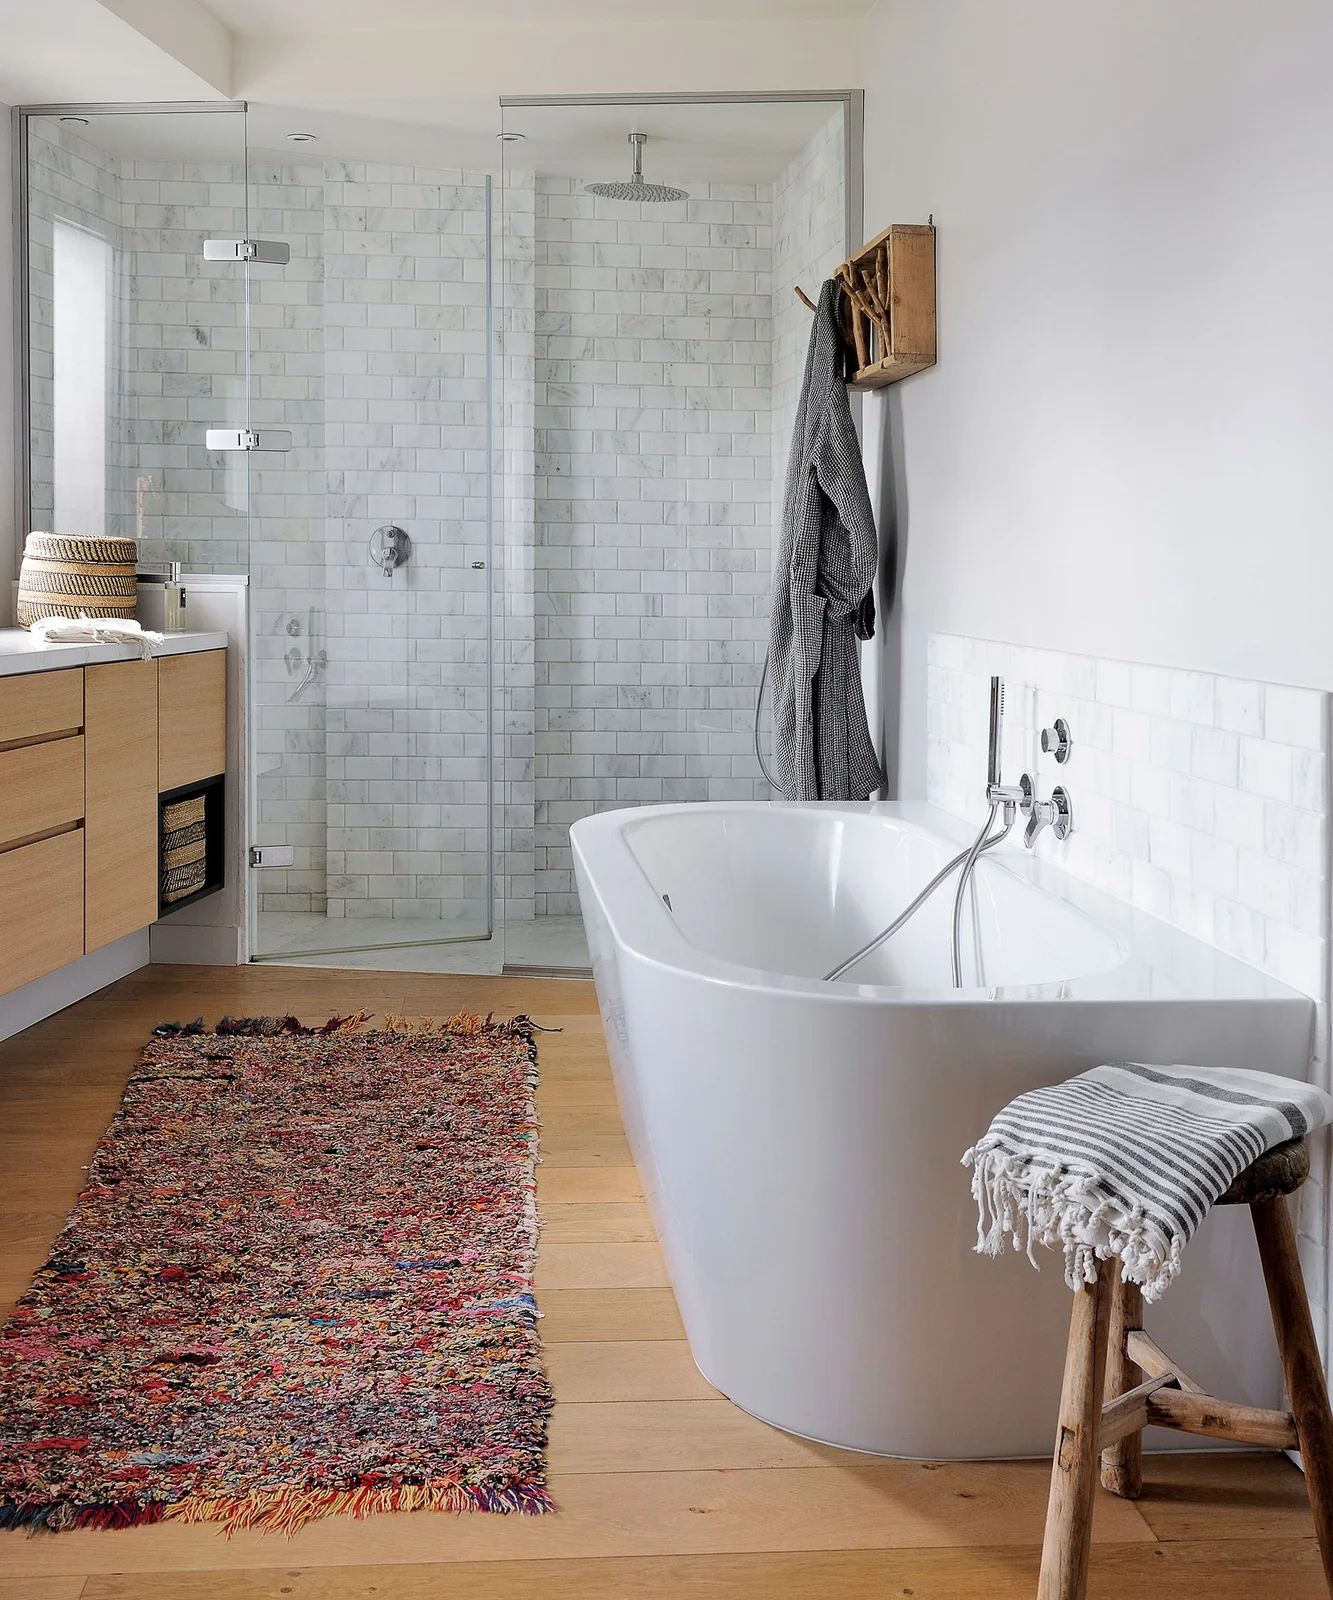
The freestanding bath creates a curved fixture shape beside the straighter shower enclosure. Wood vanity fronts and flooring add warmth around the pale walls and light shower tiles. The patterned rug and small stool provide separate softer details, while the clear screen keeps the shower’s wall finish visible from the surrounding room.
Check access around the bath for cleaning and preserve comfortable entry to the shower with the stool in place. Choose any floor textile for the actual damp conditions and manage it so it stays stable underfoot. Confirm drainage, waterproofing and floor suitability with the installation, rather than assuming a warm wood appearance identifies the flooring or proves it can tolerate repeated wet use.
IDEA 05 / 20
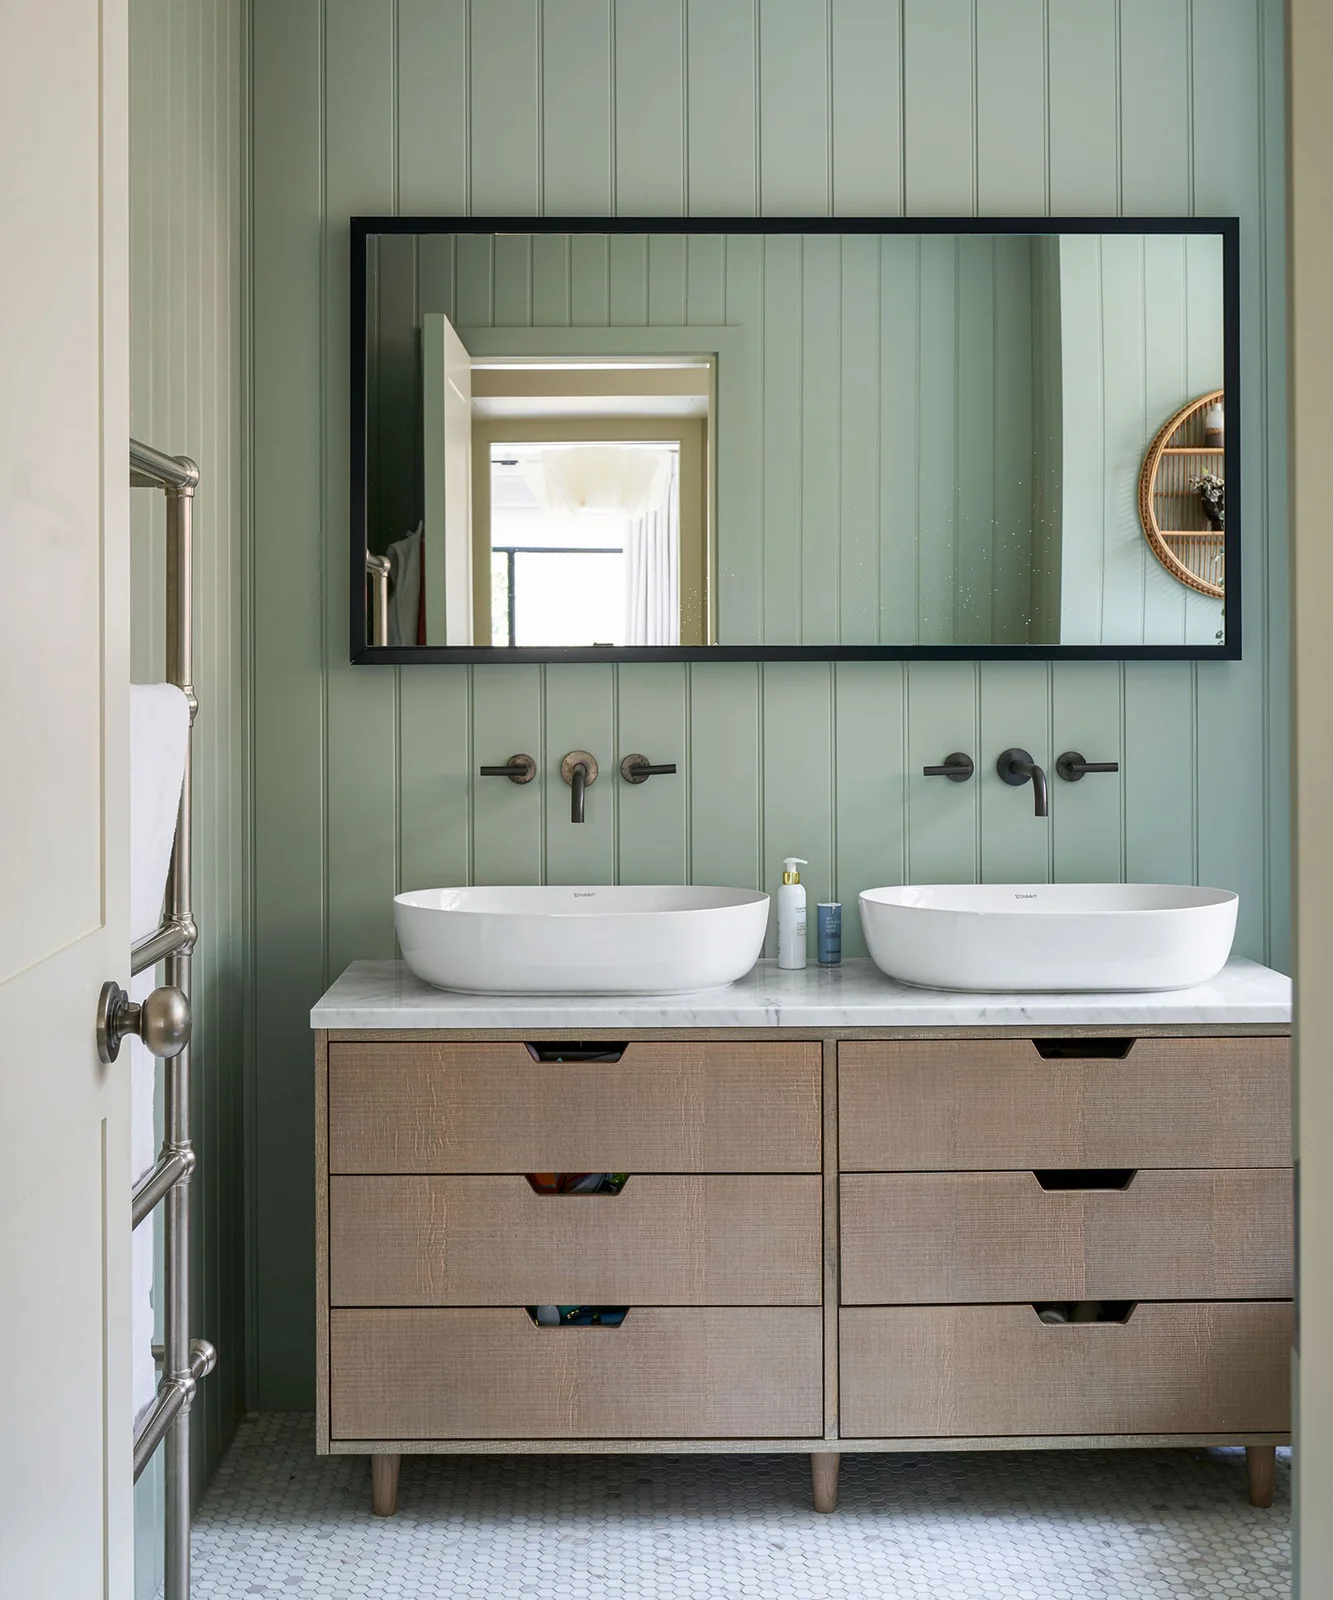
Give Two Basins Useful Drawers Below
 SaveSupport Non AI Creator
Image credit: James Merrell / Future
The paired oval basins introduce matching curved shapes above the straighter drawer fronts. A broad black-framed mirror connects the two washing positions without dividing the upper wall. Pale green paneling adds a repeating vertical detail, while the wood vanity keeps the larger furniture color warmer than the surrounding wall.
Give each user a convenient drawer area and confirm the usable depth around the plumbing. Earthy bathroom ideas compare other restrained greens and warmer furniture tones. Check the panel finish near splashes and plan access to tap controls before deciding how much countertop space can hold shared supplies without crowding either basin.
PART 02
Compare stronger finishes around modern shapes
IDEA 06 / 20
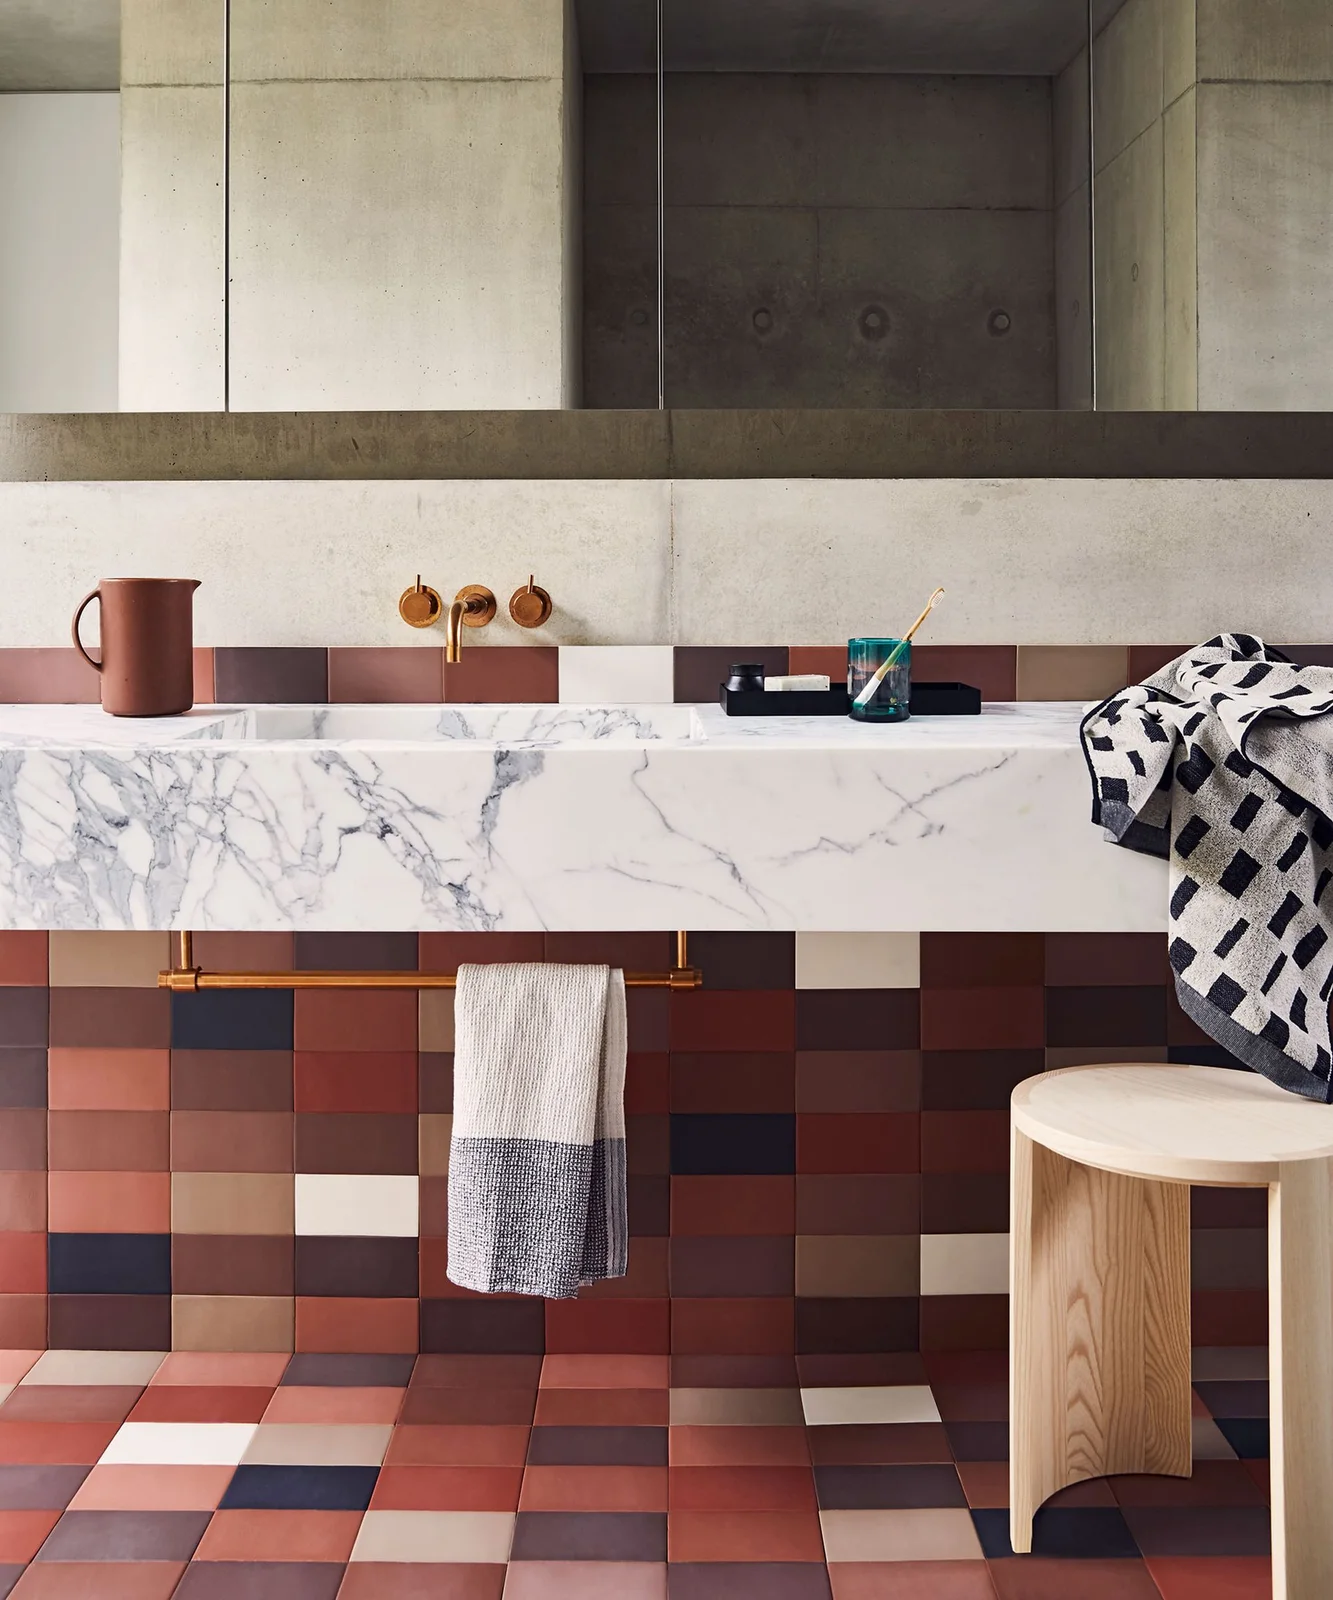
Keep a Patterned Tile Area Around a Plain Counter
 SaveSupport Non AI Creator
Image credit: Simon Bevan / Future
The counter forms one larger pale horizontal surface above the smaller blocks of tile color. Warm red, pale and darker tile sections provide most of the room’s pattern, while the larger mirror leaves the upper area comparatively simple. A wood stool adds a separate useful shape beside the straight counter edge.
Choose the tile colors as a complete group before adding patterned towels or another strong finish. Keep the stool only if it supports a real routine without narrowing access to the counter. Check the tile’s floor suitability and care guidance separately from its appearance, and leave useful room around the basin for hands, soap and straightforward wiping.
IDEA 07 / 20
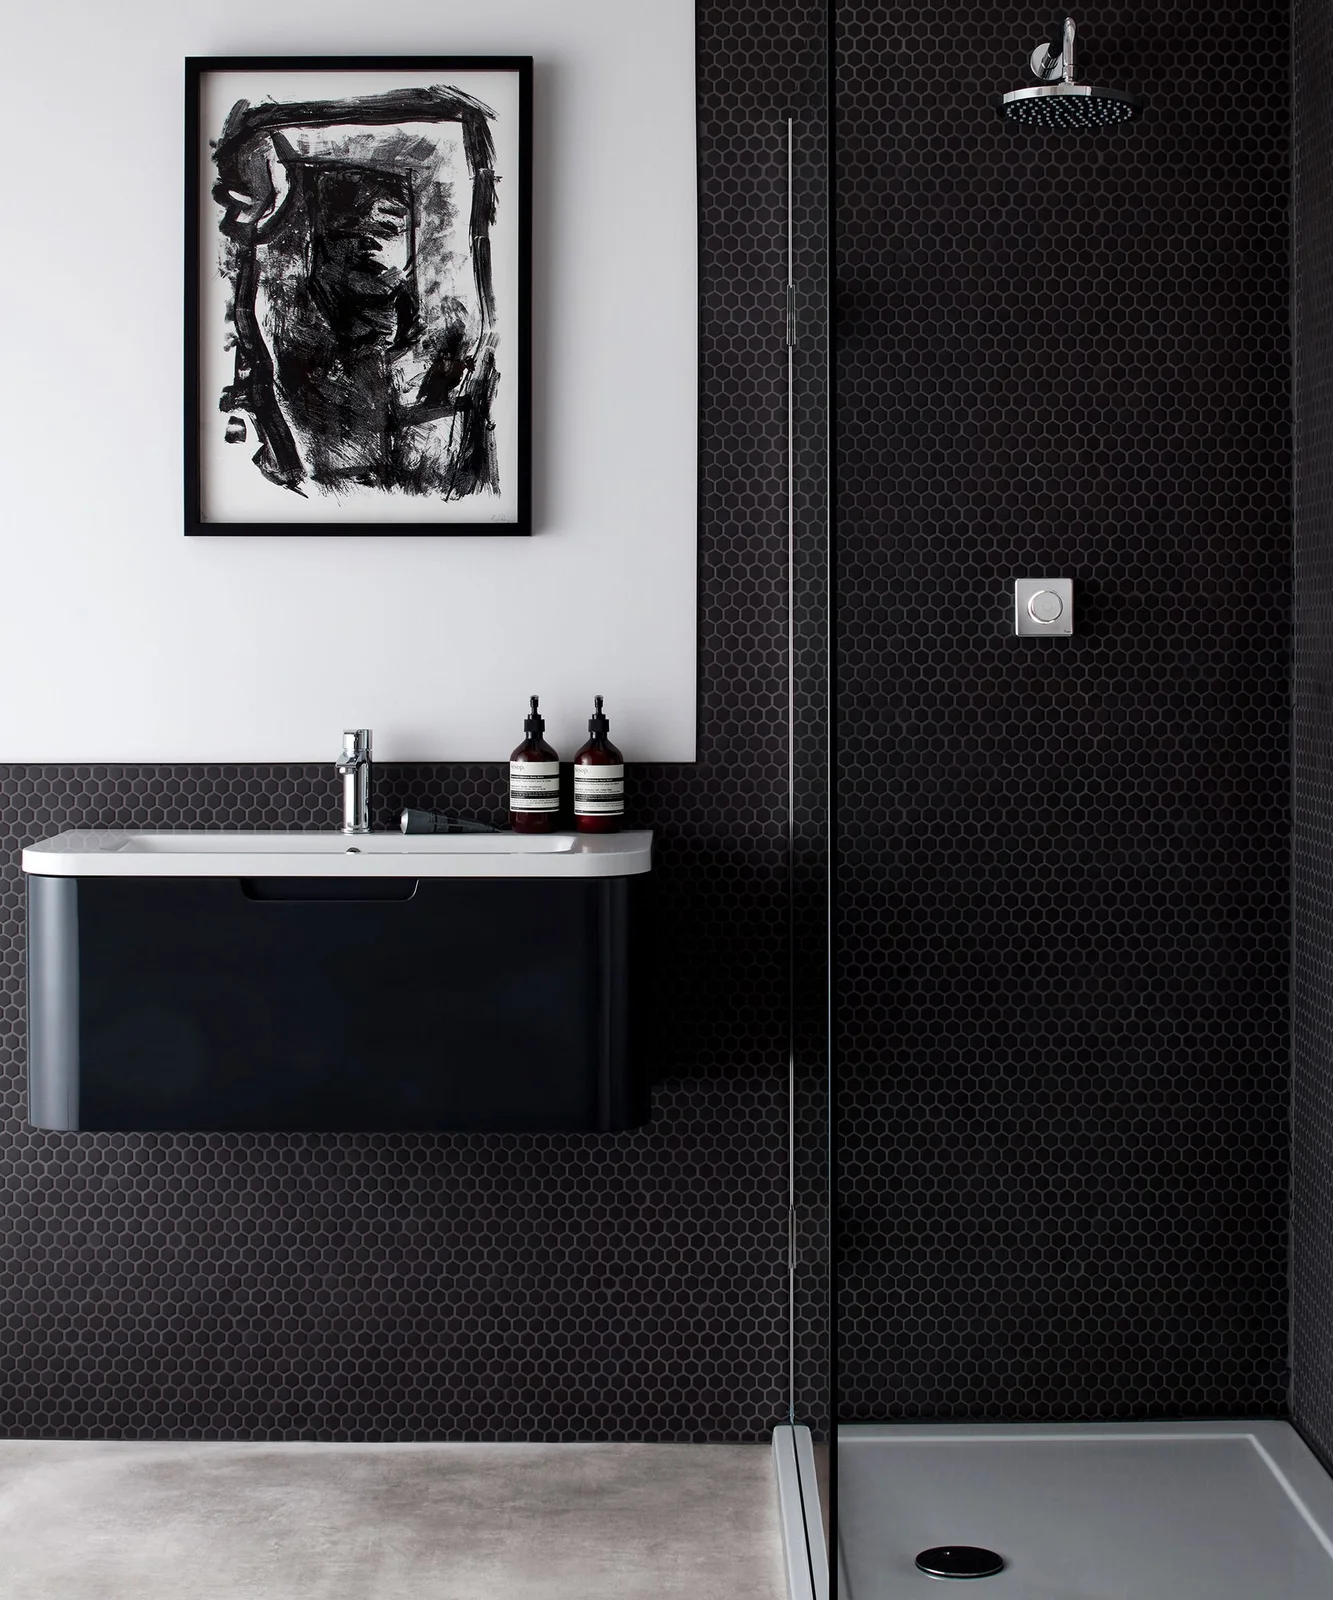
Define a Compact Shower with Dark Tile
 SaveSupport Non AI Creator
Image credit: Rob Smalley / Future
The dark tile connects the shower wall with the smaller backsplash beside the vanity. A white wall and large abstract picture create a distinct lighter section above the basin, while the wall-mounted cabinet leaves the lower floor visible. The room uses a clear dark-and-light contrast without requiring several separate accent colors.
Check lighting at both the shower and basin before using darker finishes across a small room. Keep artwork appropriate to its actual exposure to moisture and splashes. Plan shower drainage and screen details with the installation, and confirm how the small tile joints will be cleaned instead of choosing the pattern solely because it creates a strong photographic contrast.
IDEA 08 / 20
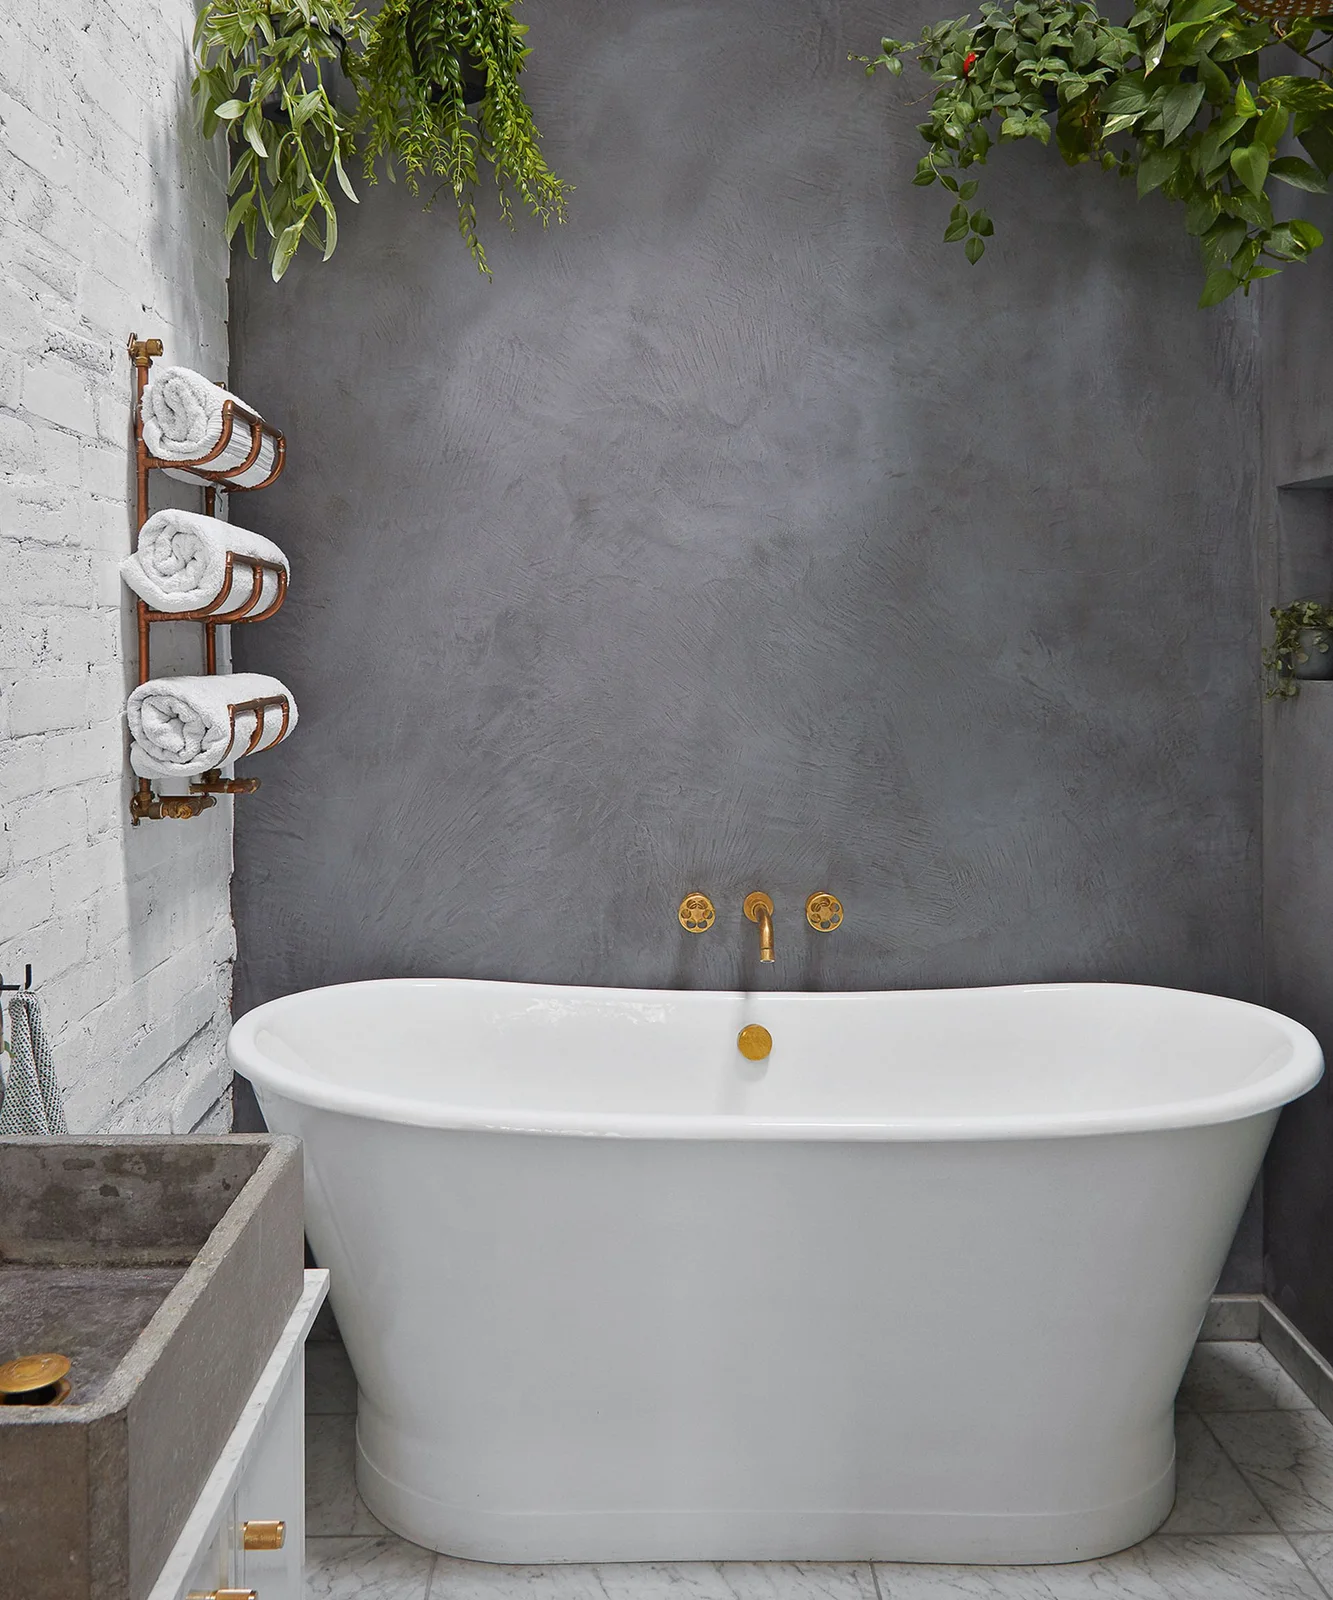
Soften Gray Walls with One Curved Bath
 SaveSupport Non AI Creator
Image credit: Anna Stathaki / Future
The white bath gives the textured gray wall a clear curved outline. Warm-toned taps provide smaller details above it, while the towel rack keeps rolled towels in one repeated group at the side. Hanging plants introduce green at the upper edges, leaving the center of the wall comparatively open around the bath.
Check the bath’s internal comfort and access for cleaning before choosing it for its outer shape. Keep towels where they can dry between uses rather than packing damp ones into a decorative stack. Select plants around the actual light and care conditions, and have any overhead containers securely fitted without assuming the photographed wall coating or plant placement suits every bathroom.
IDEA 09 / 20
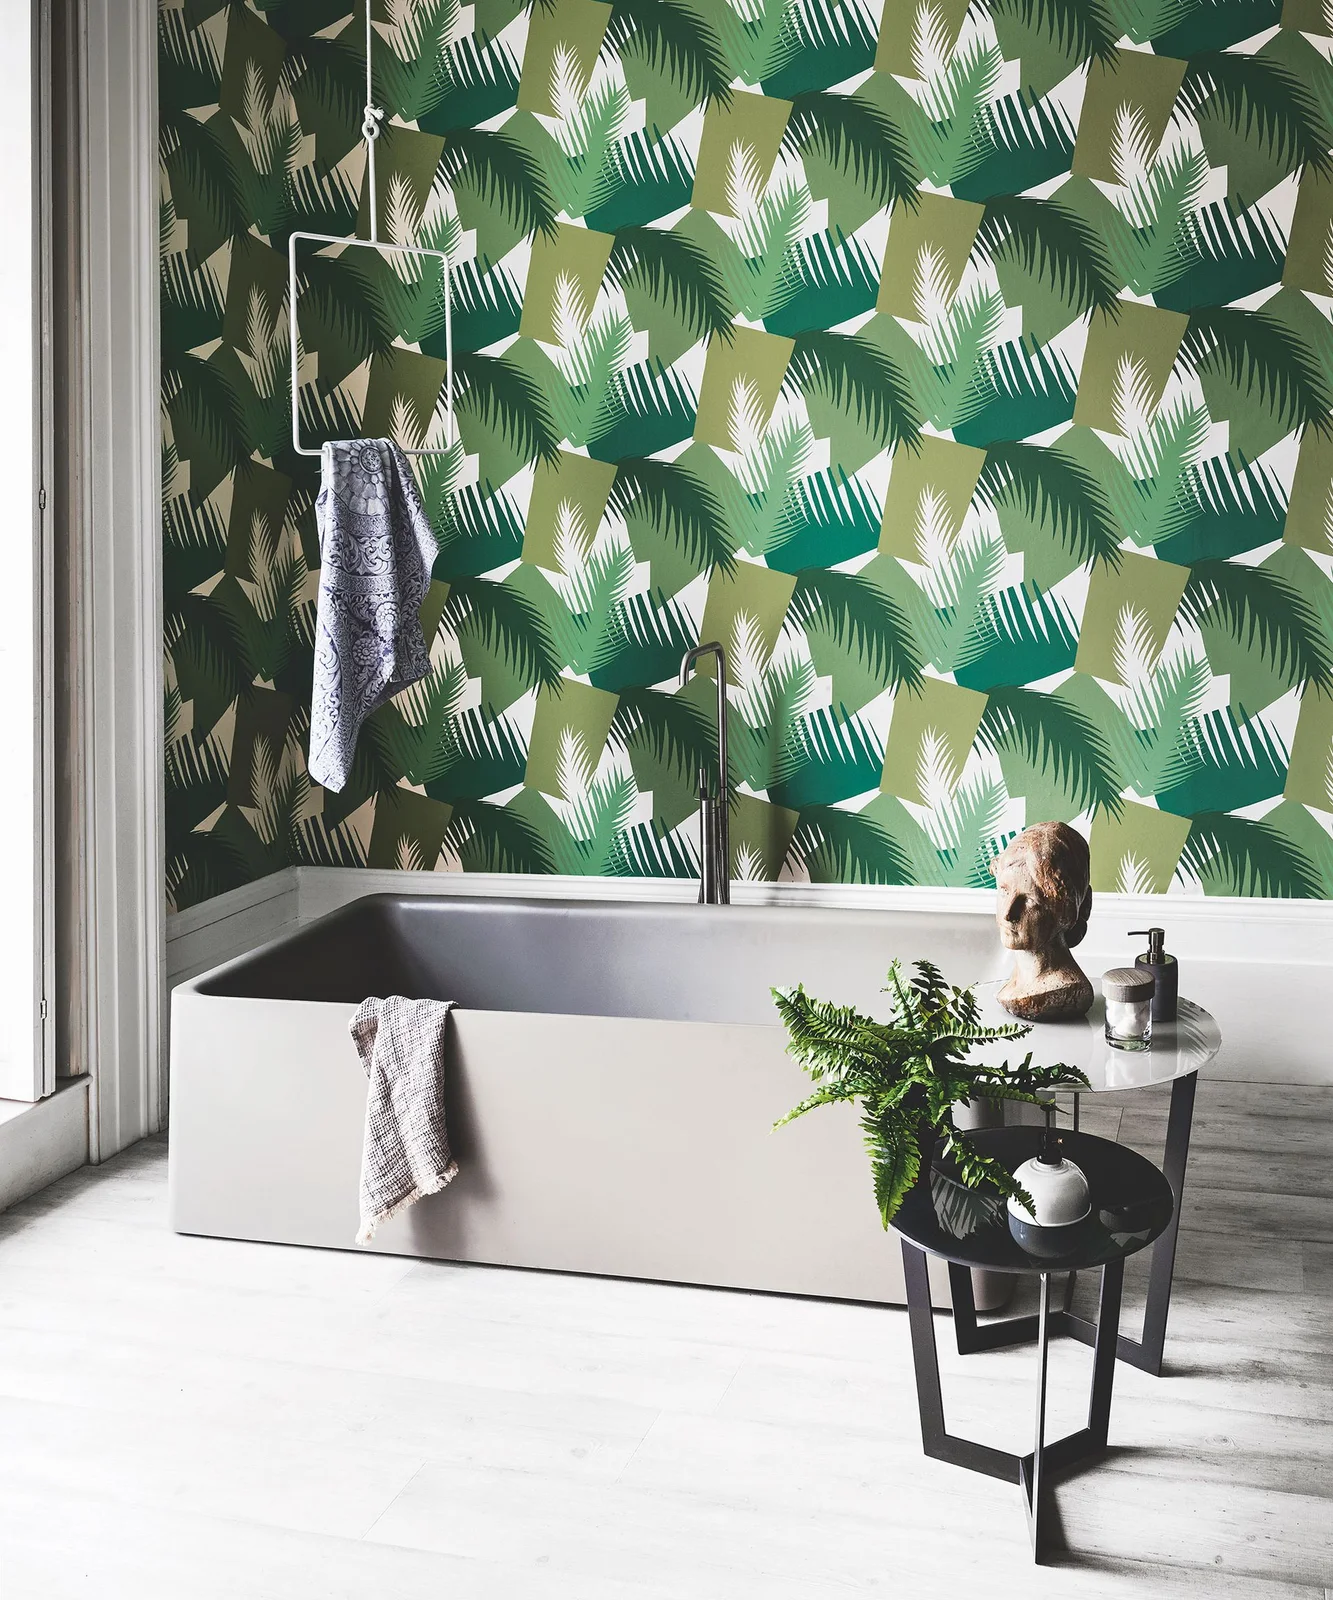
Make One Botanical Wall the Main Pattern
 SaveSupport Non AI Creator
Image credit: Paul Raeside / Future
The green leaf pattern gives the wall most of the room’s decorative energy. A plain rectangular bath provides a quieter lower shape, while darker tables contain a smaller collection of objects beside it. The bath’s straight edges leave the larger wall pattern visible, showing how a modern fixture can sit within a more expressive room.
Limit neighboring patterns when one wall already carries this much color and detail. Check whether the chosen wall covering is suitable for its actual moisture and splash exposure before applying it near a bath. Keep movable tables out of the entry route and leave enough room to clean around the fixture, using a simpler display if the surfaces become crowded.
IDEA 10 / 20
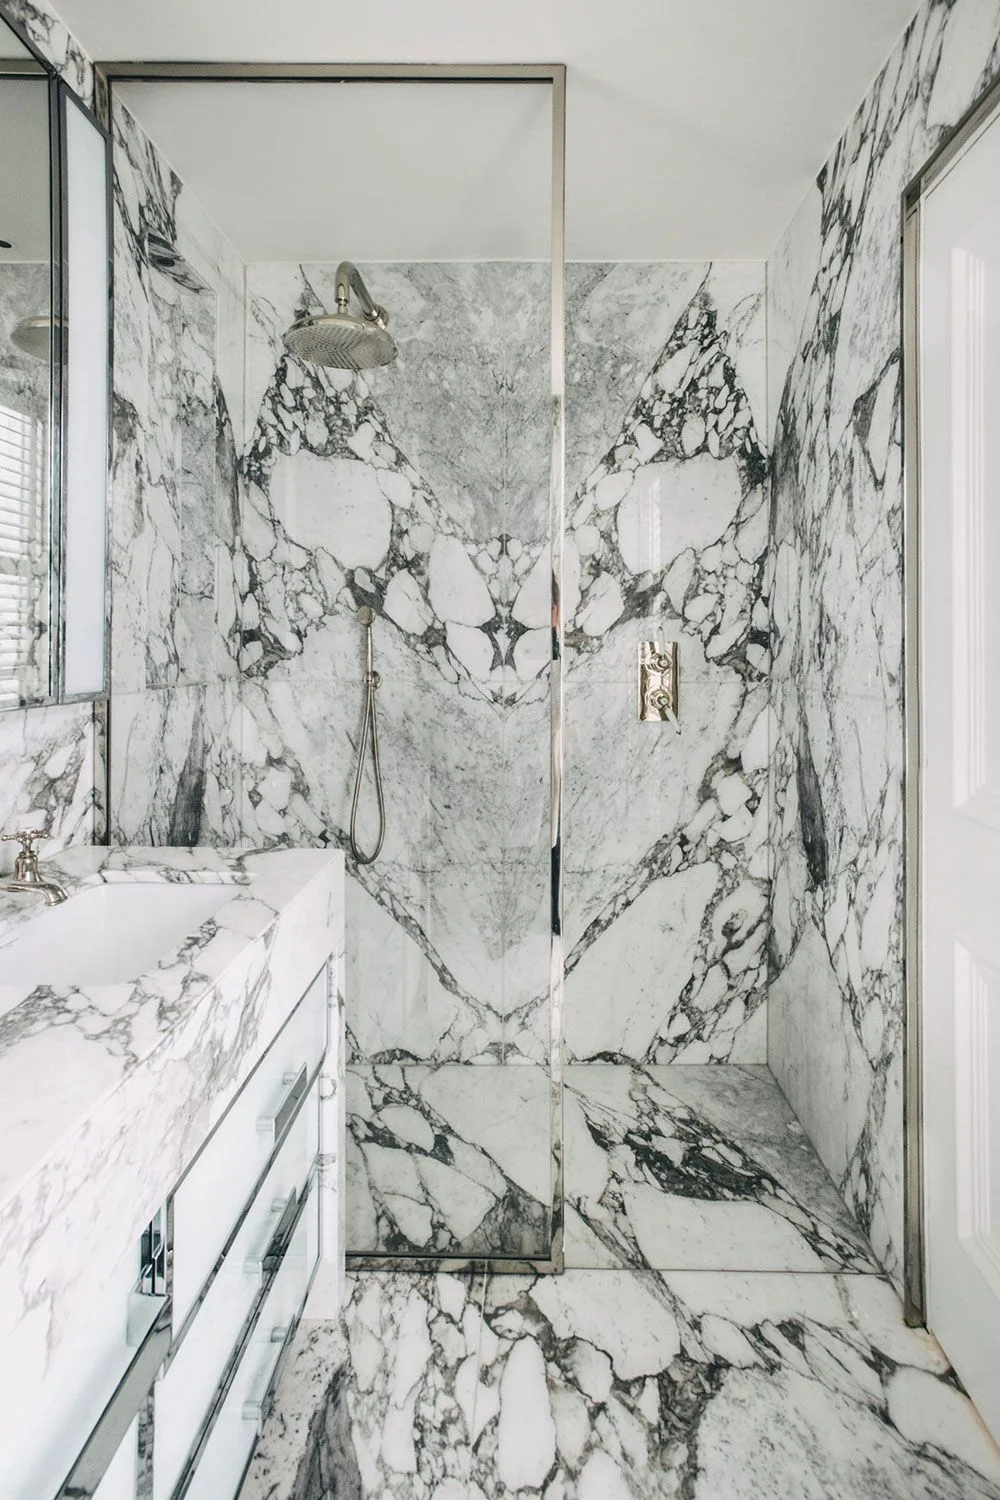
Keep a Clear Screen Around Strong Veining
 SaveSupport Non AI Creator
Image credit: Genevieve Lutkin
The clear enclosure leaves the stronger veining visible across the shower walls instead of introducing an opaque screen. A paler vanity counter repeats the broader light background, while the fittings provide smaller warm accents. The straight enclosure edges give the busy surface pattern a separate geometric boundary within the room.
Compare the veining across adjoining surfaces before choosing the final layout, leaving other details simpler where possible. Modern bathroom tile ideas offer more ways to assess patterns around a clear shower. Confirm floor suitability, drainage and waterproofing for the actual installation, and plan how the glass and joints will be cleaned without assuming a glossy photographed finish is appropriate underfoot.
PART 03
Plan baths, showers and separate washing areas
IDEA 11 / 20
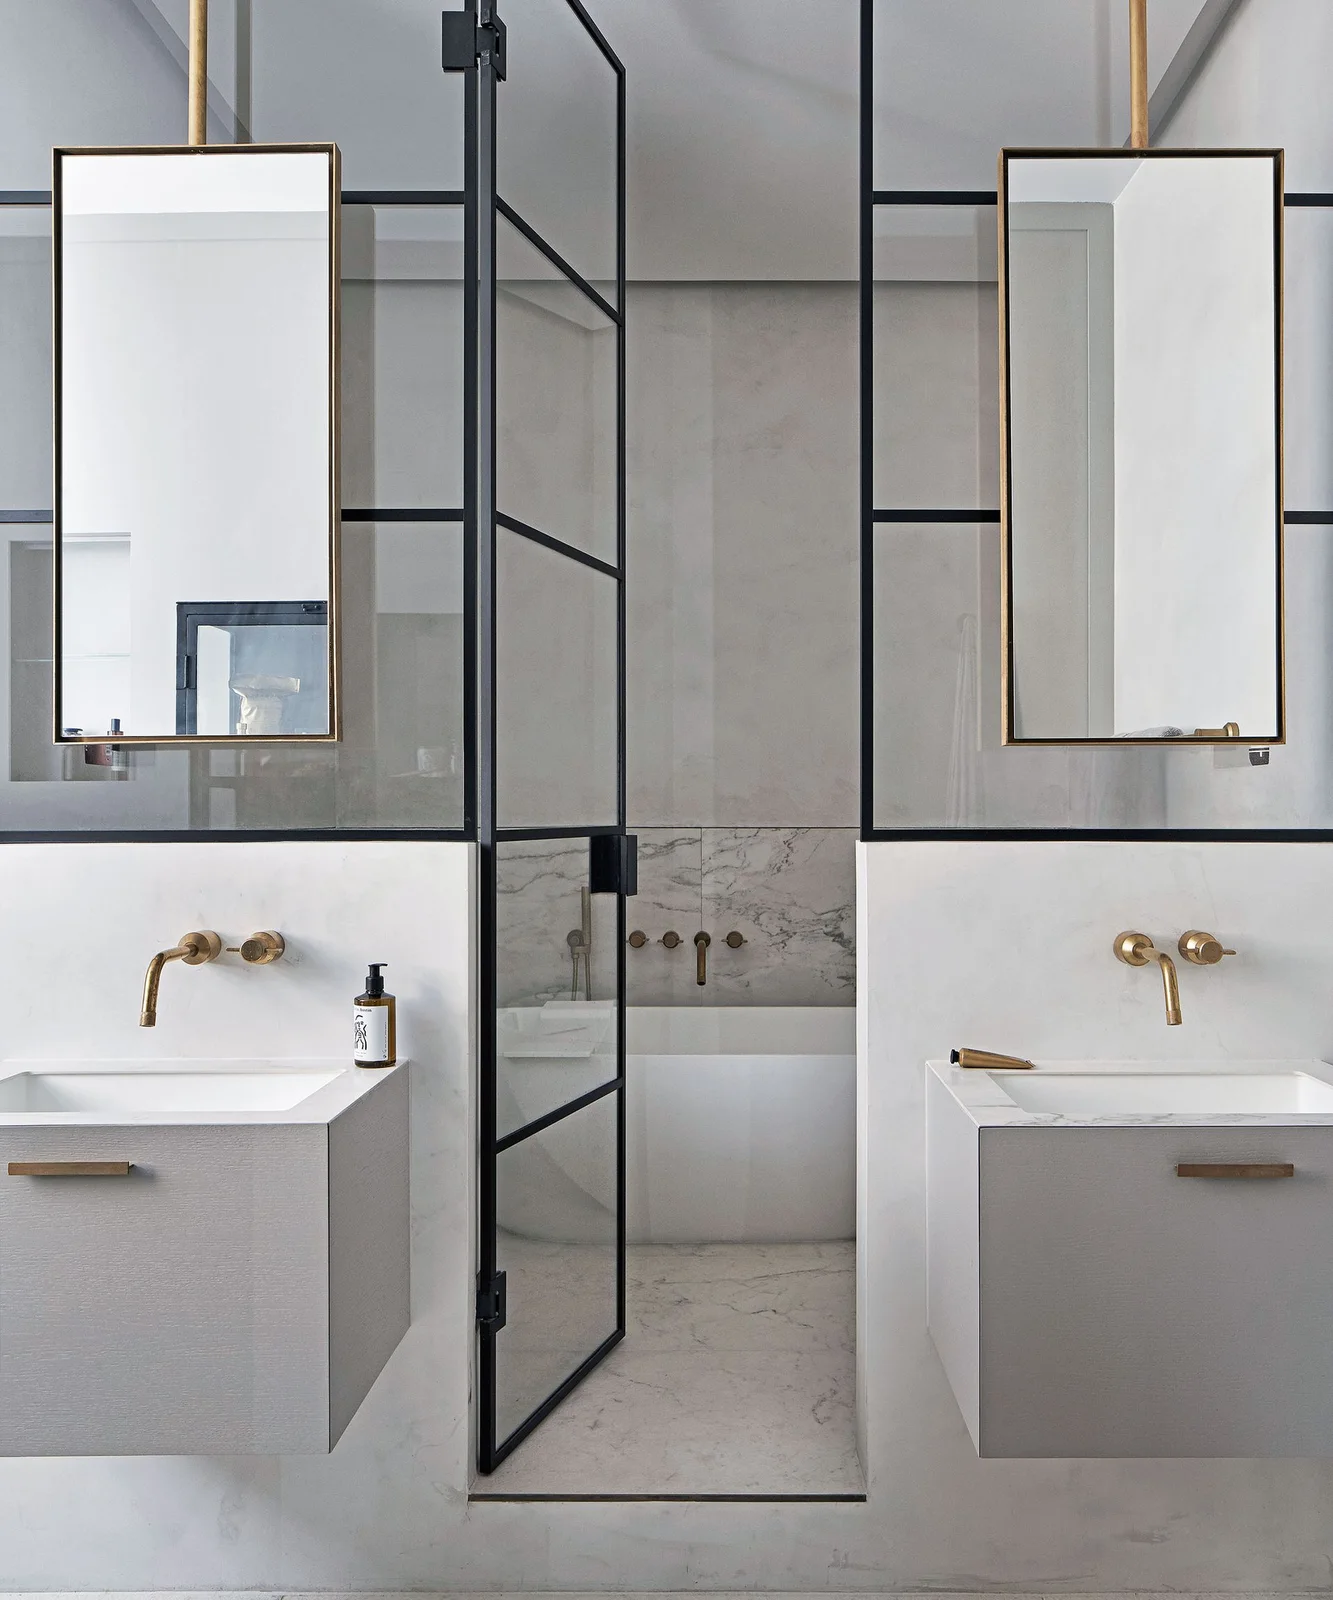
Use Dark Frames to Organize Separate Wash Areas
 SaveSupport Non AI Creator
Image credit: Davide Lovatti / Future
The dark glazing frames divide the room’s larger view into clear rectangles. Separate floating vanities give each wash area its own position, while the tall hanging mirrors add narrower vertical shapes above. Pale walls and counters keep those darker outlines visible, with warm-toned taps introducing a limited smaller accent.
Check how door movement and hanging mirror supports fit the actual room before selecting similar pieces. Plan lighting at each basin rather than relying on the brighter area beyond the doors. Confirm glazing suitability, privacy and maintenance access, preserving a comfortable route through the room with cabinet drawers open and the washing positions occupied.
IDEA 12 / 20
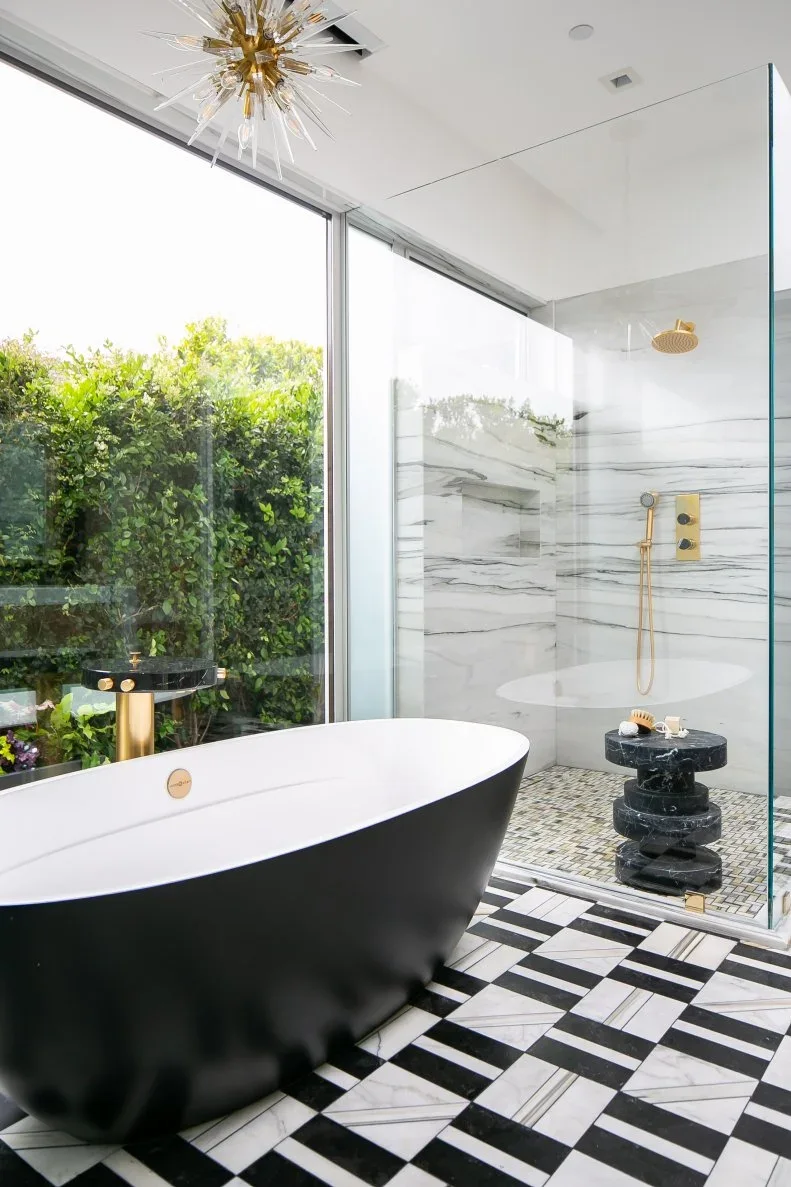
Balance a Dark Bath with a Clear Shower Wall
 SaveSupport Non AI Creator
Image credit: Photo: Ryan Garvin. From: Erica Bryen Design
The dark outer bath creates a clear larger shape against the lighter shower wall. A clear screen keeps the shower’s veining visible, while the black-and-white floor introduces another stronger pattern below. Warm-toned fittings connect smaller details across the bath and shower, with broad glazing giving the room a separate bright boundary.
Compare the floor pattern with the shower veining before deciding whether both belong in your space. Keep bath access and glass cleaning manageable, including the gap beside the enclosure. Assess privacy at the actual glazing and specify suitable lighting, drainage and floor finishes independently; the photograph does not establish material composition or how safely the layout operates when wet.
IDEA 13 / 20
Keep a Shower Niche Within a Warm Tile Palette
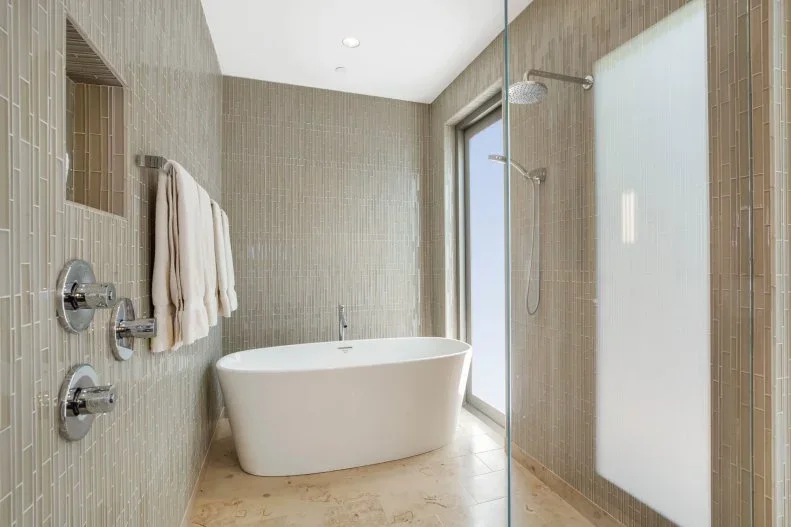 SaveSupport Non AI Creator
Image credit: Photo: Village Properties, a member of Luxury Portfolio International. From: Village Properties and Luxury Portfolio International®
The narrow tiles connect the bath and shower with one warmer wall palette. A recessed shelf holds supplies within the wall plane, while the clear shower panel leaves the tile detail visible beyond it. The white bath provides a simpler curved fixture shape, with towels kept along a separate section of the wall.
Plan niche height around the people and bottles that will use it, with waterproofing specified as part of the wall installation. Compare grout-care requirements before choosing many narrow tiles. Check access between the bath and shower and keep towels where they can dry, preserving useful space instead of adding another storage unit to every remaining corner.
IDEA 14 / 20
Pair an Angular Bath with a Floating Vanity
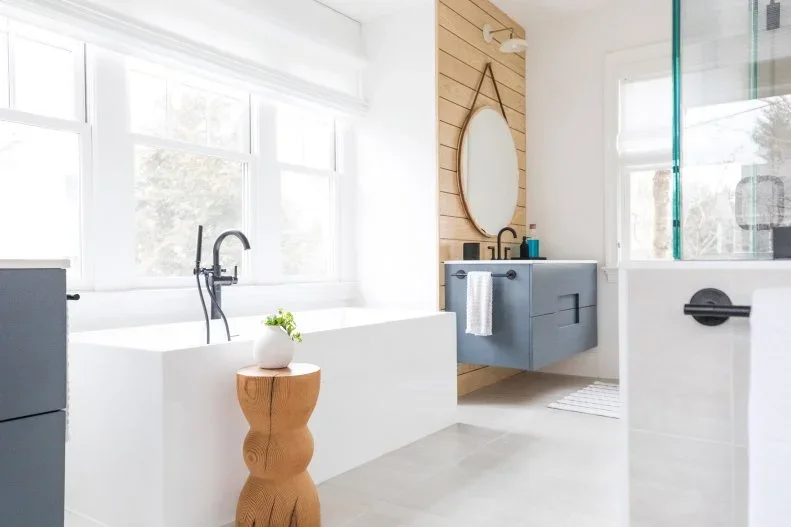 SaveSupport Non AI Creator
Image credit: Photo: Constance Mariena. From: Kerra Michele Huerta
The bath’s straighter outer edges create a different shape from the round mirror above the vanity. A floating gray cabinet provides a defined storage block against the warmer paneling. The small wood table adds another useful surface near the bath, while the pale walls and floor connect the larger background areas.
Check the bath’s internal shape for comfort rather than judging only its angular exterior. Keep the table stable and outside the route into the bath or shower. Confirm the paneled wall finish near splashes and plan usable vanity storage, leaving plumbing and fitting access available instead of letting the cleaner floating outline obscure maintenance needs.
IDEA 15 / 20
Connect Modern Fixtures with a Larger Wood Feature
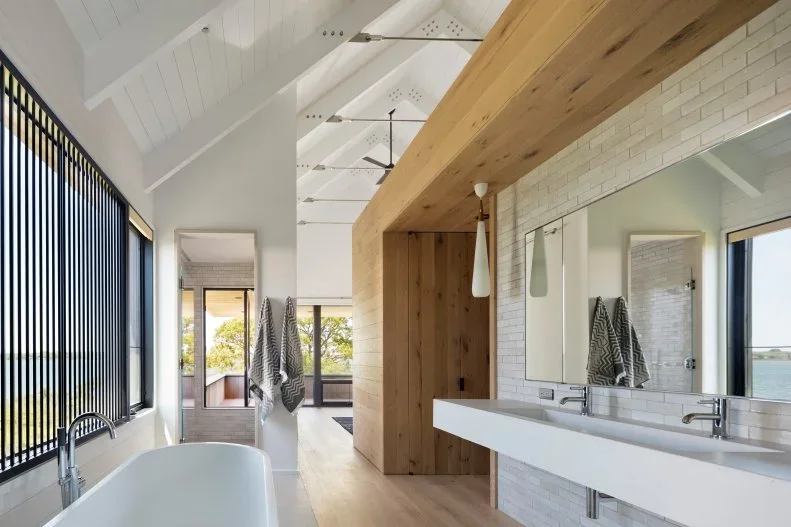 SaveSupport Non AI Creator
Image credit: Photo: Michael Moran. From: Robert Young Architects
The long white basin gives the wash area a clear horizontal shape beneath the broader wood feature. White brickwork adds a smaller repeating texture behind the mirror, while the vaulted ceiling and tall windows keep the larger architecture visible above. The pale bath forms a separate curved fixture beside the room’s straighter lines.
Keep the wash area’s fittings simple when the room already has substantial wood and ceiling detail. Check the wood finish and nearby lighting for the actual moisture conditions, and retain access for cleaning the long basin. Plan privacy and window operation before recreating the open view, making everyday use practical even when the room’s architecture provides the strongest visual interest.
PART 04
Make larger textures and storage work together
IDEA 16 / 20
Limit a Textured Wall to the Vanity Area
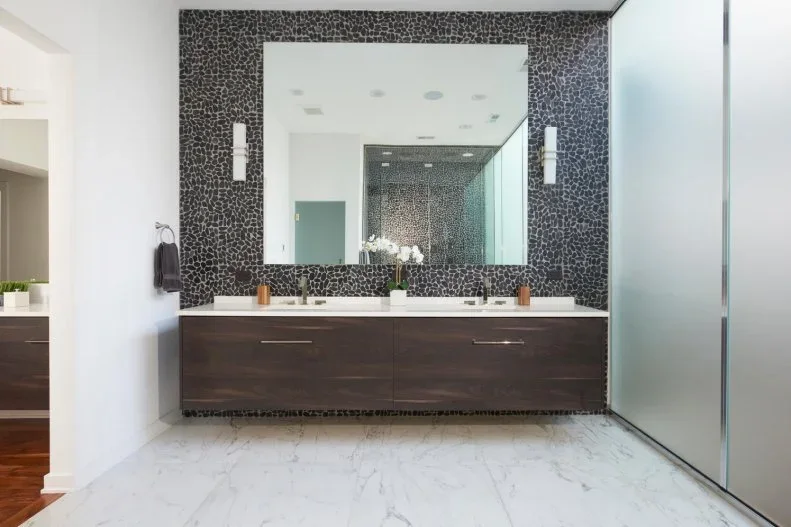 SaveSupport Non AI Creator
Image credit: Photo: @properties, a member of Luxury Portfolio International. From: @properties and Luxury Portfolio International®
The textured dark wall gives the vanity its own defined backdrop. A broad mirror separates a lighter central rectangle from that smaller surface pattern, while the floating cabinet repeats a deeper furniture tone below. Pale flooring and frosted glass keep the neighboring areas comparatively quiet around the stronger wash-area feature.
Identify the wall material and its cleaning needs before choosing a textured surface behind basins. Check drawer access and useful storage around the plumbing for both washing positions. Plan privacy at the glazing and enough light at the mirror, keeping the adjacent finishes restrained if the textured backdrop already provides the detail you want.
IDEA 17 / 20
Use Vertical Wood Lines Around a Plain Layout
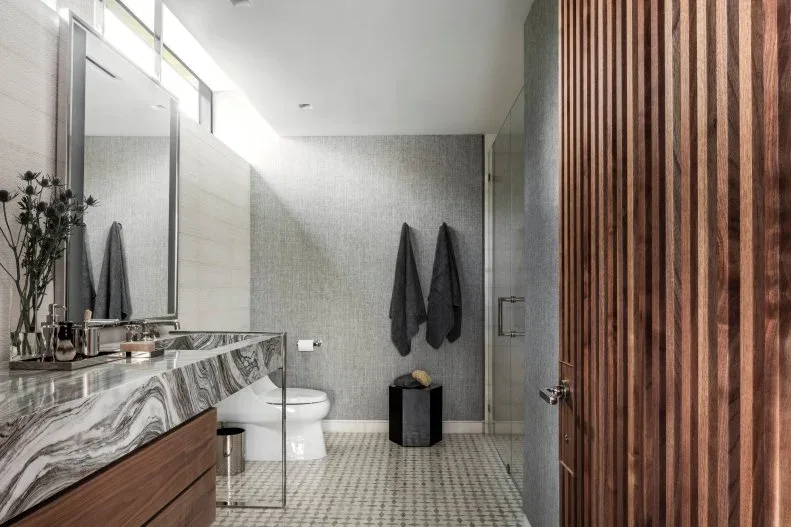 SaveSupport Non AI Creator
Image credit: Photo: Kris Tamburello. From: Deborah Wecselman
The vertical wood lines supply a warmer rhythm along one side of the room. The long counter and drawer fronts create a separate horizontal wash area, while the light gray walls give both features a quieter background. A white toilet and small floor tiles remain distinct without adding another larger furniture color.
Check the slatted finish’s suitability around moisture and how the spaces between pieces will be cleaned. Keep the countertop’s veining in the same comparison as the wood tone before adding another strong finish. Plan drawers for actual supplies and preserve a comfortable route through the room, including access to fittings and any concealed service points.
IDEA 18 / 20
Frame a Small Basin with Dark Tile and Wood
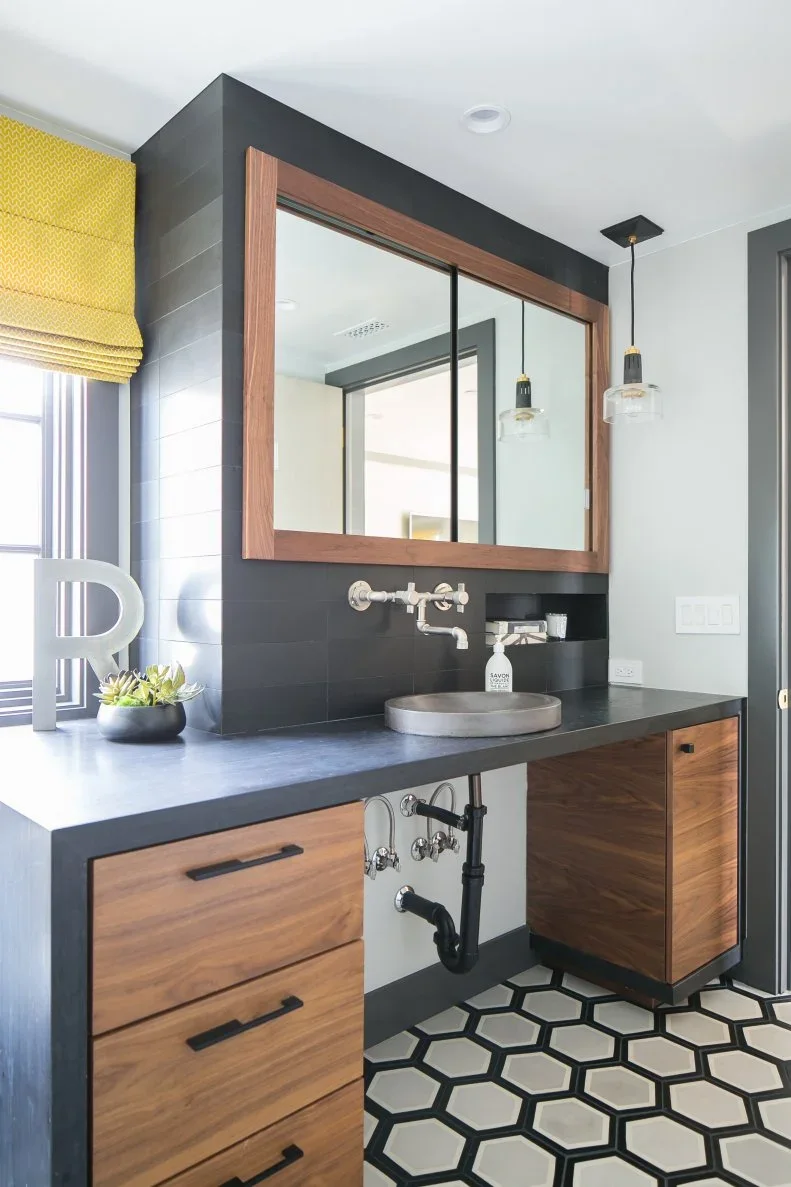 SaveSupport Non AI Creator
Image credit: Photo: Ryan Garvin. From: Erica Bryen Design
The dark wall and counter give the smaller round basin a clear light outline. Wood drawer units and the broad mirror frame repeat warmth around the washing position, while the yellow shade provides a separate stronger accent. The patterned floor introduces another detail below, leaving the cabinet fronts comparatively plain.
Check that the basin and tap align for comfortable washing before using the central gap as a visual feature. Choose drawer sizes around daily supplies and keep servicing access to exposed plumbing convenient. Compare the yellow shade with the floor pattern in daylight and evening light, limiting extra countertop objects so the smaller basin does not feel crowded.
IDEA 19 / 20
Keep Drawer Fronts Plain Below a Patterned Wall
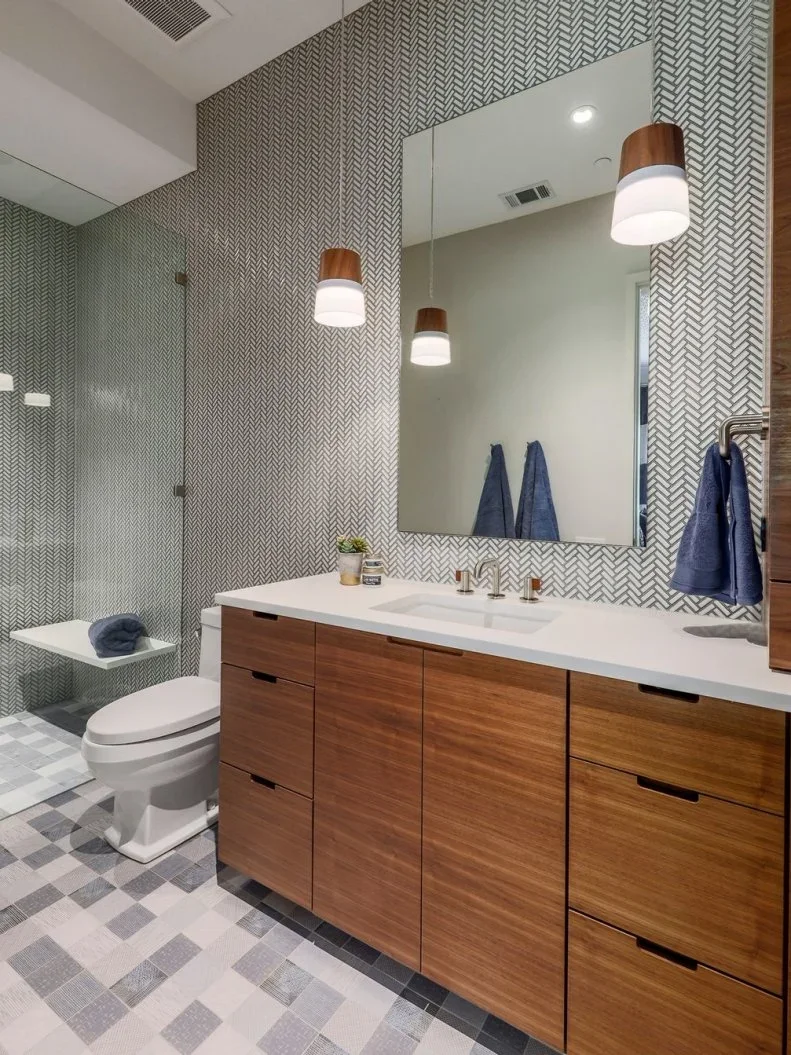 SaveSupport Non AI Creator
Image credit: Photo: Butter Lutz Interiors. From: Butter Lutz Interiors
The herringbone wall introduces a repeating pattern behind the mirror and vanity. Plain wood drawer fronts keep the larger furniture block calmer below it, while small pendant lights provide separate compact shapes above. A clear screen leaves the shower’s wall pattern visible, with the white toilet forming a distinct lighter fixture at the side.
Compare the wall pattern and floor tile together before adding another busy surface. Bathroom floor tile ideas can help assess simpler alternatives beneath a patterned wall. Check grout care and drawer access near the toilet, and have the lighting specified for its actual location rather than assuming a decorative pendant is suitable wherever it appears in a photograph.
IDEA 20 / 20
Use Horizontal Tile Bands Around a Long Vanity
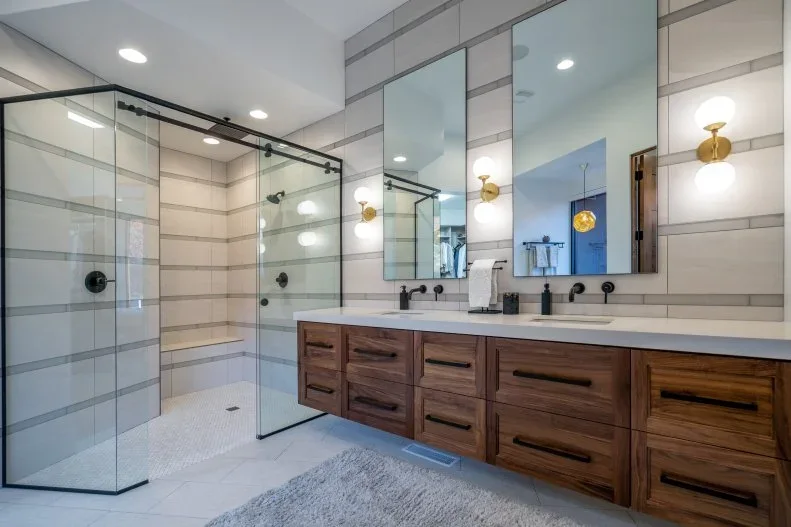 SaveSupport Non AI Creator
Image credit: Photo: Windermere Real Estate, a member of Luxury Portfolio International. From: Windermere Real Estate and Luxury Portfolio International®
The horizontal tile bands connect the shower and vanity walls with a repeated line. Wood drawer fronts give the long wash area a warmer lower block, while separate mirrors divide the upper section into two useful positions. Dark screen frames and taps add smaller contrasts against the mostly pale wall surfaces.
Check how the tile bands meet corners, mirrors and the shower opening before committing to their spacing. Keep the drawers useful for each regular user and plan basin reach independently of visual symmetry. Confirm the shower enclosure’s cleaning and servicing needs, leaving door movement and a comfortable walking route clear with the room in everyday use.
BRING IT ALL TOGETHER
Plan the daily routine before choosing finishes
Begin with comfortable reach at the basin, convenient shower entry and a clear route around the bath. List the supplies that need nearby storage and check usable drawer space around plumbing. Those choices provide a practical layout before you decide how much veining, tile pattern or stronger color the room should carry.
Then compare the larger finishes under the lighting you will use. Keep maintenance access and cleaning requirements part of every decision, including glass panels, textured walls and wood details. Confirm the actual installation needs separately from the photograph so the room remains useful and manageable after the initial decorating work is finished.