Mid-century-inspired bathrooms can combine warmer wood furniture, clean cabinet fronts, curved mirrors and geometric patterns. These photographs range from restrained pale rooms to stronger orange, green and plum arrangements. Each offers a different way to connect the vanity, lighting and surrounding finishes without losing space for the routines that make a bathroom useful.
Start with the layout, usable storage and existing plumbing before choosing the most expressive finish. Compare tile and cabinet samples under your own lighting, checking their suitability for moisture and daily cleaning. The photographs offer decorating examples; electrical installation, waterproofing and structural support need appropriate assessment for the actual bathroom rather than assumptions based on a finished room.
PART 01
Connect retro color with useful bathroom layouts
IDEA 01 / 20
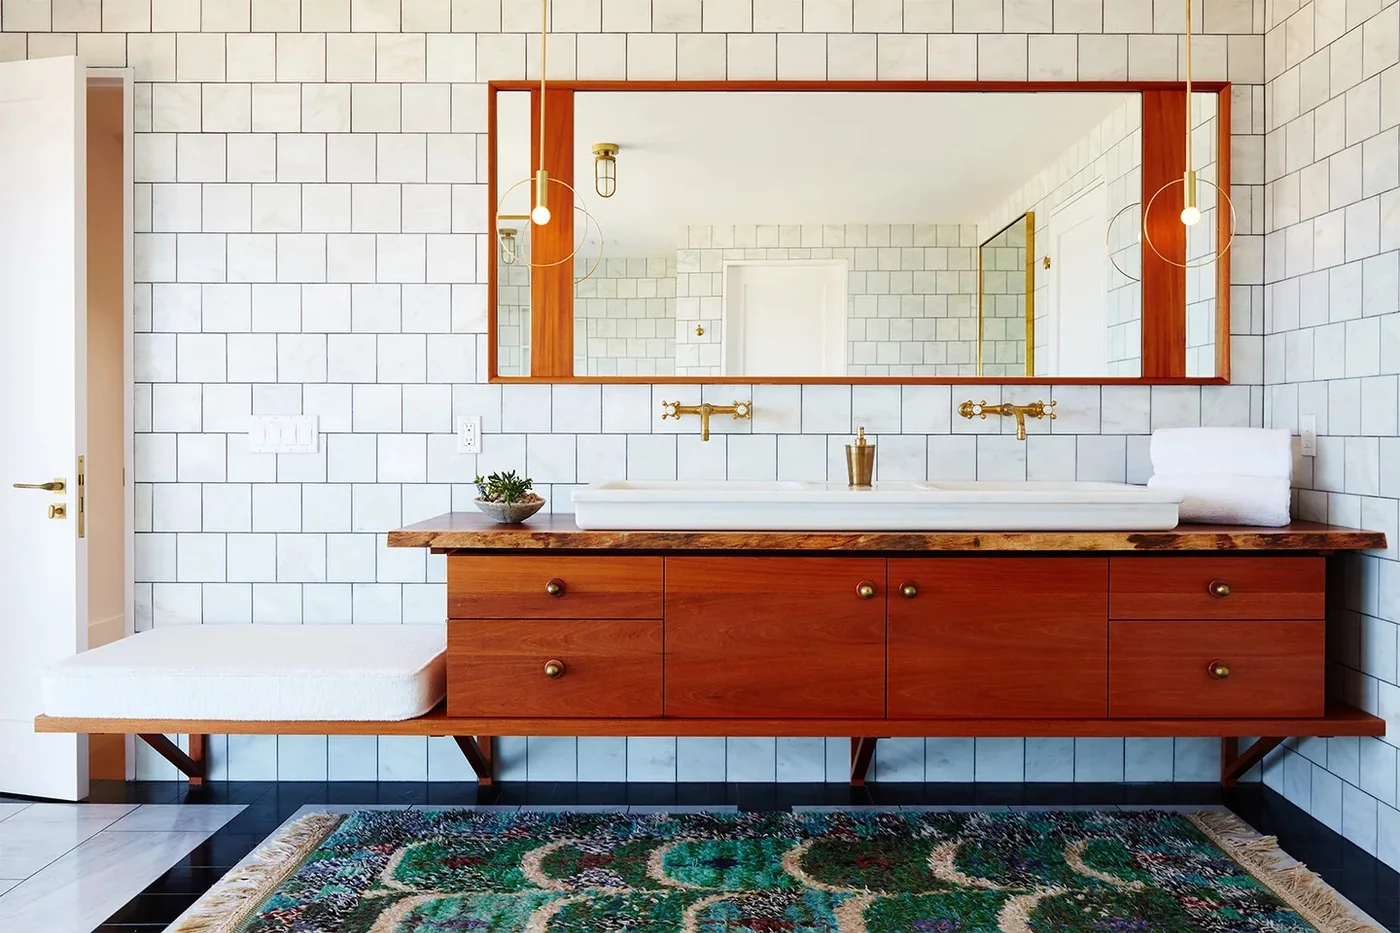
Combine a Low Wood Vanity with Round Pendants
 SaveSupport Non AI Creator
Image credit: PHOTO COURTESY OF STUDIO ROBERT MCKINLEY
The long white basin gives the wood vanity a clear horizontal outline beneath two round pendant lights. Wall-mounted taps keep the basin edge relatively open, while the wood-framed mirror repeats the warmer cabinet color above. The patterned rug introduces a smaller layer of color beside the white tiled walls and floor.
Measure usable counter space and drawer access before choosing a long basin, checking where everyday toiletries will sit. Pendant positions need appropriate bathroom electrical installation and comfortable mirror visibility. Choose a rug that suits damp conditions and stays stable underfoot; a bathroom’s warmer furniture details should work with cleaning and circulation rather than obstruct them.
IDEA 02 / 20
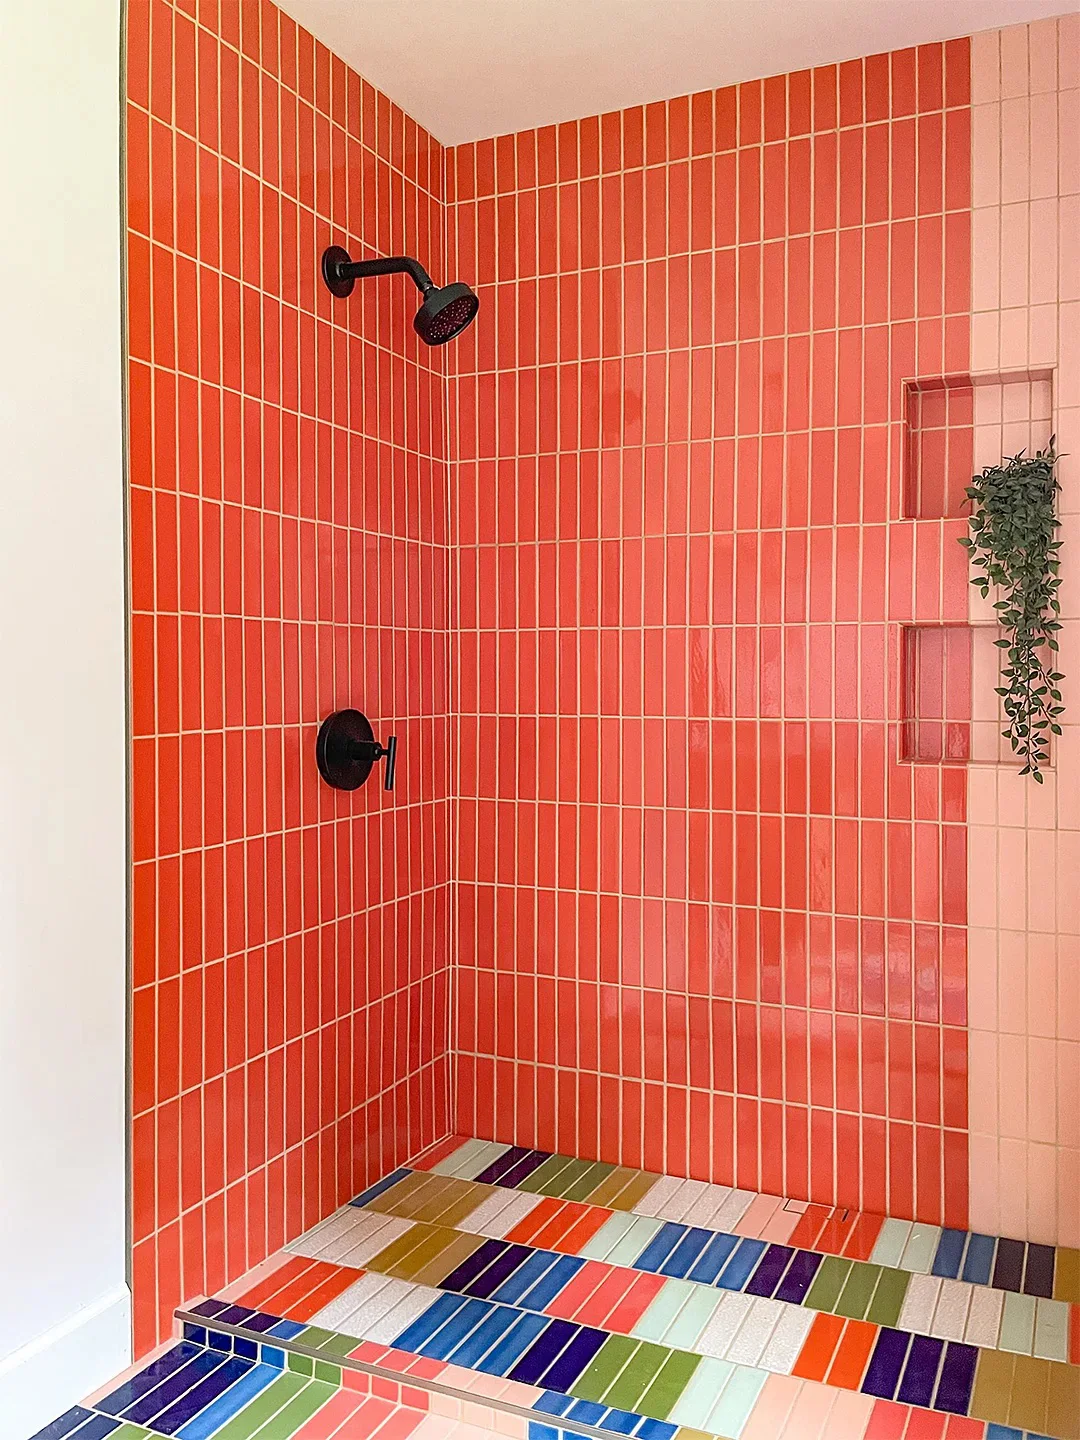
Use Coral Shower Tiles as a Solid Color Block
 SaveSupport Non AI Creator
Image credit: PHOTOGRAPHY BY RACHEAL JACKSON
Coral tiles create a strong continuous background behind the dark shower fittings. Recessed niches keep bottles within the tiled wall instead of adding a projecting shelf. Different colored rectangles introduce a second pattern on the floor, with the vertical wall lines providing a quieter repeat above that busier arrangement.
Compare the floor and wall samples together before selecting grout, checking the color relationship under your bathroom lighting. Choose floor tiles from verified suitability for wet use and cleaning requirements. Plan niches with the shower’s waterproofing rather than cutting into a finished wall, and position storage around the bottles you actually use.
IDEA 03 / 20
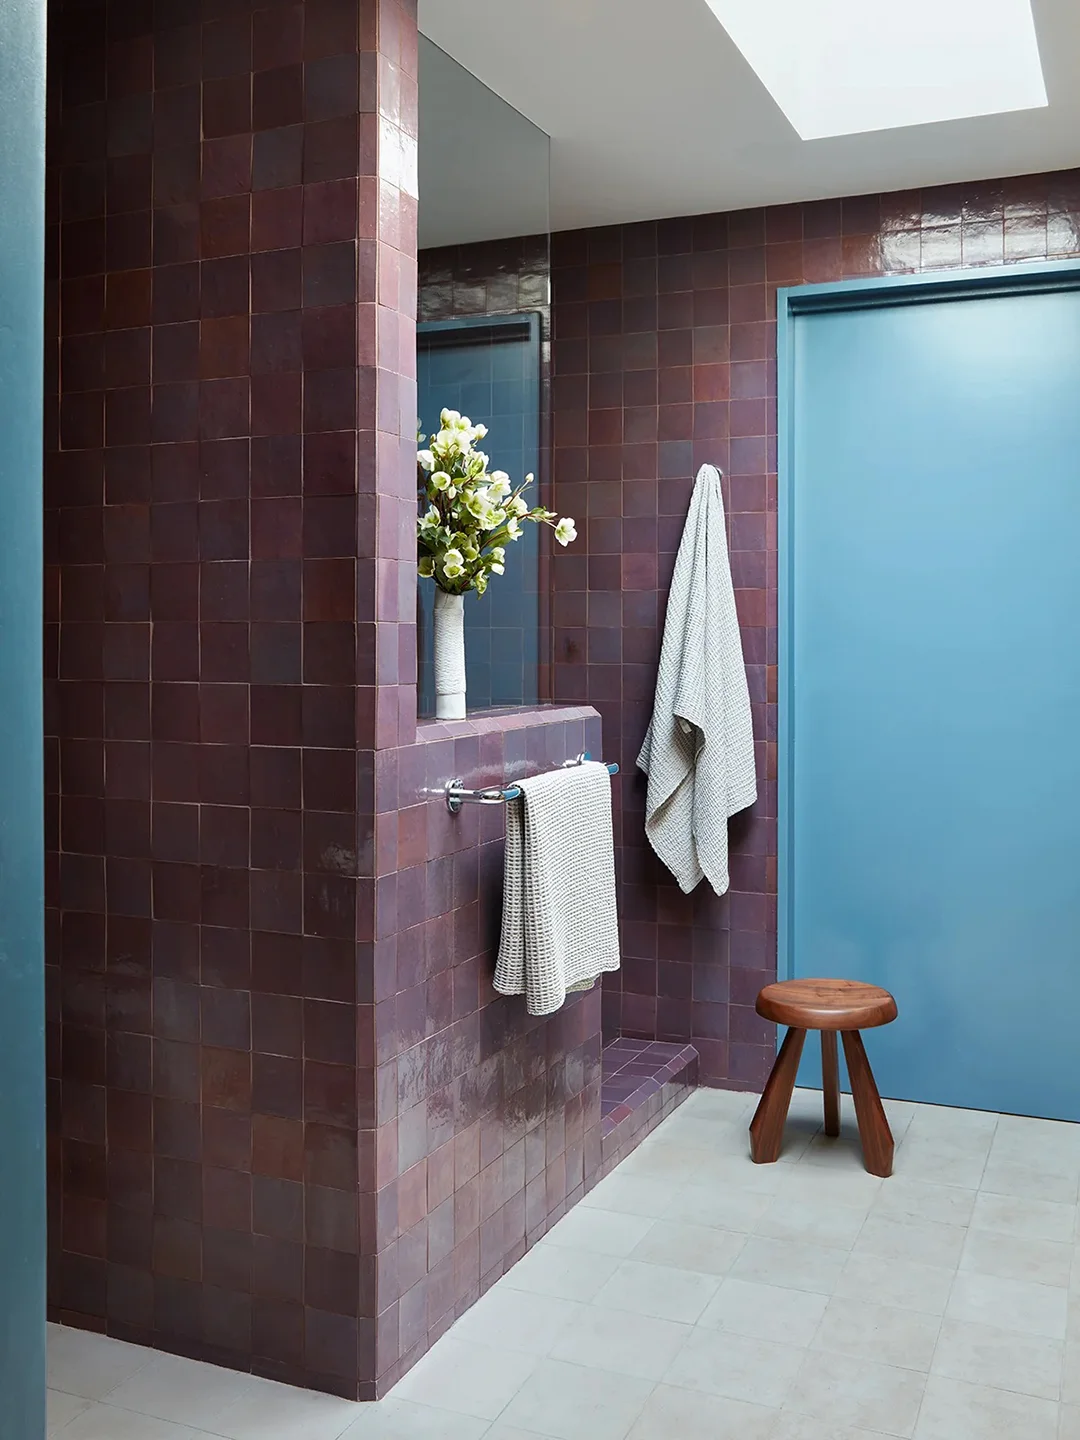
Give Deep Plum Tiles a Warm Wooden Accent
 SaveSupport Non AI Creator
Image credit: PHOTOGRAPHY BY STEPHEN KENT JOHNSON; STYLING BY MICHAEL REYNOLDS
Glossy plum square tiles establish a dark repeated grid beside the blue door. The high glazed opening brings a lighter section above the tiled walls, while the rounded wooden stool adds a warmer movable shape below. Pale floor tiles separate the stronger wall colors from the walking surface.
View a larger tile sample under evening lighting before covering several walls in a deep shade. Glossy finishes can make water marks more noticeable, so check care instructions and realistic cleaning needs. Choose any stool for stability and suitable bathroom use, keeping it away from door movement and the main route across the floor.
IDEA 04 / 20
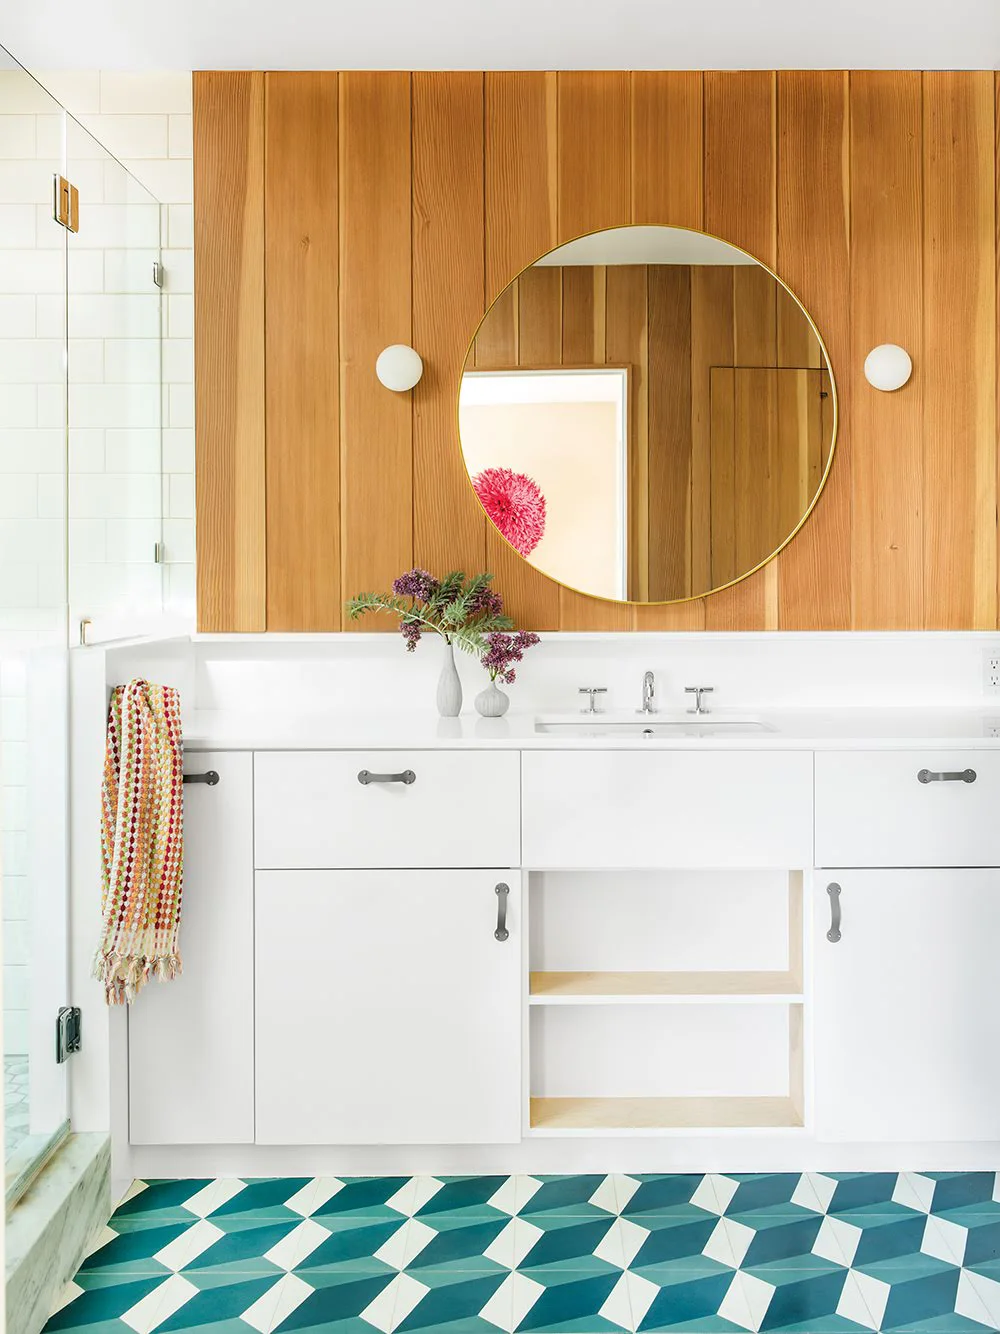
Balance Vertical Wood Panels with a Round Mirror
 SaveSupport Non AI Creator
Image credit: PHOTOGRAPHY BY LAURE JOLIET
Vertical wood panels introduce a warm striped background behind the large round mirror. Two white globe lights repeat its curves on either side, contrasting with the straighter cabinet fronts below. Teal and white geometric tiles add a separate angular pattern across the floor, while the neighboring shower has quieter pale walls.
Choose panel finishes from their verified suitability for the bathroom’s moisture exposure and maintain ventilation. Check mirror height with the people who will use it and have lights installed appropriately for their location. Bathroom floor tile ideas compare more patterns if you want a distinct repeat beneath a simpler vanity and mirror arrangement.
IDEA 05 / 20
Carry an Orange Geometric Pattern into the Shower
 SaveSupport Non AI Creator
Image credit: PHOTOGRAPHY BY SUZANNA SCOTT
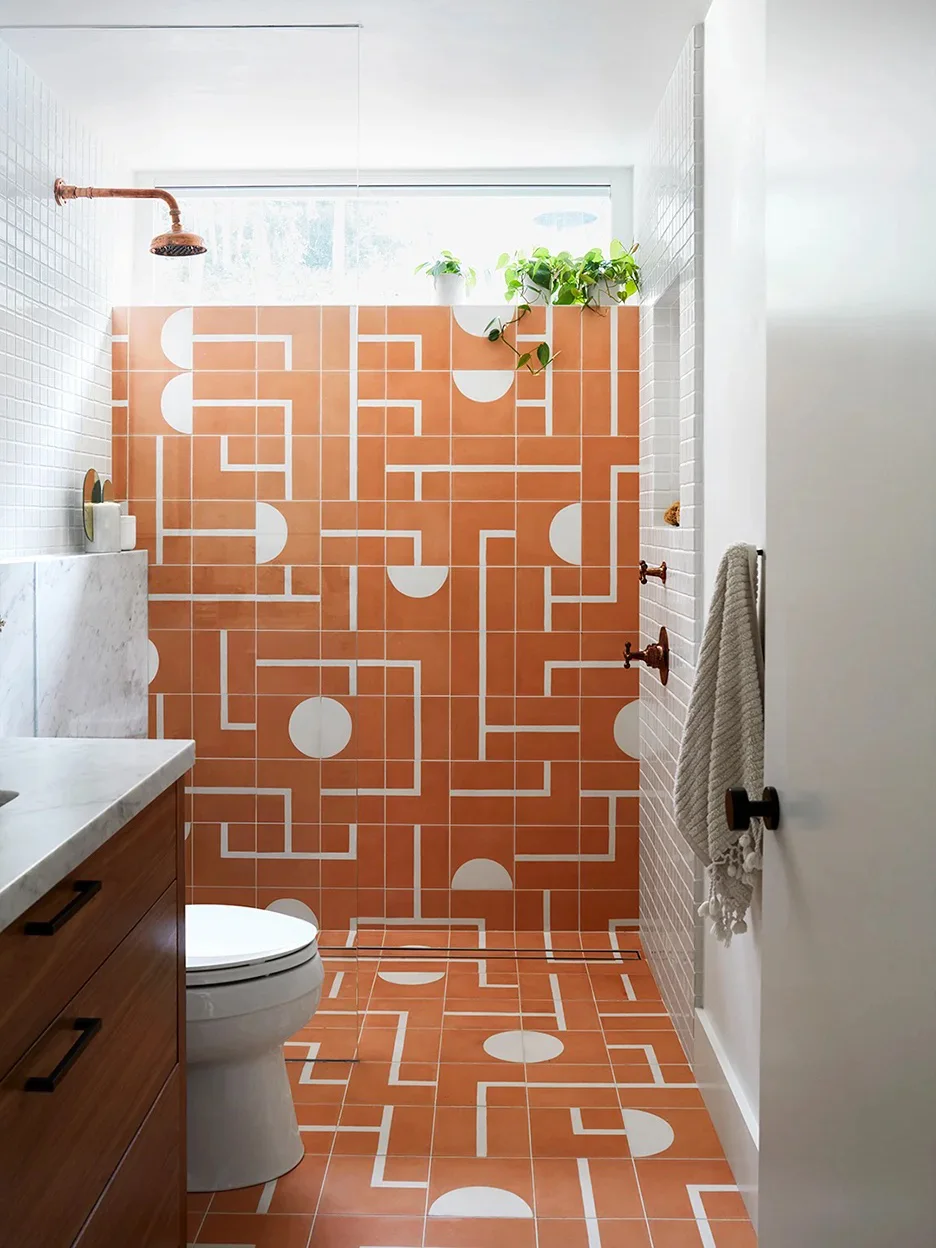
Orange shapes repeat across the shower wall and floor, making the enclosed section stand apart from the neighboring white grid tiles. The wood vanity continues the warmer palette at cabinet height. A high window introduces daylight above the stronger pattern, with a plant adding a separate irregular outline near the corner.
Use an appropriate floor-rated version of a pattern rather than assuming a wall tile can also serve underfoot. Compare grout samples with both the orange and pale sections before installation. Keep plants out of the shower’s main working space and plan waterproofing, drainage and cleaning access before extending decorative tile across several surfaces.
PART 02
Balance strong colors with quieter surrounding surfaces
IDEA 06 / 20
Pair an Orange Vanity with Pale Blue Tiles
 SaveSupport Non AI Creator
Image credit: PHOTOGRAPHY BY KELLY CHRISTINE SUTTON; STYLING BY KAITLYN COFFEE
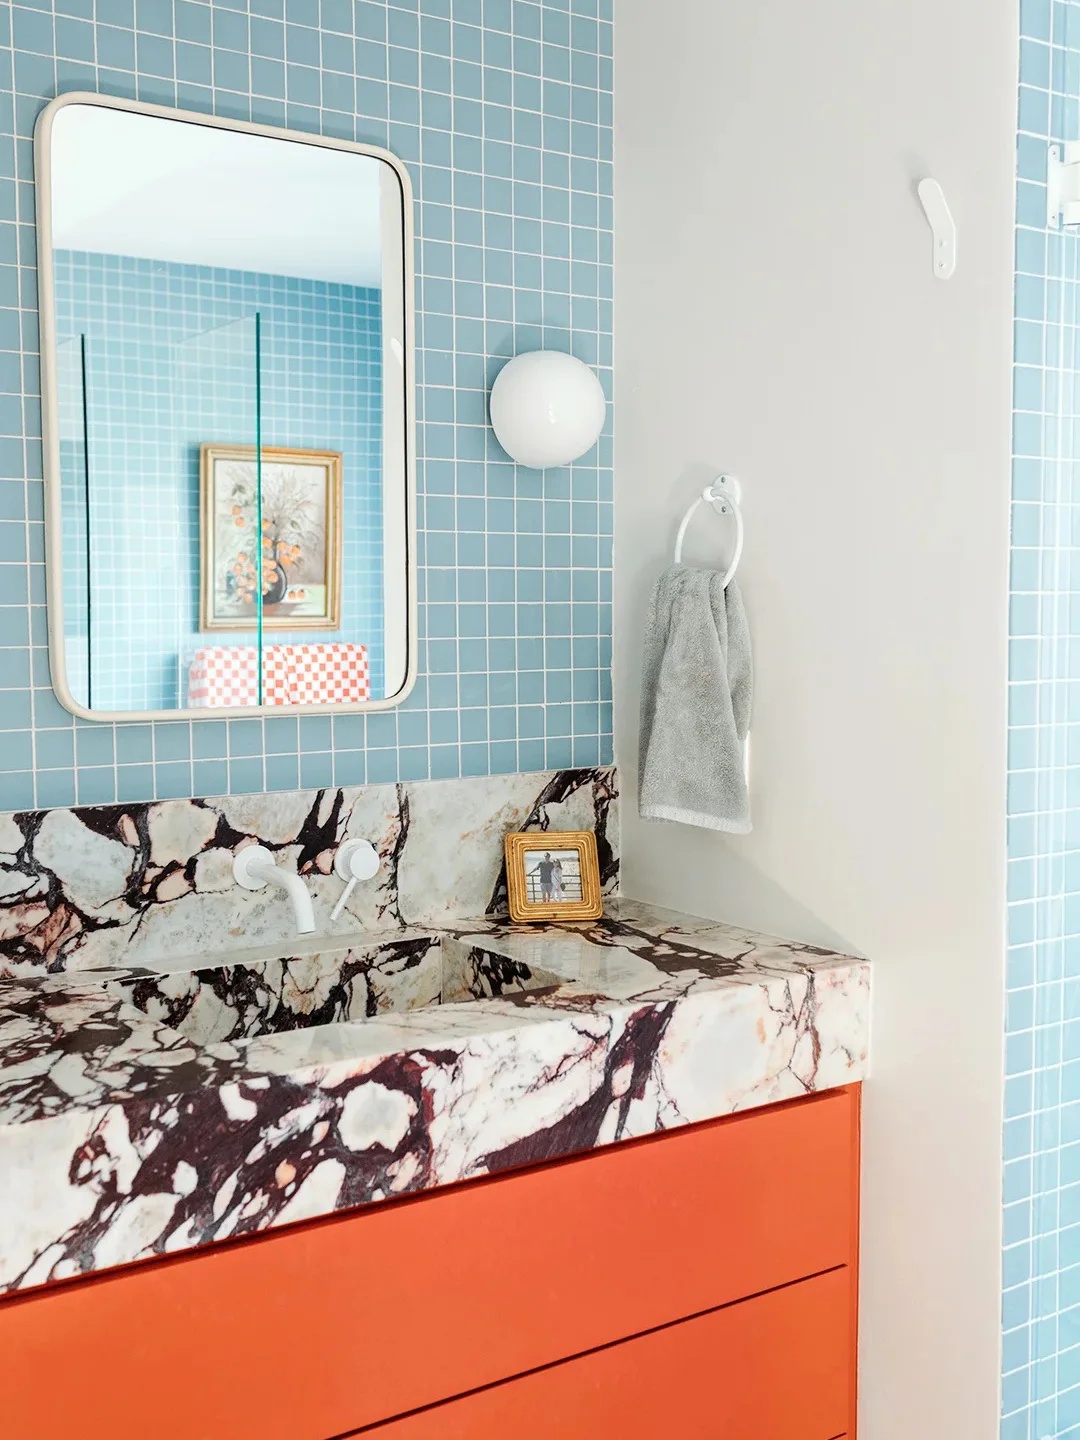
The orange vanity supplies a strong warm block below the boldly veined counter. Pale blue square tiles introduce a cooler regular grid around the rounded rectangular mirror, while white wall-mounted taps and a globe light provide smaller pale shapes. The surrounding lighter wall gives those contrasting colors room to remain distinct.
Compare cabinet and tile samples under the same lighting before committing to two strong colors. Check the counter’s actual material and care requirements instead of inferring them from its veining. Maximalist bathroom ideas compare more expressive color combinations, helping you decide whether a stronger shade belongs on the vanity, walls or smaller accessories.
IDEA 07 / 20
Connect Dark Walls with Wood Ceiling Beams
 SaveSupport Non AI Creator
Image credit: PHOTOGRAPHY BY ALICE GAO
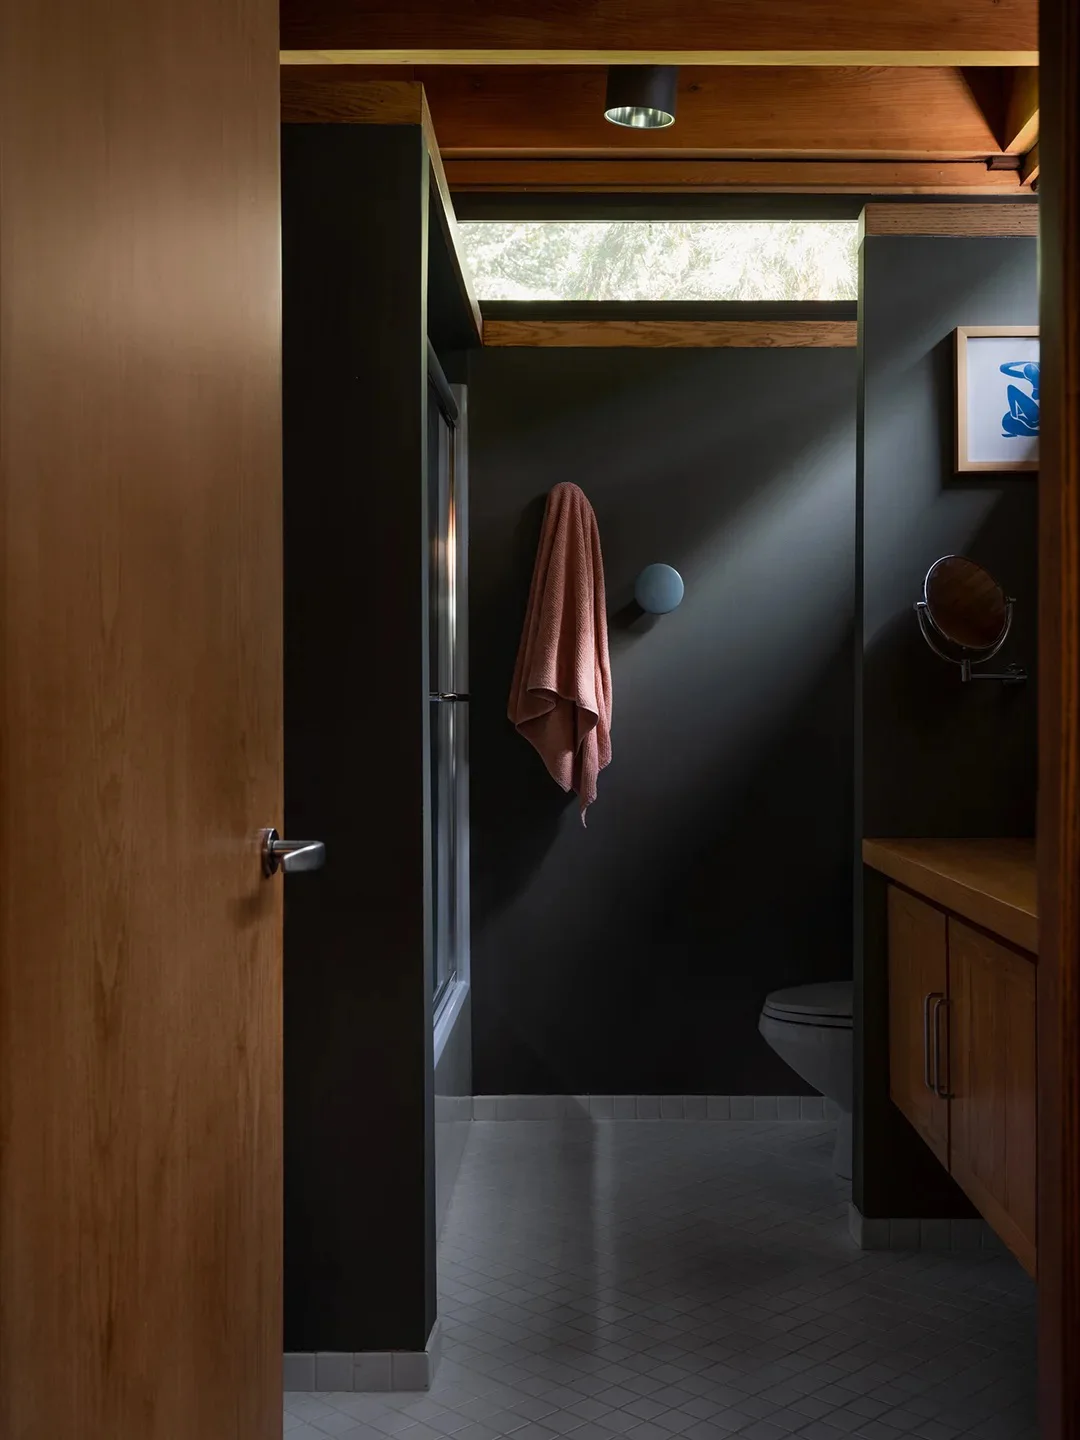
Dark walls and the shower frame create a deep continuous background beneath the wood ceiling beams. High windows introduce a brighter band above that darker enclosure, while the wood door repeats the ceiling’s warmer color. A pink towel and blue hook supply smaller accents beside the gray patterned floor.
Assess mirror and task lighting as well as daylight before painting a bathroom this dark. Choose wall finishes for the exposure in each area and keep ventilation working effectively. Check hooks, doors and shower access against daily movement, using towels for a changeable accent rather than relying on extra objects to brighten every dark corner.
IDEA 08 / 20
Divide a Yellow Tile Wall into Two Quiet Bands
 SaveSupport Non AI Creator
Image credit: PHOTOGRAPHY BY THOMAS RICHTER
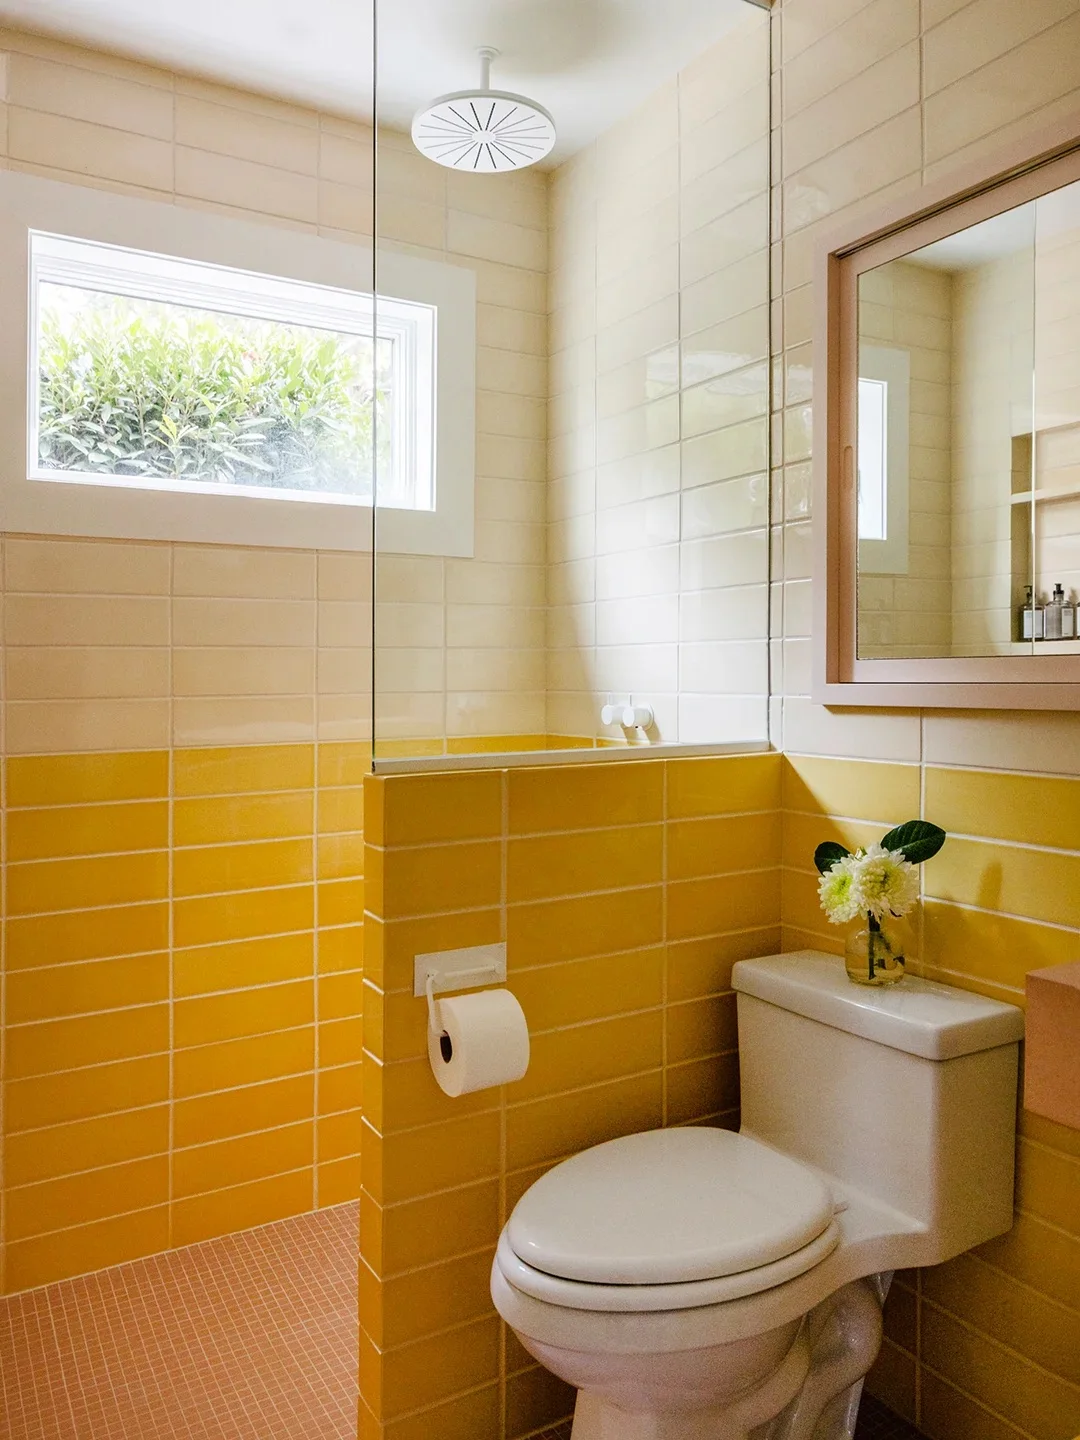
Cream and mustard tiles divide the wall into two broad horizontal bands. The darker yellow section sits below the paler tiles, with the white-framed window and wood-framed mirror repeating lighter outlines across both. A round showerhead introduces a curved detail above the tiled divider, contrasting with the otherwise regular rectangular arrangement.
Compare the two tile shades with your existing white fittings before choosing the boundary between them. Keep the join straightforward around corners and plumbing, planning the layout before installation. Pink bathroom tiles offer another warmer color option if you want to compare yellow with a softer tile palette before making a permanent choice.
IDEA 09 / 20
Make Flat Cabinet Fronts Carry the Color
 SaveSupport Non AI Creator
Image credit: PHOTOGRAPHY BY YOSHIHIRO MAKINO; STYLING BY ELAINA SULLIVAN
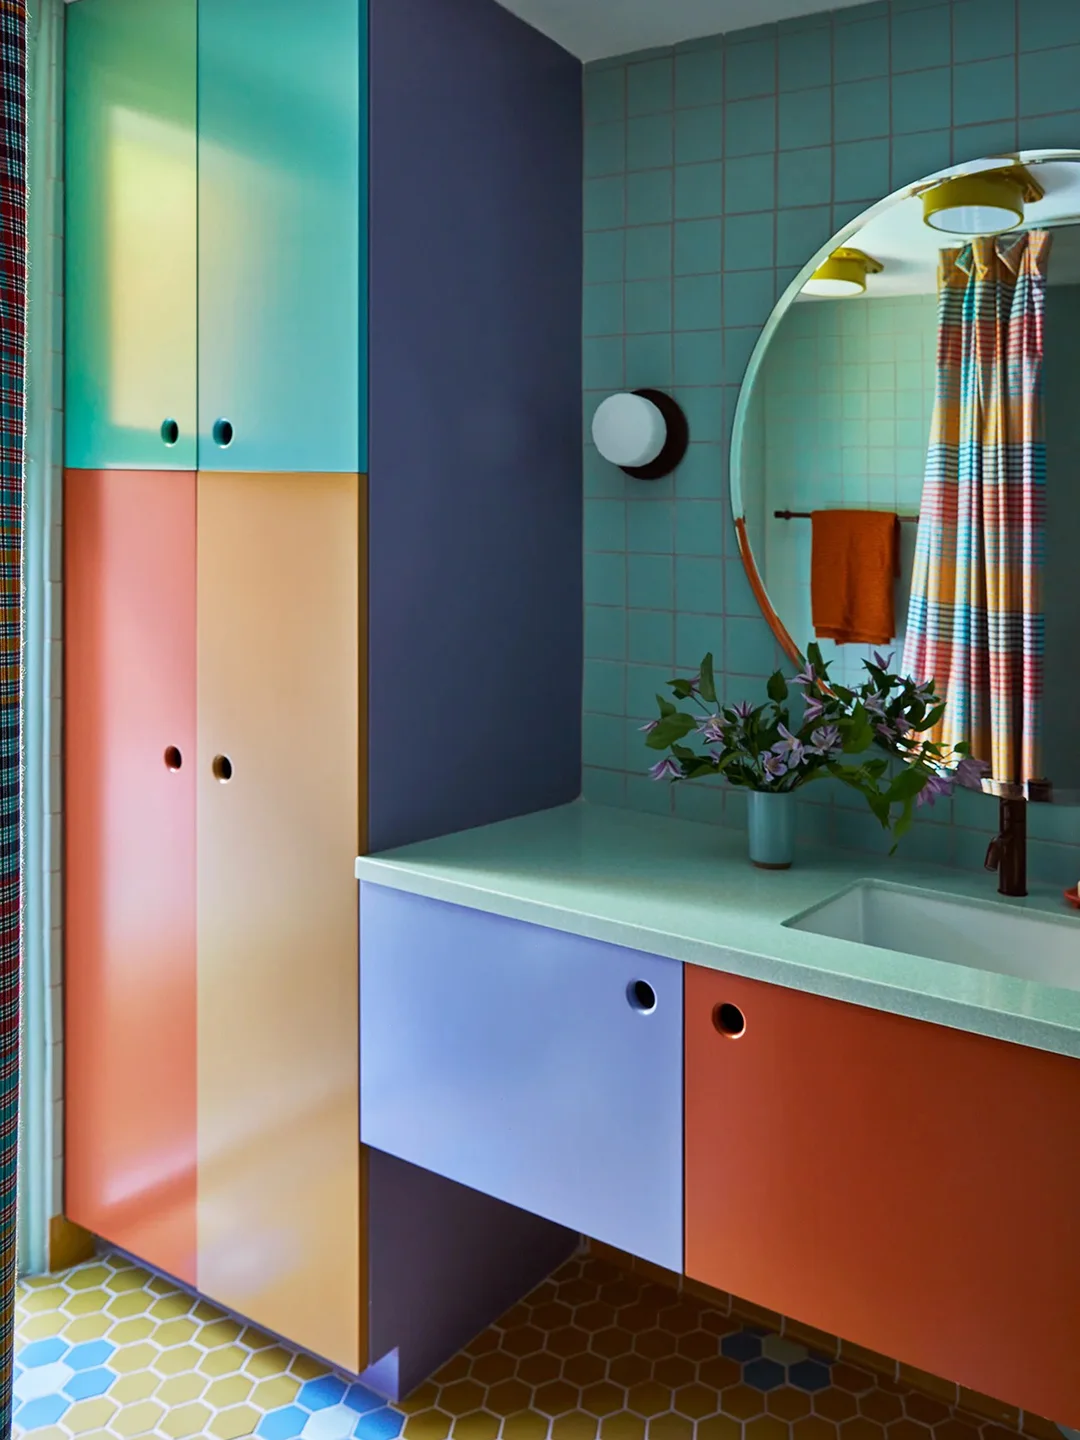
Turquoise, coral and purple cabinet fronts introduce several broad color blocks around the pale green counter. Small circular handles repeat the round mirror’s shape at furniture height. Grid tiles provide a more regular backdrop, while the striped shower curtain connects different colors through a narrower repeated pattern beside the vanity.
Map the colors onto the actual cabinet doors before ordering or painting, checking how they look when neighboring doors are open. Use finishes appropriate to moisture and frequent handling. Keep the counter useful for daily routines and compare a curtain sample with the fixed cabinet colors so its stripes connect the scheme without obscuring it.
IDEA 10 / 20
Frame a Green Bath with High Glazing
 SaveSupport Non AI Creator
Image credit: PHOTOGRAPHY BY LAURE JOLIET; STYLING BY MERISA LIBBEY
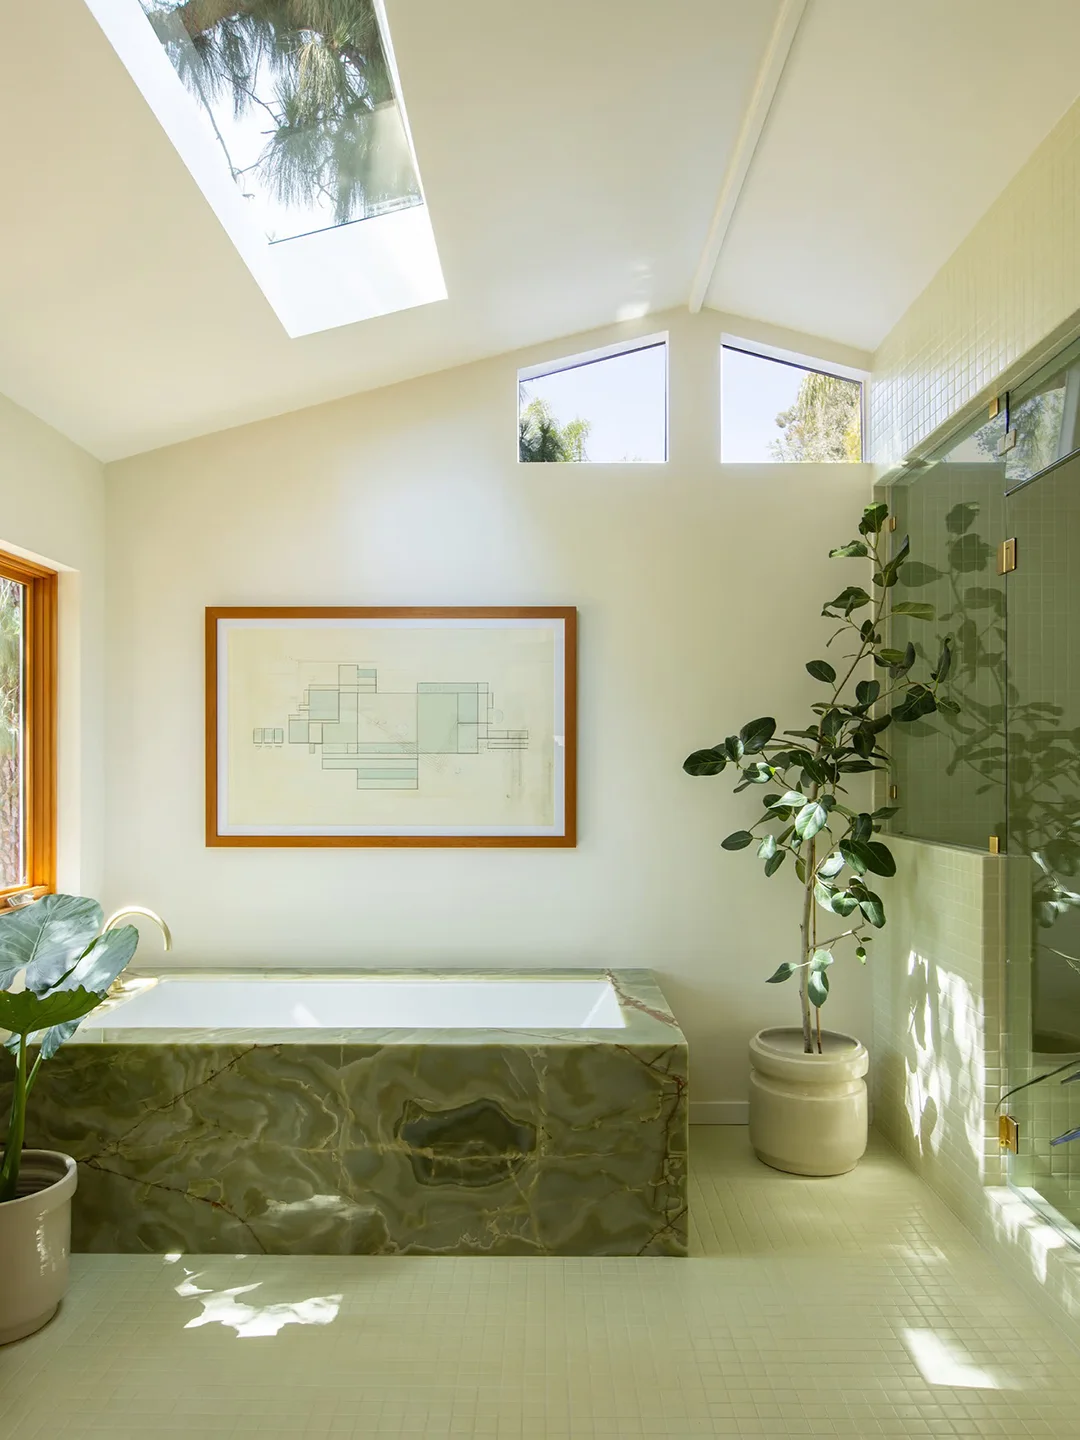
The green veined bath surround forms the strongest lower color beneath the high glazing and skylight. Pale walls leave the framed geometric print clearly visible above the tub. Plants introduce softer irregular shapes beside the glass shower, connecting the garden view with the stronger green section around the bath.
Check the surround’s actual surface and cleaning requirements before choosing products; appearance alone does not establish its composition. Plan privacy, ventilation and maintenance access alongside the daylight. Keep larger plant pots stable and clear of bathing access, and choose artwork protection suitable for humidity rather than assuming a regular frame will tolerate repeated moisture.
PART 03
Compare mirror shapes and furniture-like vanities
IDEA 11 / 20
Repeat Globe Shapes Above a Double Vanity
 SaveSupport Non AI Creator
Image credit: C.P. Hart
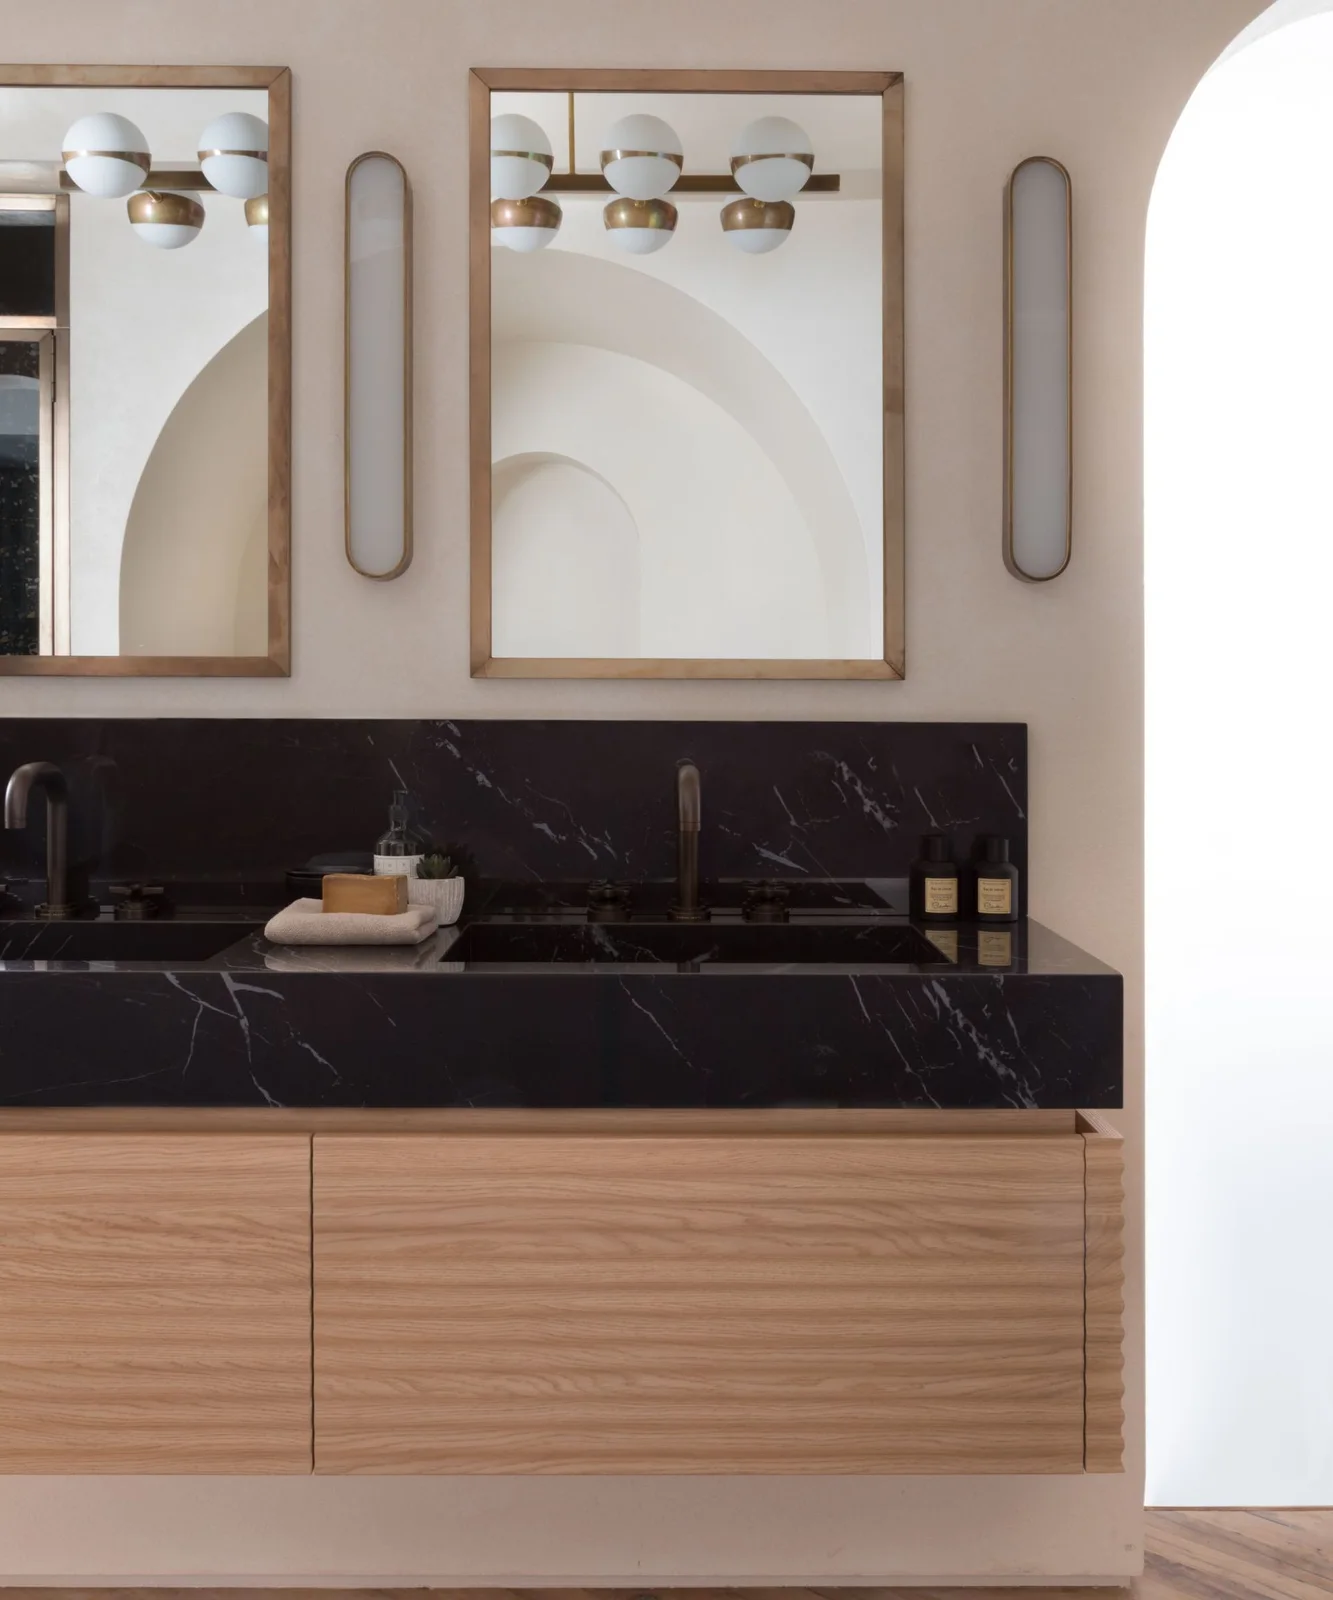
Two wood-framed mirrors divide the space above the dark double basin counter. Globe lights introduce repeated curves within their reflections, while slim oval fittings create a different vertical outline between the mirrors. The lighter wood cabinet fronts connect those frames with the vanity below, keeping the darker counter as a clear horizontal band.
Check both users’ counter and storage needs before choosing a double vanity, allowing space for taps and daily toiletries. Compare lighting at face height rather than selecting fittings solely for their shape. Ensure mirror placement and electrical installation suit the actual room, and confirm the dark counter’s care instructions before choosing cleaners or leaving bottles directly on it.
IDEA 12 / 20
Connect a Floating Basin with Warm Checker Tiles
 SaveSupport Non AI Creator
Image credit: Future
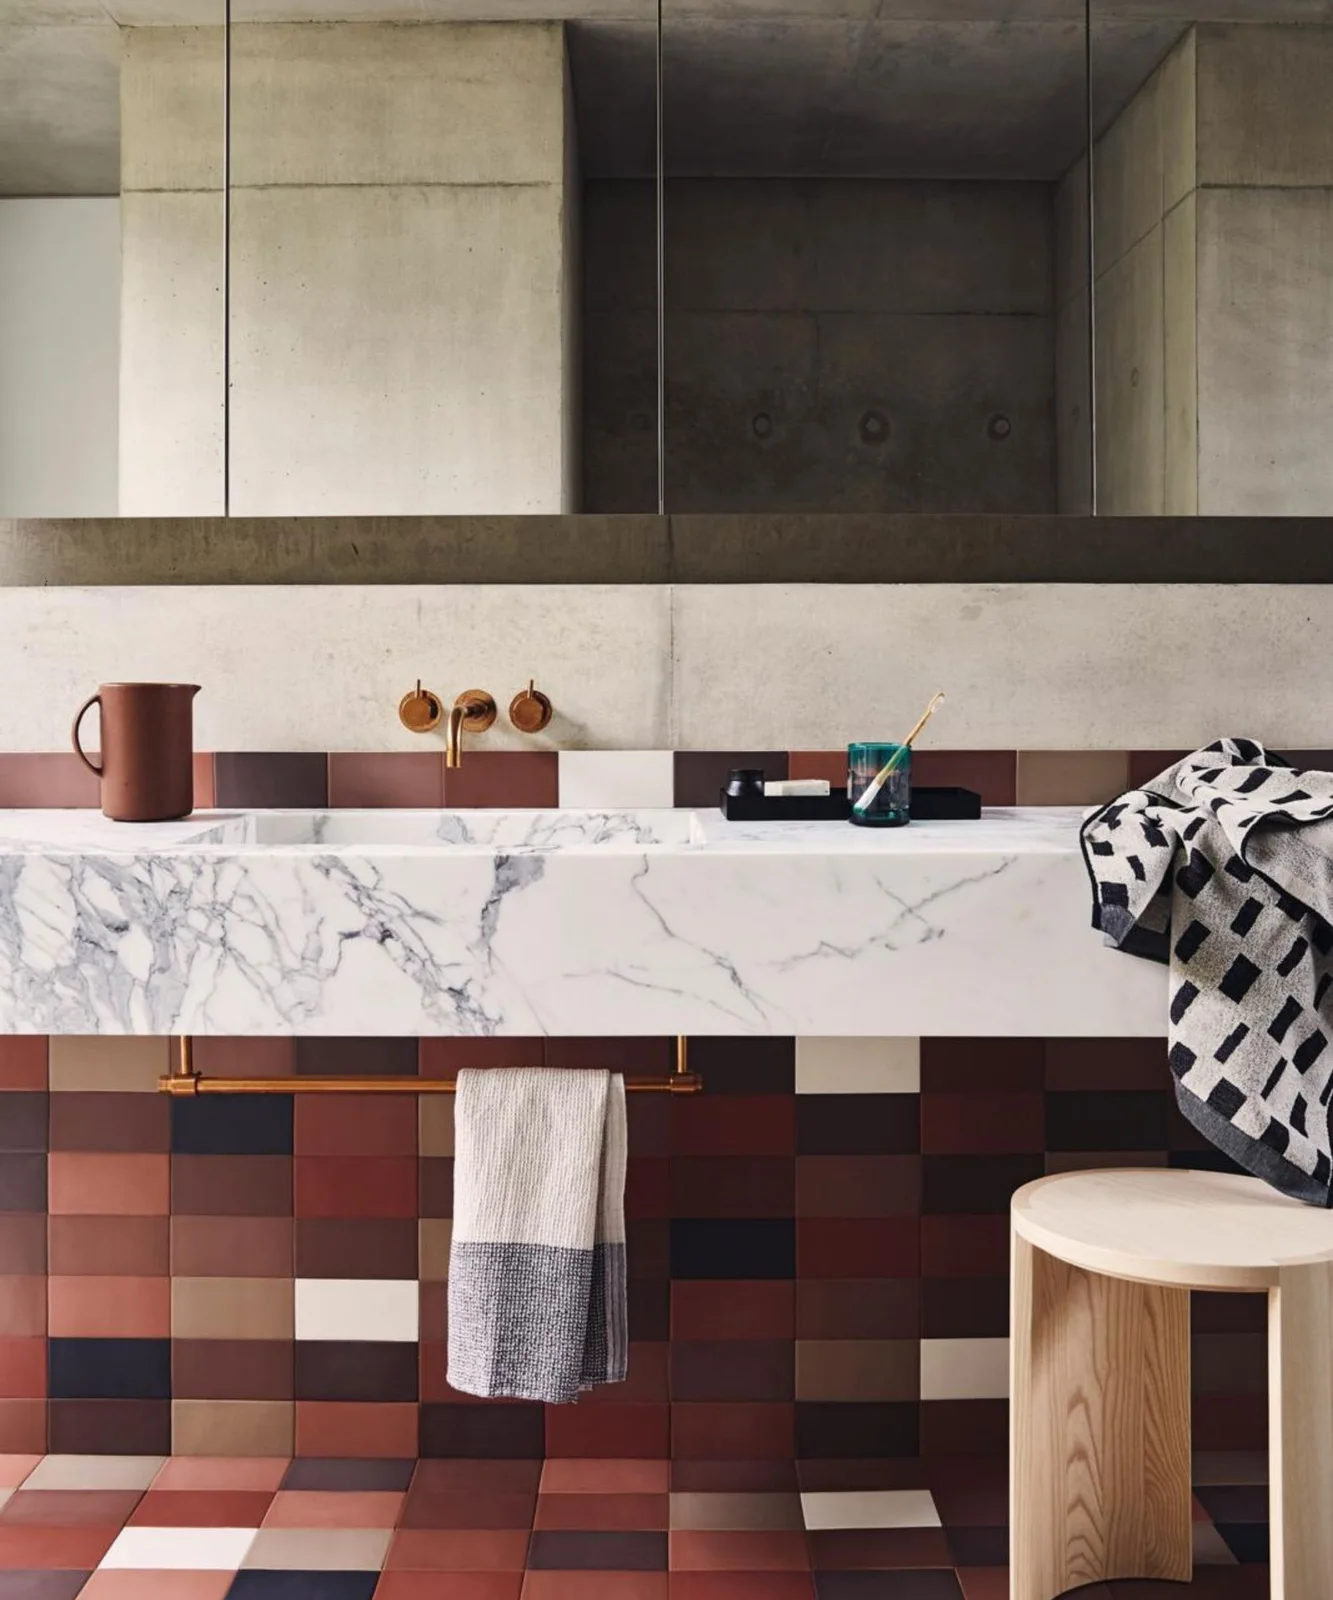
Warm red, brown and pale squares continue from the lower wall across the floor. The pale veined basin provides a broad lighter strip above that checker pattern, with a wide mirror extending the horizontal arrangement. Warm-colored taps and a towel rail introduce smaller accents, while the wooden stool adds a separate rounded form beside the basin.
Lay out the checker pattern around corners and the basin position before installation so abrupt partial squares do not distract from the arrangement. Choose floor finishes for wet conditions and follow verified care instructions for the basin. A floating installation needs appropriate support and accessible plumbing; keep the stool outside the main standing and door-opening space.
IDEA 13 / 20
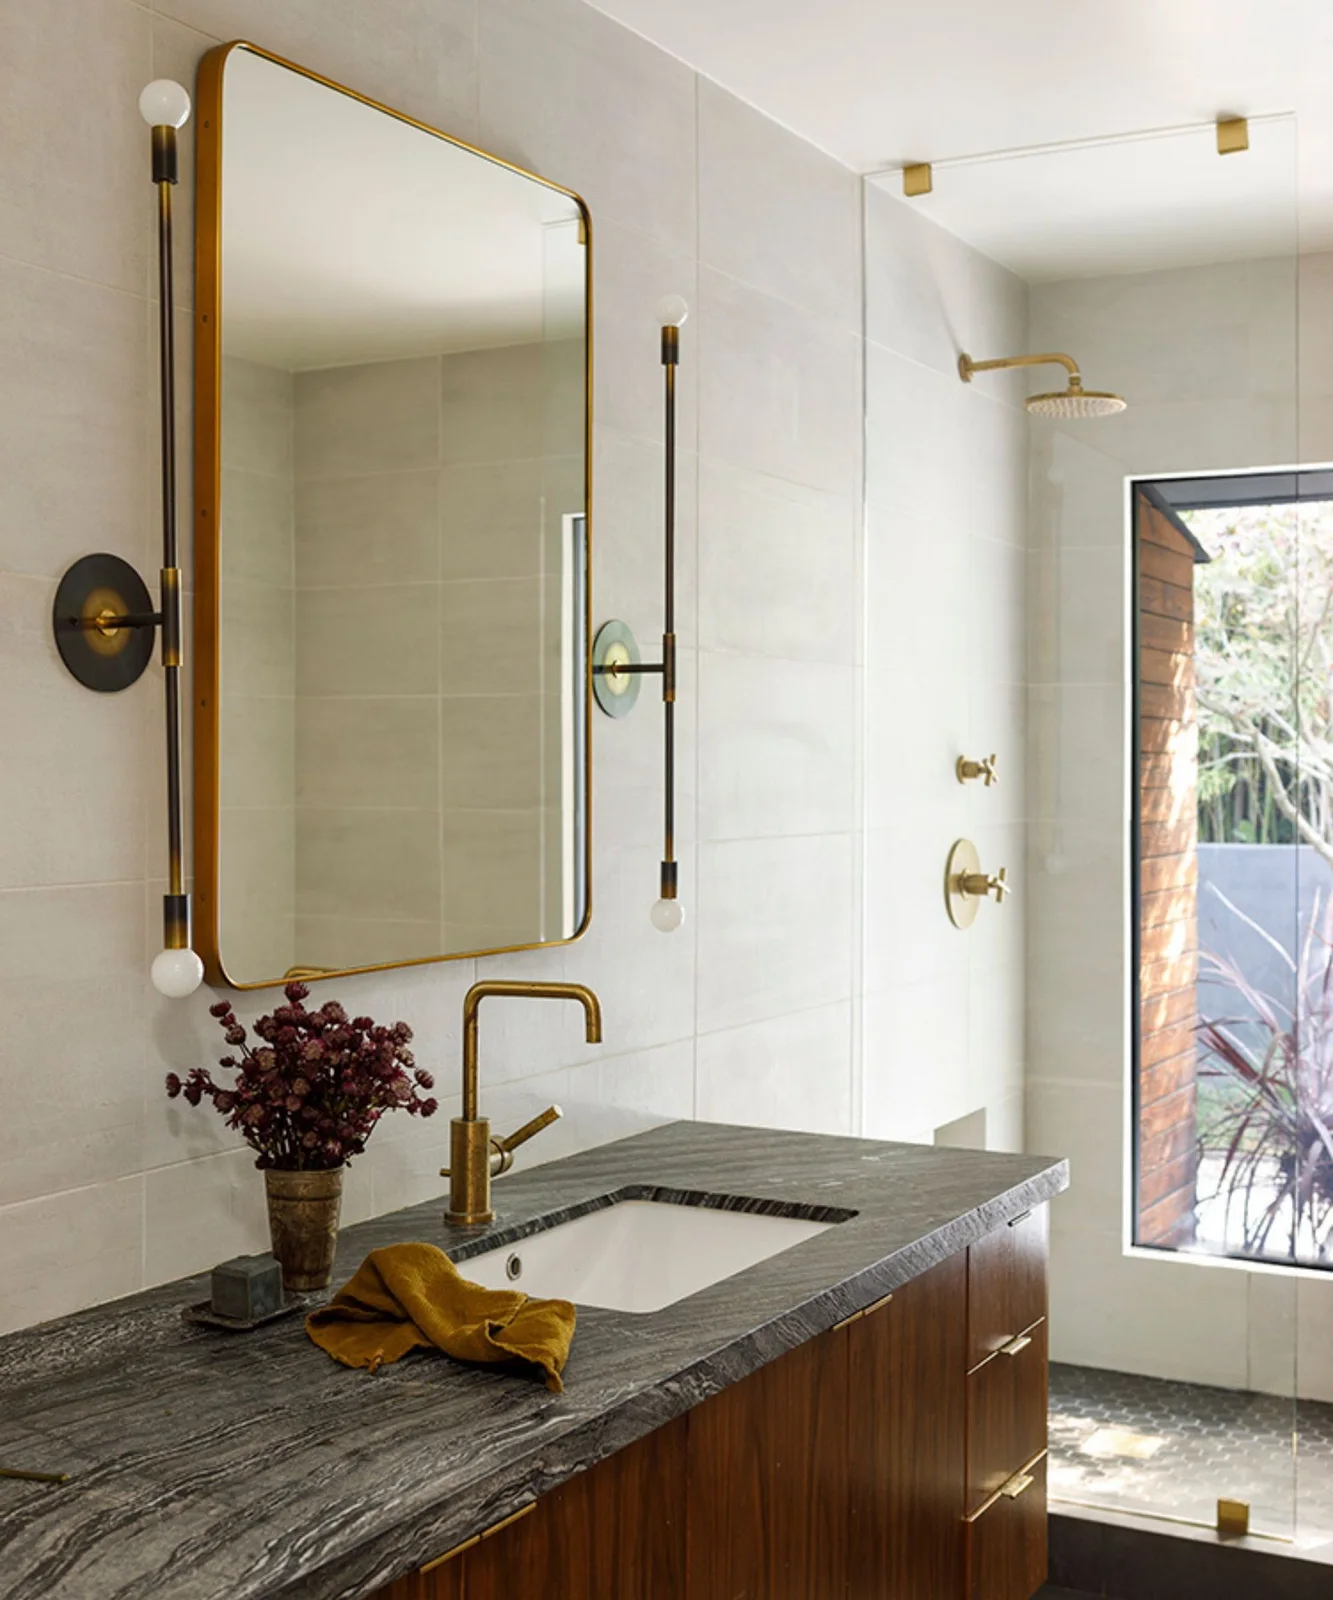
Use a Tall Mirror to Connect Wood and Pale Tile
 SaveSupport Non AI Creator
Image credit: Laurel Joliet, Courtesy of Assembledge and Susan Mitnick Design Studio
The tall warm-colored mirror frame adds a narrow vertical outline above the wood vanity. Slim lights with pale rounded ends repeat that height on either side, while the boldly veined counter creates a separate horizontal surface below. Pale tiles continue toward the shower window, leaving the warmer furniture and fittings clearly defined.
Choose mirror height from comfortable daily use rather than filling the entire wall automatically. Have lighting positioned and installed appropriately for the bathroom, checking reflections and glare as well as appearance. Keep window and shower cleaning access usable, and choose cabinet and counter finishes from verified maintenance needs before matching their warmer colors to the metal fittings.
IDEA 14 / 20
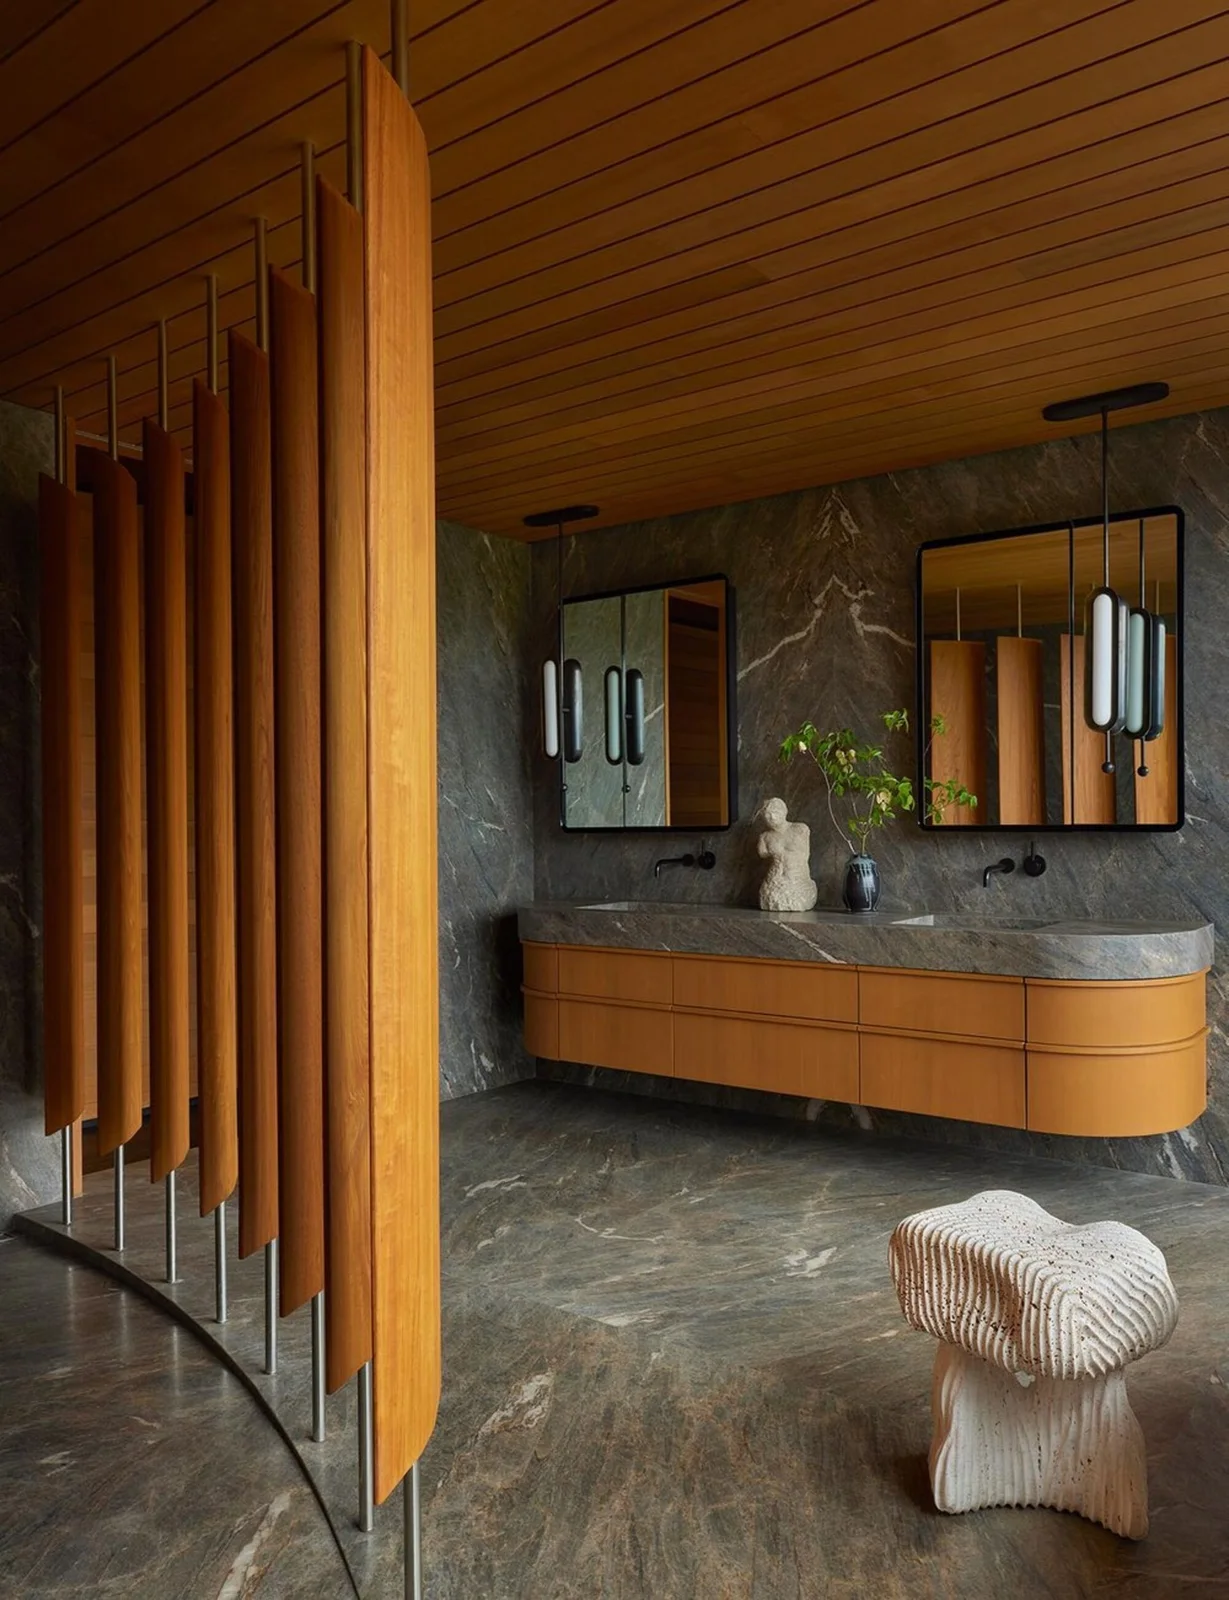
Match a Curved Vanity with Vertical Wood Screens
 SaveSupport Non AI Creator
Image credit: Yoshihiro Makino. Design: Jamie Bush + Co
The vanity’s curved ends soften its long horizontal outline beneath two framed mirrors. Vertical wooden screens introduce repeated tall elements to one side, while the wood ceiling carries the same warmer color overhead. Gray veined walls and floor surround those regular wood shapes, with the sculptural pale stool adding a separate textured curve.
Check drawer movement and standing space before selecting a curved vanity, especially where screens narrow the route beside it. Confirm how each surface should be cleaned and protected in a humid room. Screens need suitable construction and secure installation, with access for cleaning between their elements; choose a stool that stays stable and clear of circulation.
IDEA 15 / 20
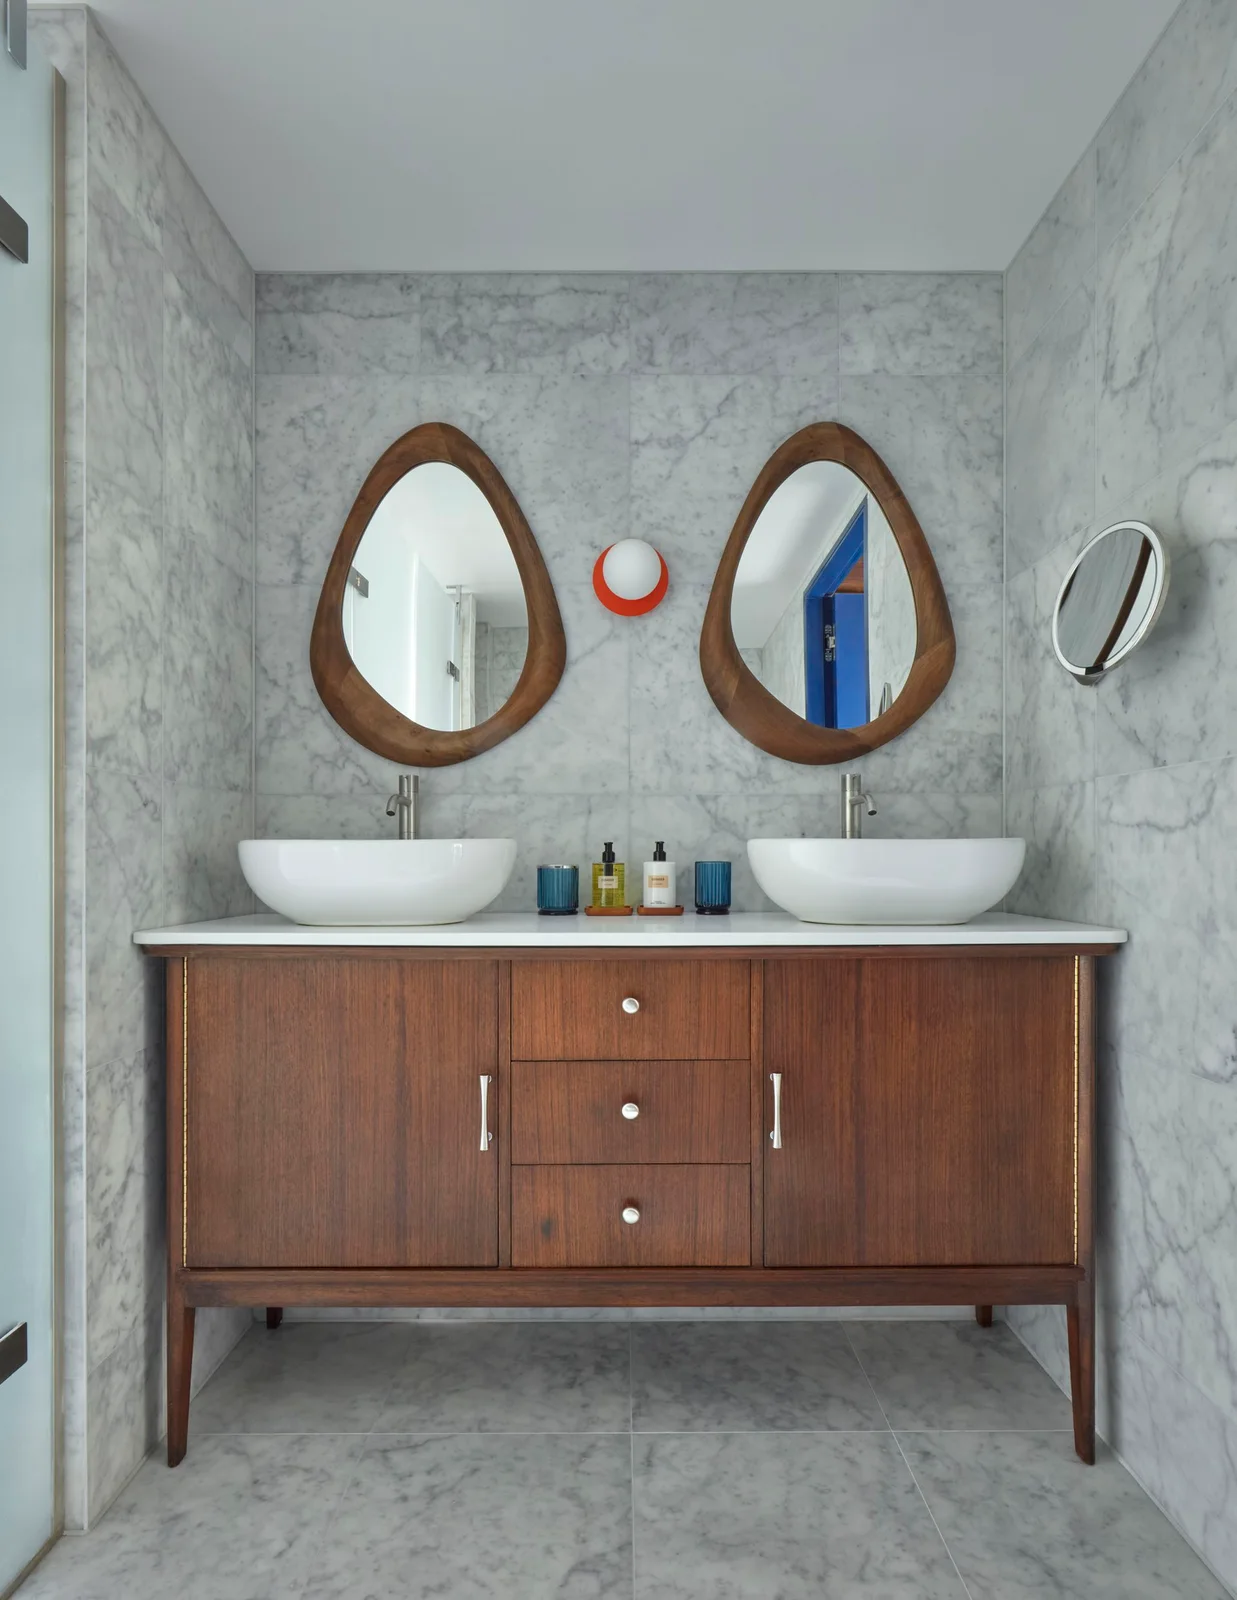
Turn a Furniture-Shaped Vanity into a Focal Point
 SaveSupport Non AI Creator
Image credit: James McDonald. Design: The Lore Group
Tapered legs and separate drawers give the dark wood vanity a furniture-like outline below the two white basins. Curved wood mirror frames repeat that warmer material appearance against the pale veined walls. A small red globe light supplies a concentrated color accent between the mirrors, leaving the surrounding surfaces comparatively quiet.
Use a vanity designed for bathroom conditions, or have a suitable existing cabinet assessed for plumbing, moisture and structural support before conversion. Keep storage useful after pipework is accommodated. Check basin height and cleaning space around the legs, choosing the mirror shapes to complement the furniture without reducing visibility or crowding the taps.
PART 04
Repeat geometric details without crowding the room
IDEA 16 / 20
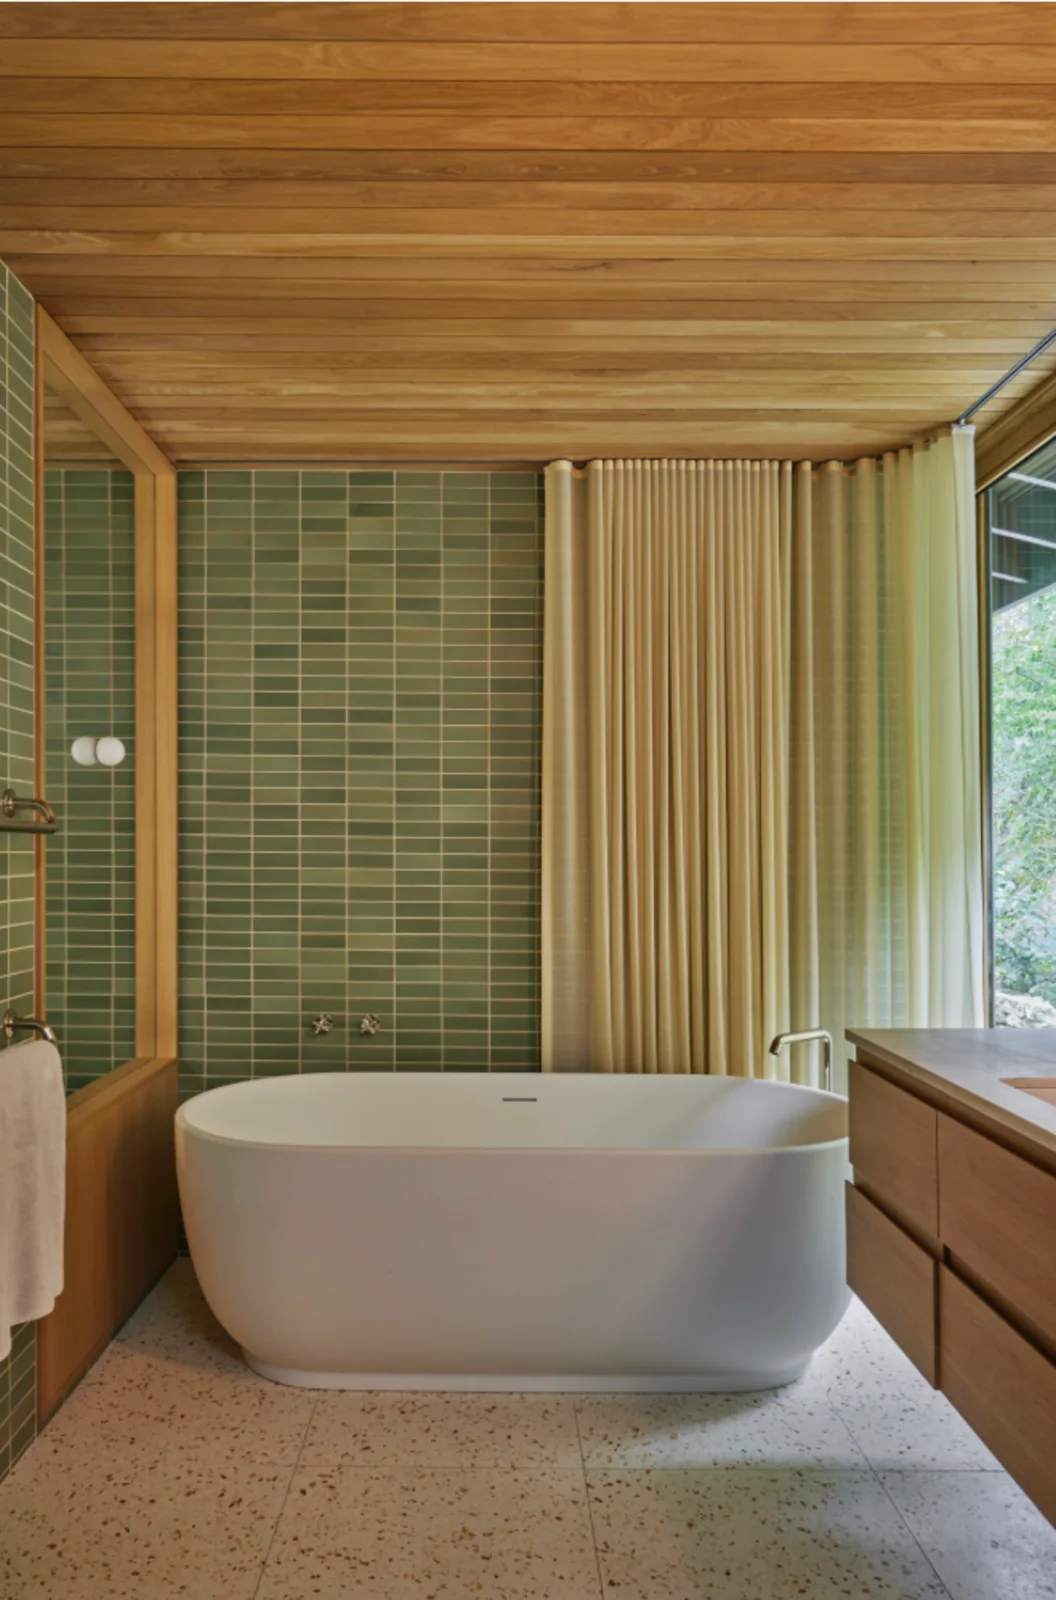
Connect Green Tiles with a Wood Ceiling
 SaveSupport Non AI Creator
Image credit: Caitlin Atkinson. Design: And And And Studio
Green grid tiles create a cooler background behind the white freestanding bath. The wood ceiling and vanity introduce warmer straight sections above and beside it, while pale curtains soften the window edge. A speckled floor adds a finer pattern below, keeping the larger green and wood surfaces distinct from the white tub.
Confirm the floor finish’s slip suitability and cleaning requirements before choosing it from appearance alone. Allow accessible space around the bath for cleaning and daily movement. Choose curtains appropriate to their actual exposure, maintaining ventilation and window access. Earthy bathroom ideas compare more restrained palettes if you want green surfaces and warmer wood details with quieter surrounding colors.
IDEA 17 / 20
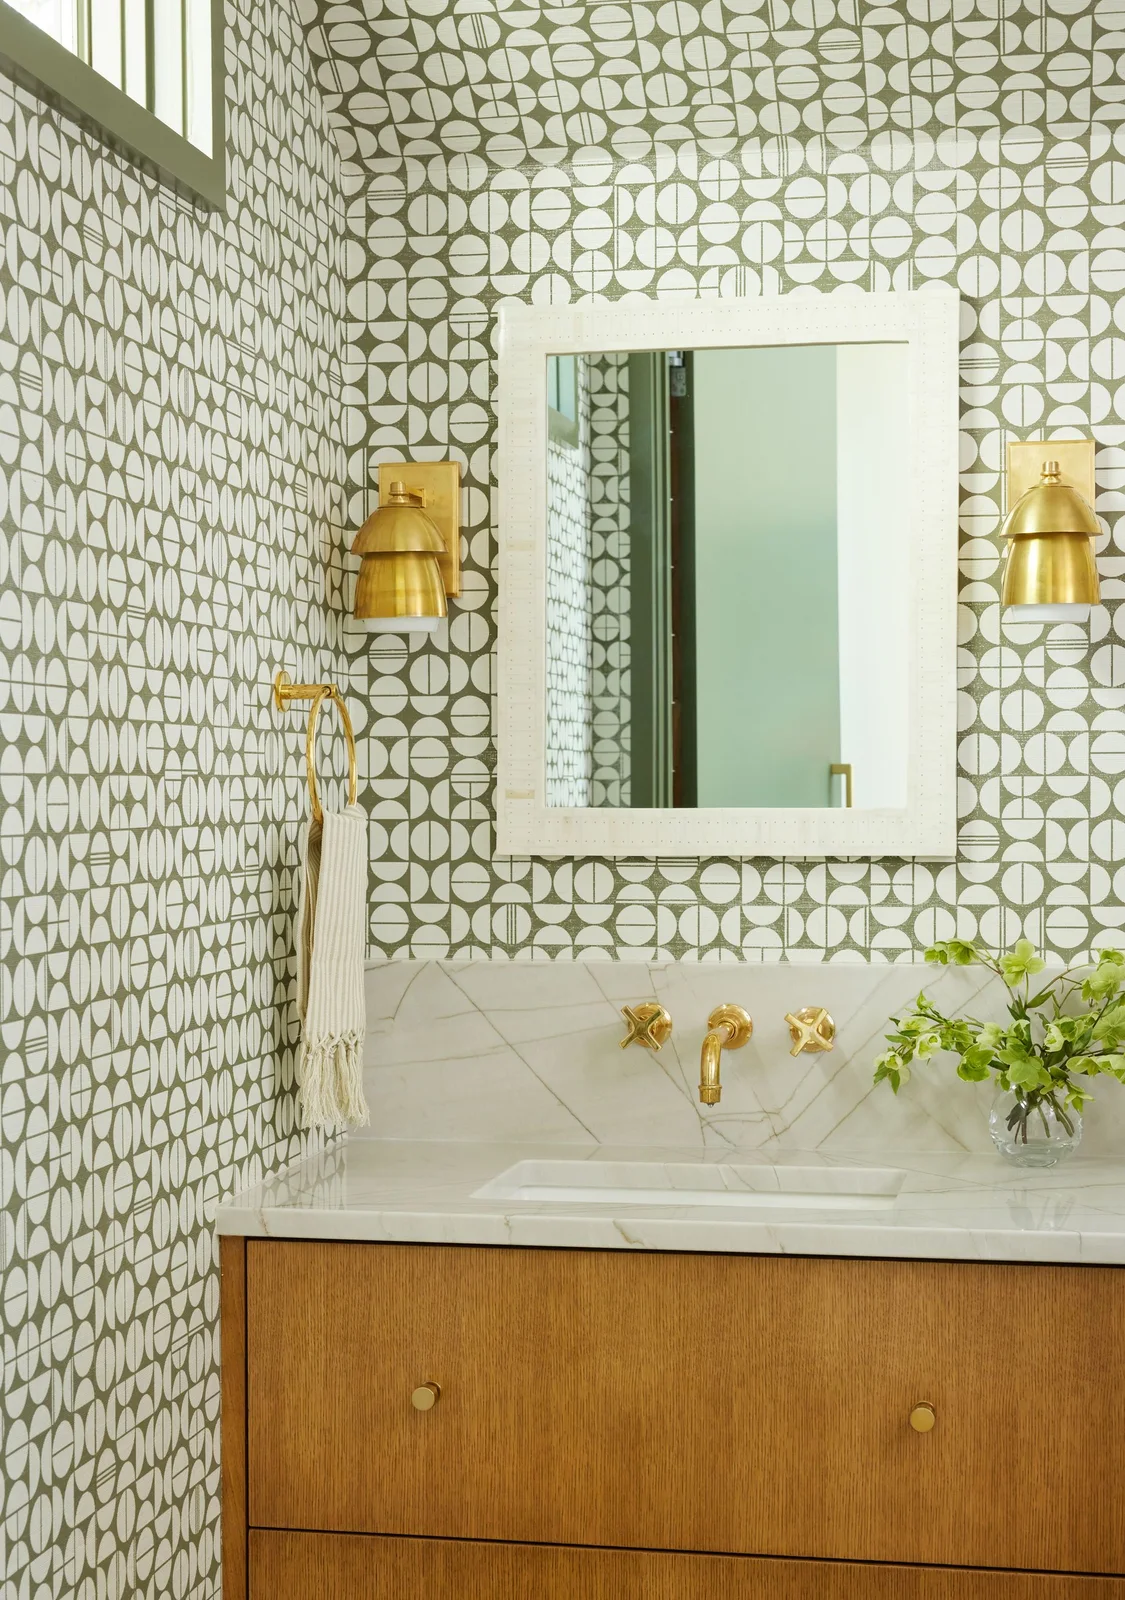
Repeat Small Geometric Shapes Around a Wood Vanity
 SaveSupport Non AI Creator
Image credit: Buff Strickland. Design: Andrea Leigh Interiors
Green and white geometric shapes repeat around the white-framed mirror, bringing a smaller-scale pattern above the wood vanity. Gold-colored lights and taps introduce warmer details beside the pale tiled backsplash. The plain cabinet fronts give the busy wall a calmer lower section, with the mirror breaking up its continuous repeat.
Use wallpaper only where its verified specification suits the room’s humidity and water exposure, keeping vulnerable edges away from direct splashes. Check the repeat around corners before ordering enough material. Boho bathroom ideas compare more combinations of pattern and warmer furniture if you want an expressive vanity wall with practical washable surfaces around the basin.
IDEA 18 / 20
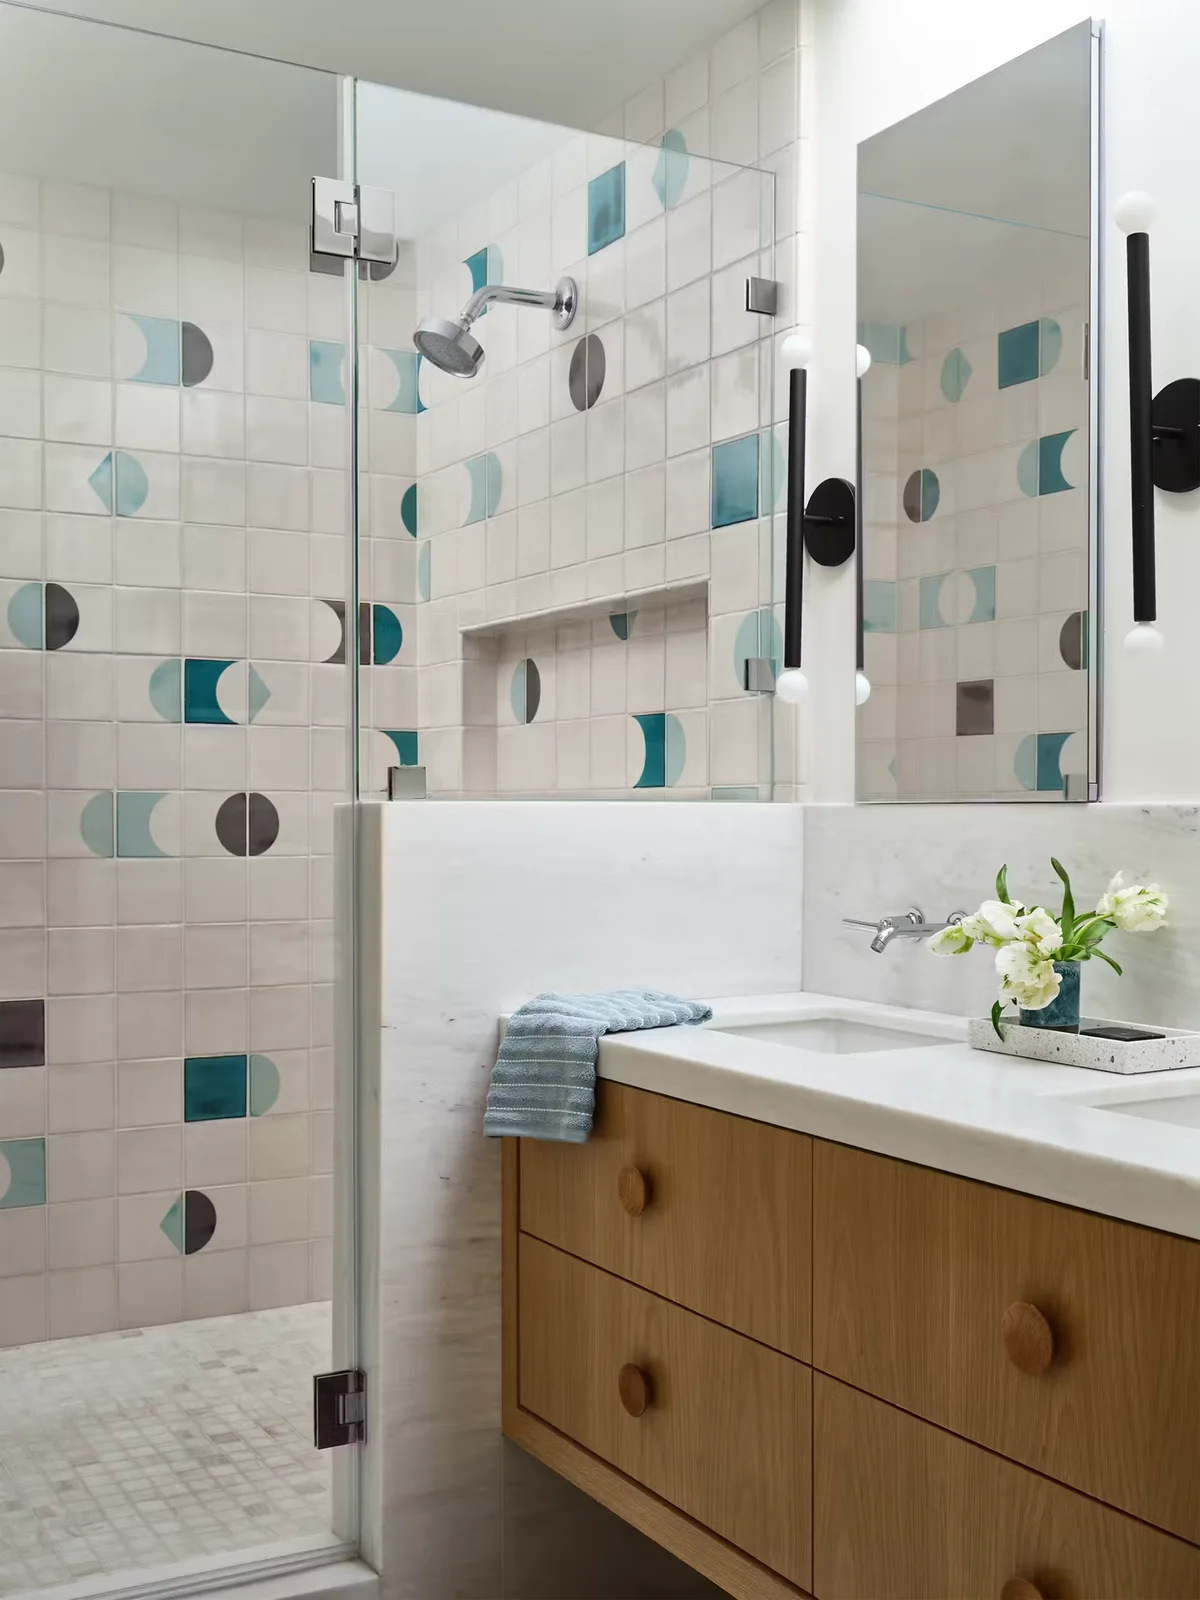
Scatter Geometric Tiles Around a Simple Wood Cabinet
 SaveSupport Non AI Creator
Image credit: Jessica Burke. Design: Regan Baker Design
Blue and gray geometric shapes interrupt the otherwise pale tile grid around the shower. The wood vanity adds a warmer solid block below the mirrored cabinet, with round drawer handles repeating some of the tiles’ curved elements. Slim dark lights introduce straighter vertical accents beside the pale counter and glass partition.
Plan the patterned tile positions before installation, checking that small motifs remain balanced around niches, fittings and mirror edges. Select appropriate tiles and grout for each wet area and follow their cleaning guidance. Keep the cabinet storage and door movement useful, allowing the occasional patterned tile to supply interest without adding more competing countertop accessories.
IDEA 19 / 20
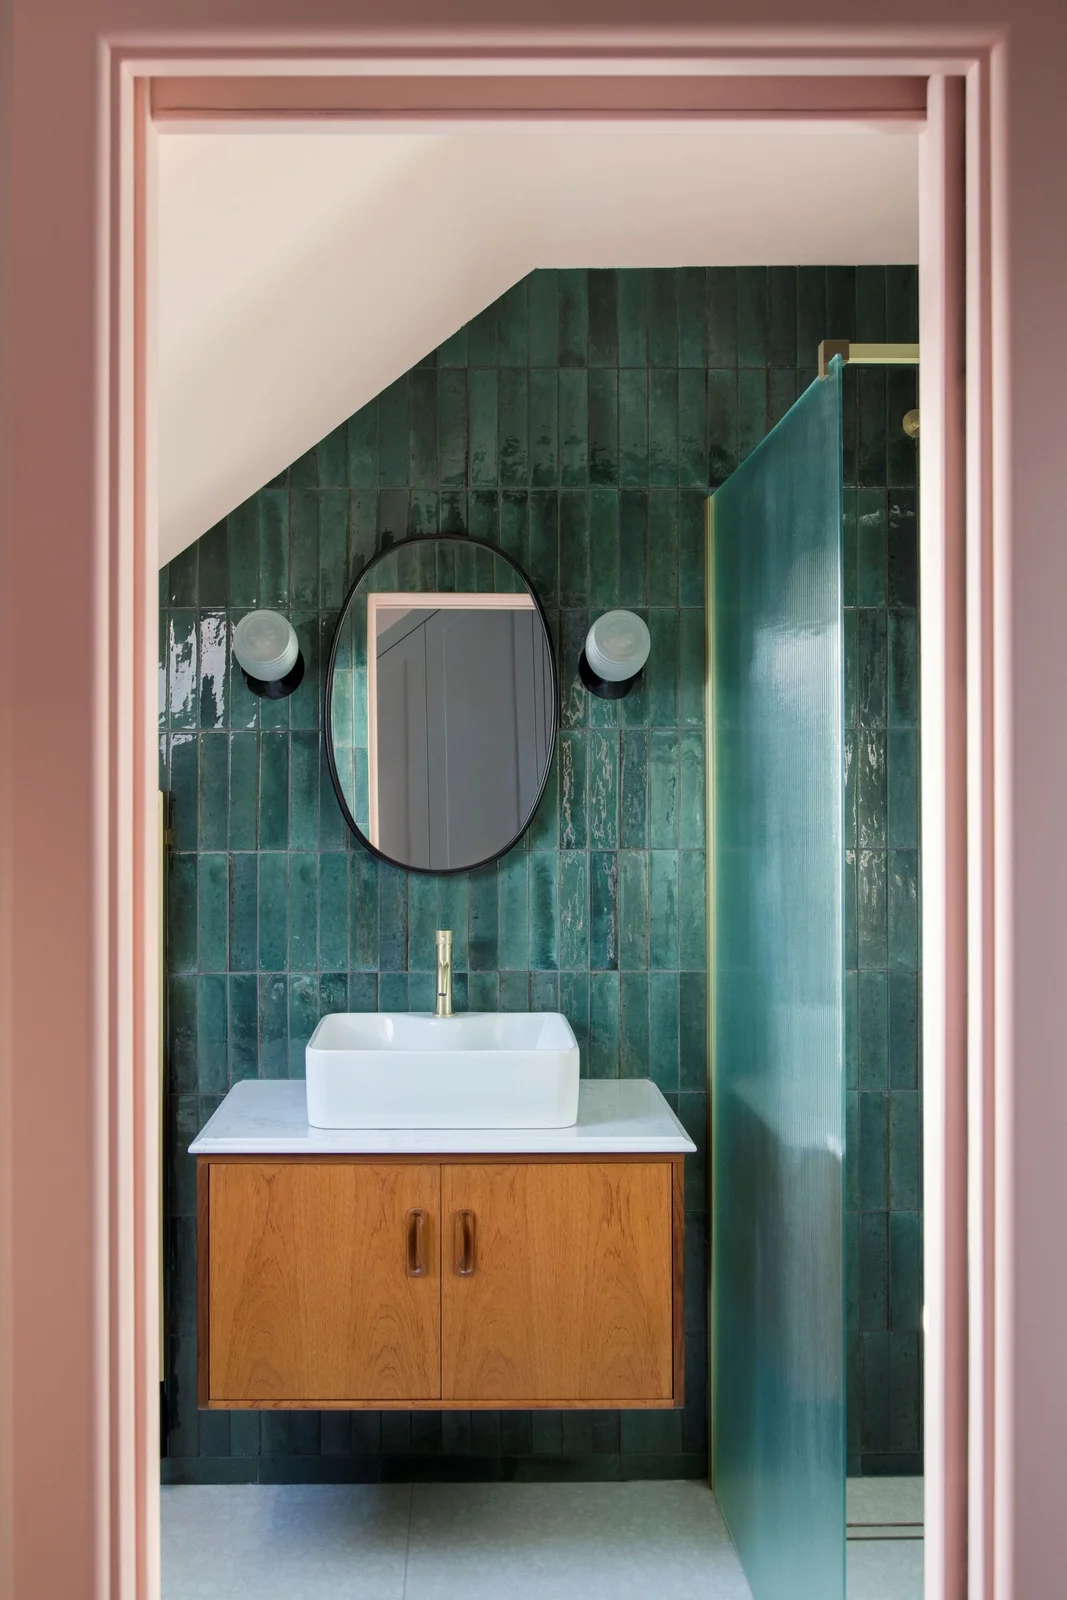
Set a Round Mirror Against Deep Green Tiles
 SaveSupport Non AI Creator
Image credit: YesColours
Deep green tiles create a continuous background behind the round dark-framed mirror. Two globe lights repeat its curves on either side, with the pale basin and floating wood cabinet providing lighter horizontal sections below. Pink paint around the doorway introduces a separate warm border that frames the darker green bathroom beyond.
Compare the doorway color with the tile under both adjoining rooms’ lighting before painting, checking the transition with the door open. Confirm the floating vanity’s support and accessible plumbing before installation. Choose mirrors and lights from comfortable daily use and appropriate bathroom specifications, retaining cleaning space beneath the cabinet rather than filling that open area with baskets.
IDEA 20 / 20
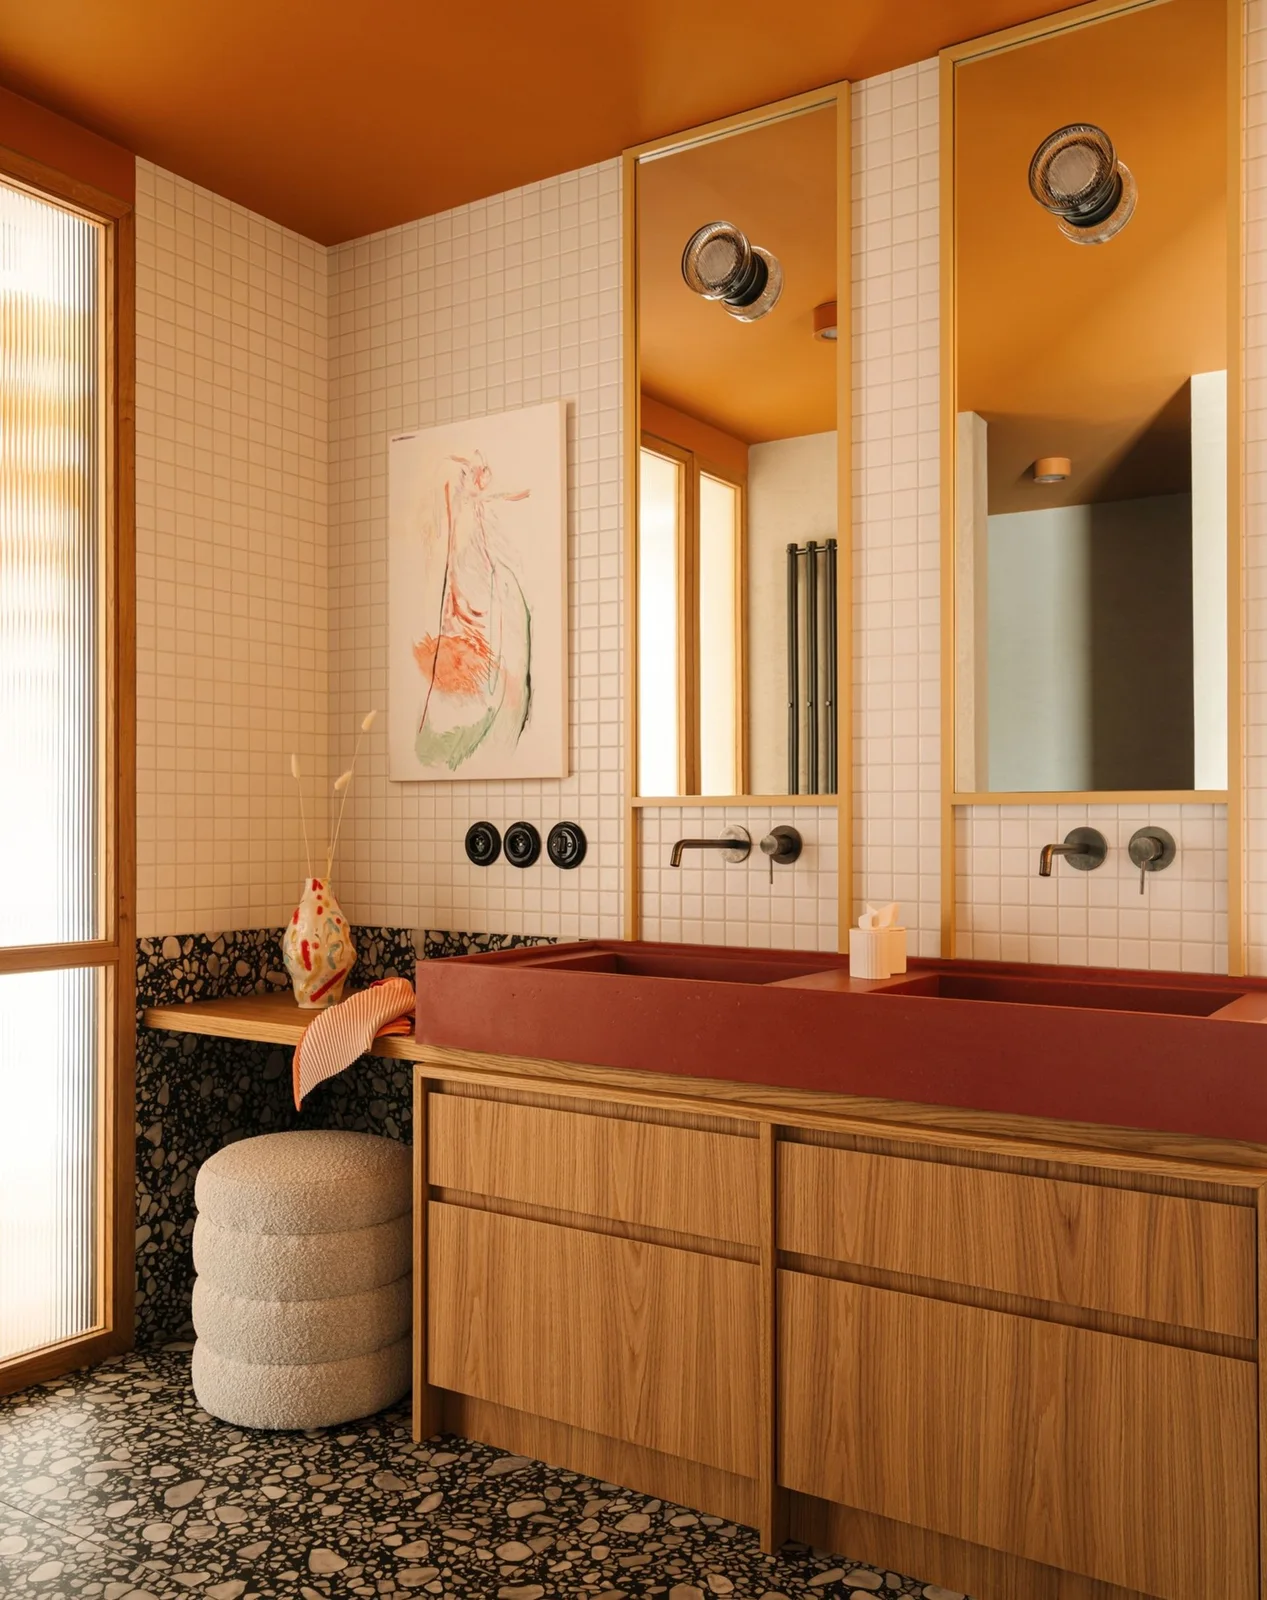
Give a Red Double Basin a Warm Wood Base
 SaveSupport Non AI Creator
Image credit: Mood Authors. Design: Jagoda Sergiel
The red double basin creates a broad warm band above the wood vanity. Tall framed mirrors repeat vertical lines against the white tile grid, while the orange ceiling extends the warmer palette overhead. A rounded upholstered stool introduces a softer shape beside the cabinetry, contrasting with the finer speckled floor and backsplash pattern.
Check basin depth, counter usability and cleaning guidance before choosing a strong-colored integrated design. Compare the red with a larger ceiling-paint sample under the planned lighting. Keep any upholstered seat away from repeated splashes and select an appropriate washable covering, preserving comfortable access to the vanity and neighboring doors instead of treating every open corner as extra seating.
BRING IT ALL TOGETHER
Choose a practical layout before the statement finish
Look at storage, basin access and cleaning space before selecting a vanity. Curved mirrors, globe lights or a geometric tile section can introduce mid-century character without changing every surface. View finish samples together, choosing materials from verified bathroom suitability and maintenance information rather than the appearance of the photographs.
Plan tile layouts and lighting positions before installation, keeping wet-area construction and electrical work appropriately assessed. Choose changeable towels or a wall color if a larger renovation is unnecessary. The most useful arrangement leaves the basin, shower and storage comfortable to use while connecting a few warmer furniture details with a clear pattern or color.